
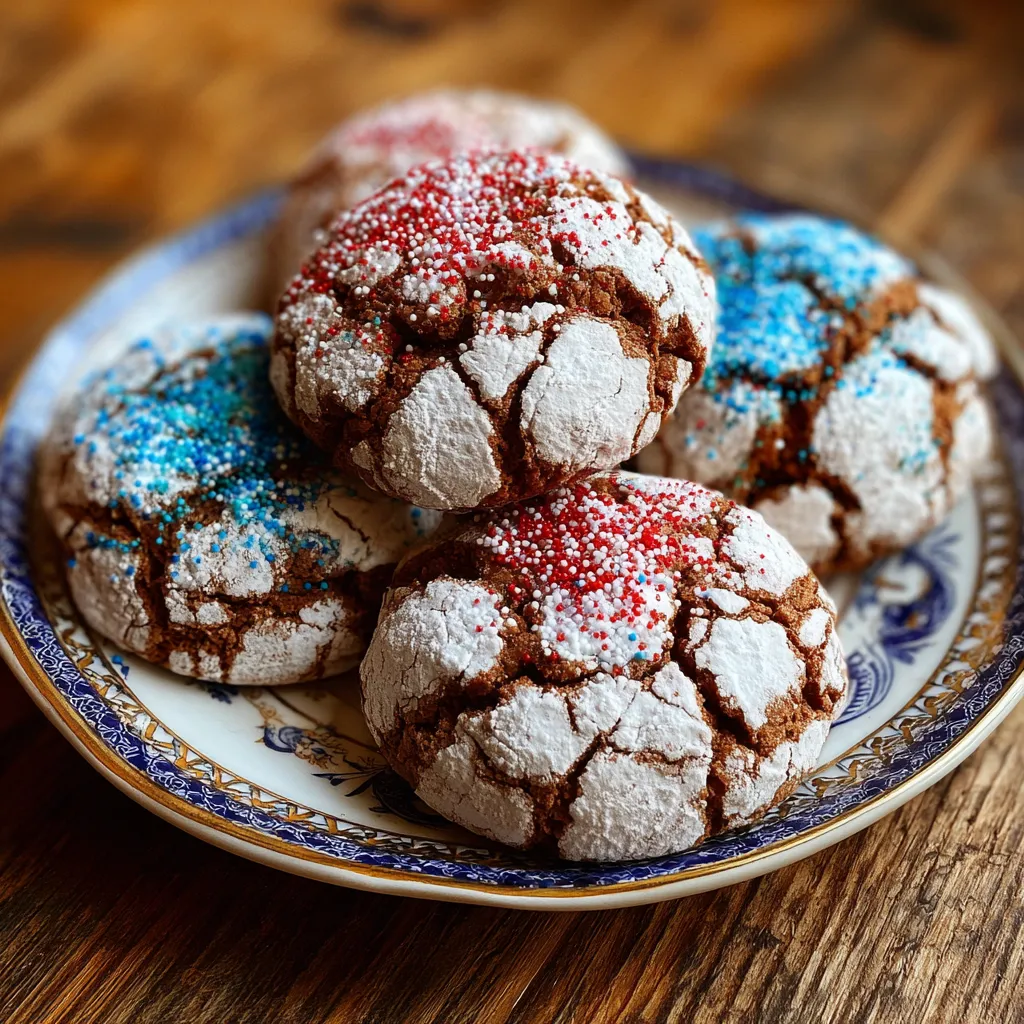
4th of July Crinkle Cookies are your new holiday hero, celebrating Independence Day with festive red-and-blue crinkle cookies that bake into perfectly fudgy, crackled bites loaded with chocolate flavor. Bright swirls of red and blue dough reveal fudgy, chocolatey centers while a sweet powdered sugar coating melts on your tongue. These beginner-friendly desserts bring a patriotic pop of color to your 4th of July spread and are so fun to make that your friends will think you’ve hired a professional. Grab your spatula and dive in – this recipe is too good to miss!
Gather these simple pantry staples before you get rolling on your crinkle cookies:
Ready to roll up your sleeves and whip up some star-spangled treats? These 4th of July Crinkle Cookies follow a straightforward process that combines mixing, coloring, and baking into a fun, hands-on baking session. From whisking the sugar and eggs to watching the chocolate dough crack open under a snowy powdered sugar blanket, each step is designed to be easy and enjoyable. Let’s dive into the step-by-step instructions to get these red and blue beauties onto your dessert table.
1. Preheat oven and prep sheets: Preheat your oven to 350°F (175°C) and line baking sheets with parchment paper to ensure even baking and easy cleanup.
2. Whisk sugar and eggs: In a large bowl, vigorously whisk together 2 cups granulated sugar and 4 large eggs until the mixture is thick, pale, and ribbon-like.
3. Combine oil and vanilla: Stir in 1 cup vegetable oil and 2 teaspoons vanilla extract, mixing until the batter is fully smooth and homogenous.
4. Mix dry ingredients: In a separate bowl, whisk together 4 cups all-purpose flour, 1 cup unsweetened cocoa powder, 2 teaspoons baking powder, and 1/2 teaspoon salt until evenly blended.
5. Form the dough: Gradually add the dry ingredients to the wet mixture, stirring until a smooth, cohesive dough forms without streaks of flour.
6. Divide and color: Split the dough evenly into two bowls. Add red food coloring to one bowl and blue food coloring to the other, stirring each until the color is uniform.
7. Shape marbled balls: Pour 1 cup powdered sugar into a shallow bowl. Scoop one tablespoon of red dough and one tablespoon of blue dough, press lightly together to create a marbled ball.
8. Coat in sugar: Roll each marbled dough ball in powdered sugar until fully coated, then arrange on prepared baking sheets about 2 inches apart.
9. Bake to crackle: Bake for 10 to 12 minutes, or until the surface is cracked and the cookies are set around the edges.
10. Cool completely: Let the cookies rest on the baking sheet for 5 minutes, then transfer to a wire rack to cool completely before serving.
When it comes to presenting your 4th of July Crinkle Cookies, a little extra flair goes a long way. These crackled chocolate morsels look gorgeous against any summer spread, and with a few creative touches, you can elevate their festive charm even further. Whether you’re hosting a backyard barbecue or sending cookies as a surprise treat, consider these serving ideas to make your celebration unforgettable.
These 4th of July Crinkle Cookies come out best when you nail a few easy tricks. Starting with bold, vibrant hues is key—gel food coloring delivers richer reds and blues that really pop against the white sugar coating. If your dough feels too soft to shape, a quick chill will firm it up and make handling a breeze. And remember, that signature crackle happens when each marbled dough ball is generously rolled in powdered sugar—don’t be shy! When you’re done, store your cookies properly so every bite stays tender inside with just the right crisp edge. Follow these insider tips, and you’ll have knock-out treats that look and taste fabulous.
After you've baked a batch of these festive crinkle cookies, proper storage ensures they stay as delicious as day one. Whether you’re saving leftovers or making cookies ahead, the right method keeps them tender inside with a crisp sugar exterior. Here are a few ways to maintain that just-baked charm so you can enjoy your treats over the next few days—or even weeks.
Got questions? Here are some quick answers to help you perfect these cookies.
A: It takes about 15 minutes to prepare the dough—which includes whisking sugar and eggs, combining wet and dry ingredients, dividing and coloring the dough, then forming and coating the balls in powdered sugar—plus 10 to 12 minutes of baking time. Allow an additional 5 minutes for cooling on the baking sheet and another 10 minutes for cooling on a wire rack, for a total of approximately 40 minutes from start to finish.
A: If the dough is too soft to shape, chill it in the refrigerator for 30 minutes. Chilling firms up the fat in the dough, making it easier to scoop and roll. If you skip chilling, lightly dust your hands and work surface with flour or powdered sugar to prevent sticking while forming the marbled dough balls.
A: For brighter, more vibrant hues use gel food coloring instead of liquid. Gel-based colors have a higher pigment concentration, so add them drop by drop until you reach your desired shade. Stir thoroughly in step 6 to ensure the color is uniform throughout the dough.
A: The crinkle effect comes from a generous coating of powdered sugar. Make sure the dough balls are fully and evenly coated before baking (step 8). If the sugar layer is too thin, the surface won’t crack properly. You can also slightly press the two colored doughs together to create more surface tension under the sugar coating, which enhances cracking.
A: Yes. After mixing and coloring the dough (step 6), cover each portion tightly with plastic wrap and refrigerate for up to 24 hours. When you’re ready to bake, let chilled dough sit at room temperature for 10 minutes to soften slightly, then proceed with rolling, coating, and baking.
A: Once cookies are completely cool, place them in an airtight container at room temperature. They’ll stay fresh for up to 3 days. To maintain crisp edges and a soft interior, layer with parchment or wax paper to prevent sticking and condensation inside the container.
A: You can replace the 1 cup of vegetable oil with 1 cup of melted and slightly cooled unsalted butter. The cookies will have a richer flavor and a slightly firmer texture. Be sure to let the butter cool to around room temperature before adding it in step 3 to avoid cooking the eggs prematurely.
These 4th of July Crinkle Cookies hit the sweet spot between festive flair and irresistible fudgy flavor. The magic happens when the powdered sugar coating meets the vibrant red and blue dough, cracking open to reveal a soft, chocolatey center that’s as eye-catching as it is delicious. This recipe works because the simple ingredient list and straightforward steps let you focus on color and texture without any fuss—perfect for a beginner-friendly bake that looks like you spent hours in the kitchen. Print this article to keep the details close at hand, and save it for your next summer gathering. If you give it a try, let me know how it turned out or drop any questions below for extra tips!
Bright swirls of red and blue dough crack open to reveal fudgy, chocolatey centers while a sweet powdered sugar coating melts on your tongue. Each cookie brings a festive pop of color to your 4th of July spread.

¡Hola, cocineros! I'm Alba Morales, and welcome to my kitchen where Spanish traditions meet California innovation, and every recipe is a love letter to the flavors that have shaped my culinary journey.