
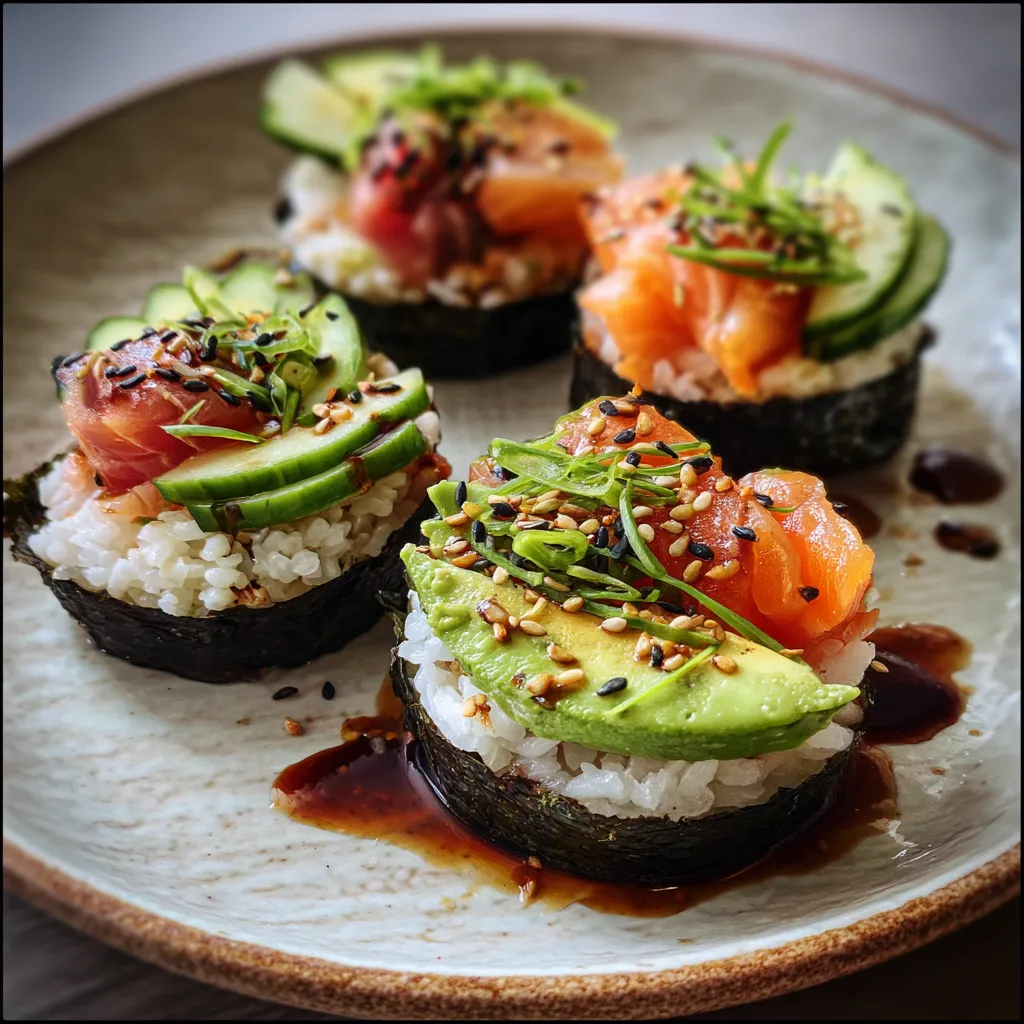
Craving sushi but want a fun, healthy twist? Healthy Sushi Cups bring the flavors of the ocean and garden into a playful, handheld snack. These crunchy nori shells cradle perfectly vinegared rice, buttery avocado, crisp carrot ribbons, cucumber, and delicate smoked salmon in every bite. Whether you’re hosting a lunch party or treating yourself to a solo meal, these cups deliver the classic sushi experience without the rolling mat fuss. Gather your ingredients and let’s dive into making these colorful, flavor-packed bites that are as delightful to eat as they are to look at.
Before diving in, let’s gather the key elements that make each bite pop with flavor and texture.
Creating Healthy Sushi Cups is a fun, hands-on process that transforms simple ingredients into bite-size delights. You’ll start by preparing perfectly seasoned sushi rice, then craft individual nori cups using a muffin tin. Filling these cups with fresh vegetables, creamy avocado, and silky smoked salmon lets you customize each bite. Follow these ten easy steps and you’ll have a platter of colorful, playful sushi cups ready to impress friends or elevate your lunch game.
1. Rinse the sushi rice under cold water until the water runs clear. Use cold water and swirl the grains to remove excess starch.
2. Combine the rinsed rice and water in a pot or rice cooker and cook according to package instructions, bringing to a boil then simmering covered.
3. In a small bowl heat the rice vinegar, sugar, and salt until the sugar dissolves, stirring the warm mixture until fully combined.
4. Transfer the cooked rice to a wide bowl and gently fold in the vinegar mixture until every grain is evenly coated.
5. Cut the nori sheets into squares and line the cups of a muffin tin with the nori, pressing the edges into the sides with your fingertips.
6. Press a spoonful of seasoned rice into each nori-lined cup to form a firm base, using a damp spoon to prevent sticking.
7. Slice the cucumber, carrot, and avocado into thin strips and cut the smoked salmon into bite-size pieces with a sharp knife.
8. Arrange the vegetables and salmon on top of each rice cup, mixing colors and textures for visual appeal.
9. Drizzle the soy sauce over the sushi cups and sprinkle with sesame seeds and sliced green onion for that final umami punch.
10. Remove the sushi cups from the tin by gently pressing each nori cup from the bottom and serve immediately.
These Healthy Sushi Cups shine on any table—bright, colorful, and perfectly portable. Pair them with a few extra dipping sauces or arrange them on a platter for popping at parties. Whether you’re feeding kids, hosting friends, or enjoying a solo lunch, these bite-size delights bring that classic sushi experience in a playful form. To make your presentation even more special, try these serving ideas that highlight the textures and flavors in every cup.
Getting these Healthy Sushi Cups just right is all about timing and fresh ingredients. From perfectly seasoned rice to crisp nori cups, a few simple tweaks can elevate your sushi game. Start by ensuring your rice isn’t overcooked—slightly al dente rice holds its shape better. When cutting your veggies, aim for uniform strips so each cup looks as inviting as it tastes. Pat your avocado slices dry to prevent extra moisture, and handle the nori gently to avoid tears. Remember, assembling right before serving locks in that signature crunch and creamy avocado texture. These extra pointers will have you nailing the perfect balance of flavor and structure every time you make them!
Planning ahead can make enjoying these sushi cups stress-free, but proper storage is key to preserving their textures. The secret is to keep each component separate until you’re ready to serve. Keeping rice and toppings stored separately prevents nori from softening and your veggies from wilting. Follow these storage tips to keep everything fresh and crisp, so you can assemble perfect sushi cups at a moment’s notice.
Got questions about making or customizing your Healthy Sushi Cups? Check out these quick answers and common troubleshooting tips to help you on your sushi-making journey.
Rinse the sushi rice under cold water until the water runs clear to remove excess starch. Cook it with the precise 1 cup rice to 1¼ cups water ratio according to package instructions or in a rice cooker. Transfer the hot rice to a wide bowl and fold in the warm rice vinegar, sugar, and salt mixture gently so the grains stay intact but become well coated. This technique yields sticky rice that holds the cup shape while remaining tender.
Cut the nori sheets into squares slightly larger than the muffin cups. Place each square in the cup with the shiny side down and gently press the edges against the tin using your fingertips or a small spoon. If the nori resists bending, quickly pass it over steam or a dry skillet for a second to soften it before lining the cups to avoid cracking.
Assemble and serve the sushi cups immediately after adding the toppings and drizzling with soy sauce. If you need to prep ahead, store the cooked rice, sliced vegetables, and proteins separately in airtight containers in the refrigerator. Only assemble the nori cups minutes before serving to maintain their crisp, paper-like texture.
For a vegetarian or vegan version, replace smoked salmon with firm tofu marinated in soy sauce, rice vinegar, and sesame oil, or use marinated mushrooms sautéed in a bit of mirin and soy sauce. Both options provide satisfying flavor and texture that complement the sushi rice and nori.
Yes. You can cook and season the rice up to 4 hours ahead, then cool it slightly and store in an airtight container at room temperature. Slice the cucumber, carrot, and avocado (store avocado with a splash of lemon juice in an airtight container). Keep the nori squares in a sealed bag away from moisture. Assemble everything just before serving for the best texture.
Substitute the regular soy sauce with tamari or a certified gluten-free soy sauce. Ensure that any vinegar you use is gluten-free, and if you choose a vegetarian protein like tofu, verify the marinade ingredients or use a simple gluten-free seasoning.
Store leftover seasoned rice and toppings separately in airtight containers in the refrigerator for up to 2 days. When ready to use, bring the rice to room temperature or gently reheat it in the microwave with a damp cloth over the bowl to restore moisture. Refresh sliced vegetables by laying them on a paper towel to absorb any excess moisture before assembly.
Healthy Sushi Cups take all the tasty fun of classic sushi rolls and package them into adorable, bite-size treasures that are as Instagram-worthy as they are delicious. The crisp nori shell, perfectly seasoned rice, creamy avocado, and silky smoked salmon create a symphony of textures and flavors in every cup. This playful format is perfect for beginners and sushi lovers alike—no rolling mat required! Feel free to print this recipe card, save it for your next gathering, and don’t forget to leave a comment or ask questions if you tweaked a topping or need a hand mastering the nori cups.
Crunchy nori shells hold fluffy, vinegared rice topped with fresh cucumber, crisp carrot ribbons, buttery avocado, and delicate smoked salmon. A dash of soy and sesame seeds add a savory crunch in every bite.

¡Hola, cocineros! I'm Alba Morales, and welcome to my kitchen where Spanish traditions meet California innovation, and every recipe is a love letter to the flavors that have shaped my culinary journey.