
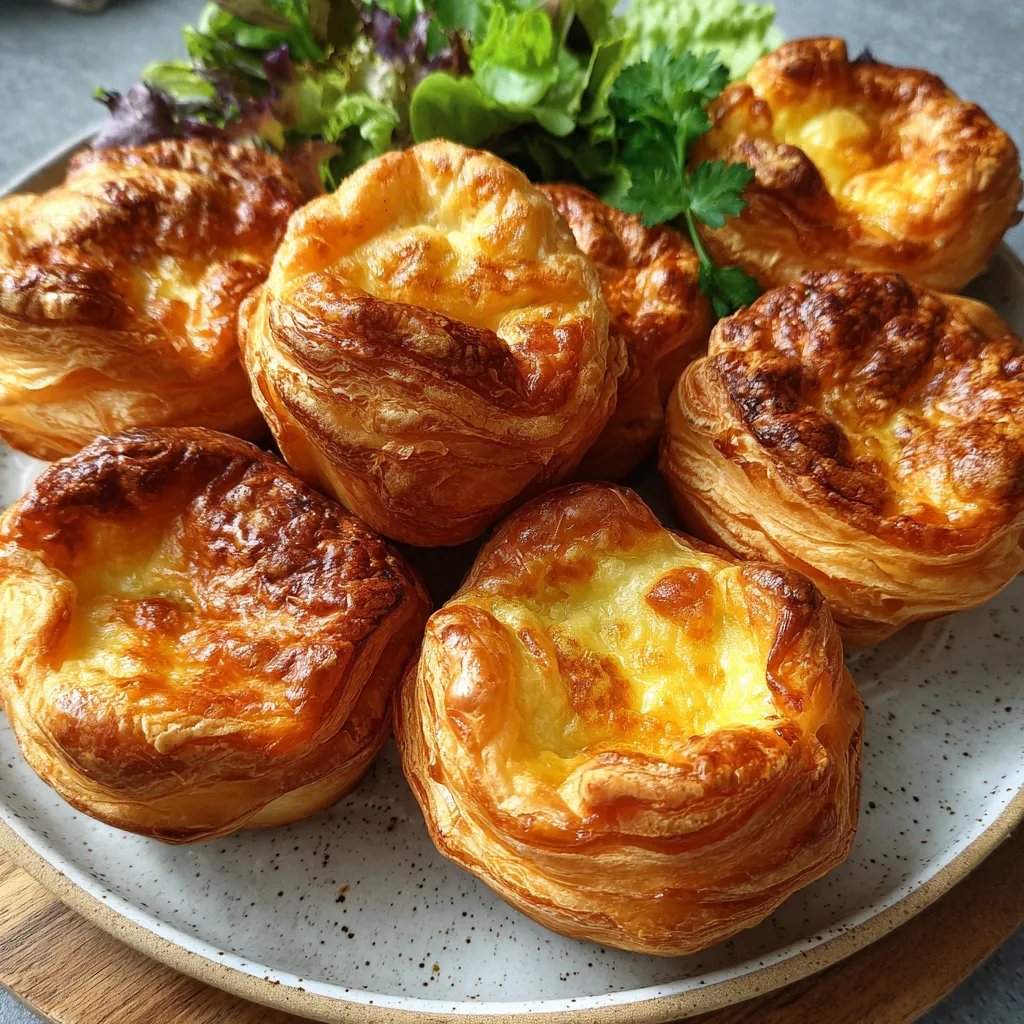
Get ready to elevate your brunch or snack game with these Puffed Pastry Baskets! These crispy golden pastry shells are perfect for cradling your favorite fillings—whether you’re craving sweet fruits or savory bites. Light, flaky baskets emerge from the oven golden and puffed, their buttery layers crisp at the edges. It’s a beginner-friendly recipe that comes together in under 30 minutes, so let’s roll up our sleeves and bake something amazing!
Before we dive into the steps, let’s gather the essentials that make these baskets puff up perfectly:
Transforming simple dough into elegant baskets is easier than you think! With just a few minutes of prep and a hot oven, you’ll achieve bakery-worthy results. Follow each step carefully—keeping your pastry cold and handling it gently ensures maximum puff and crispiness.
1. Preheat the oven to 200°C and lightly grease a 12-cup muffin tin to prevent sticking.
2. On a lightly floured surface roll out the puff pastry to about 3 mm thickness, ensuring even puff.
3. Use a round cutter slightly larger than the muffin wells to cut out 12 circles for perfect coverage.
4. Press each pastry circle gently into the muffin cups, forming baskets with even edges.
5. In a small bowl whisk together the egg and water to create a smooth egg wash.
6. Brush the edges of each basket with the egg wash, focusing on the rim for golden browning.
7. Bake for 12–15 minutes or until the baskets are puffed up and turn a deep golden brown.
8. Allow the baskets to cool in the tin for 5 minutes before removing, preserving their shape.
Once your baskets are ready, the flavor possibilities are endless! Here are four tasty ideas to inspire your next gathering:
Achieving light, flaky baskets is all about timing and temperature. Here are a few friendly pointers to help you master this recipe every time:
Proper storage ensures your Puffed Pastry Baskets stay crisp and delicious:
Here are answers to some common questions from fellow pastry lovers:
It takes about 25–30 minutes in total. Rolling out and cutting the pastry circles takes around 5–7 minutes, pressing them into the muffin tin and applying the egg wash another 5 minutes, and then baking for 12–15 minutes until they are golden brown and puffed.
Work quickly on a lightly floured surface and return any unused sheets of pastry to the refrigerator between batches. You can even chill your rolling pin and cutter beforehand. Keeping the pastry at fridge temperature (around 4 °C) ensures the butter remains solid, which creates maximum lift and those characteristic flaky layers in the oven.
Yes. For unbaked baskets, cut and form them in the tin, then freeze on a tray for about 1 hour until firm. Transfer to a freezer bag for up to one month. When ready to bake, place them back in the tin from frozen, brush with egg wash, and add a couple of extra minutes to the baking time. After baking, you can also freeze fully baked and cooled baskets for up to two weeks; reheat at 160 °C for 5–7 minutes to crisp them up.
Both sweet and savory fillings work beautifully. For savory, try quiche-style custard with cheese and spinach or a chicken and mushroom ragout. For sweet options, vanilla pastry cream with fresh berries or a simple chocolate ganache topped with nuts are excellent. Just make sure hot fillings are added once the baskets have cooled slightly to avoid sogginess.
If you notice the edges browning too quickly, loosely tent the tin with a sheet of aluminum foil halfway through baking. The foil will shield the edges while still allowing the centers to puff and set properly. Also, ensure even spacing in your oven to allow good air circulation around each cup.
Let the baskets rest in the tin for about 5 minutes after removing them from the oven. This short cooling period helps them set. If you remove them immediately, the sudden change in structure can cause collapse. Gently run a thin spatula or knife around the edges before lifting them out to preserve their shape.
You can use any small, ovenproof mold that’s about 5–6 cm in diameter and 2–3 cm deep, such as mini tart tins or a silicone muffin mold. Adjust only the baking time slightly if the volume is significantly larger or smaller, watching for the same golden color and puffiness as your indicators of doneness.
These Puffed Pastry Baskets are a true crowd-pleaser—they’re simple to make, endlessly customizable, and deliver that irresistible flaky texture every time. What makes them special is how they effortlessly transition from sweet brunch showstopper to savory party snack. Print this recipe, stash it in your baking binder, and get ready to impress friends and family with fresh pastry cups on demand. If you have questions, feedback, or a favorite filling idea, drop a comment below—I’d love to hear how your baskets turned out!
Light, flaky baskets emerge from the oven golden and puffed, their buttery layers crisp at the edges. Fill with creamy custard, fresh berries, or savory cheese mixtures for a customizable treat.

¡Hola, cocineros! I'm Alba Morales, and welcome to my kitchen where Spanish traditions meet California innovation, and every recipe is a love letter to the flavors that have shaped my culinary journey.