
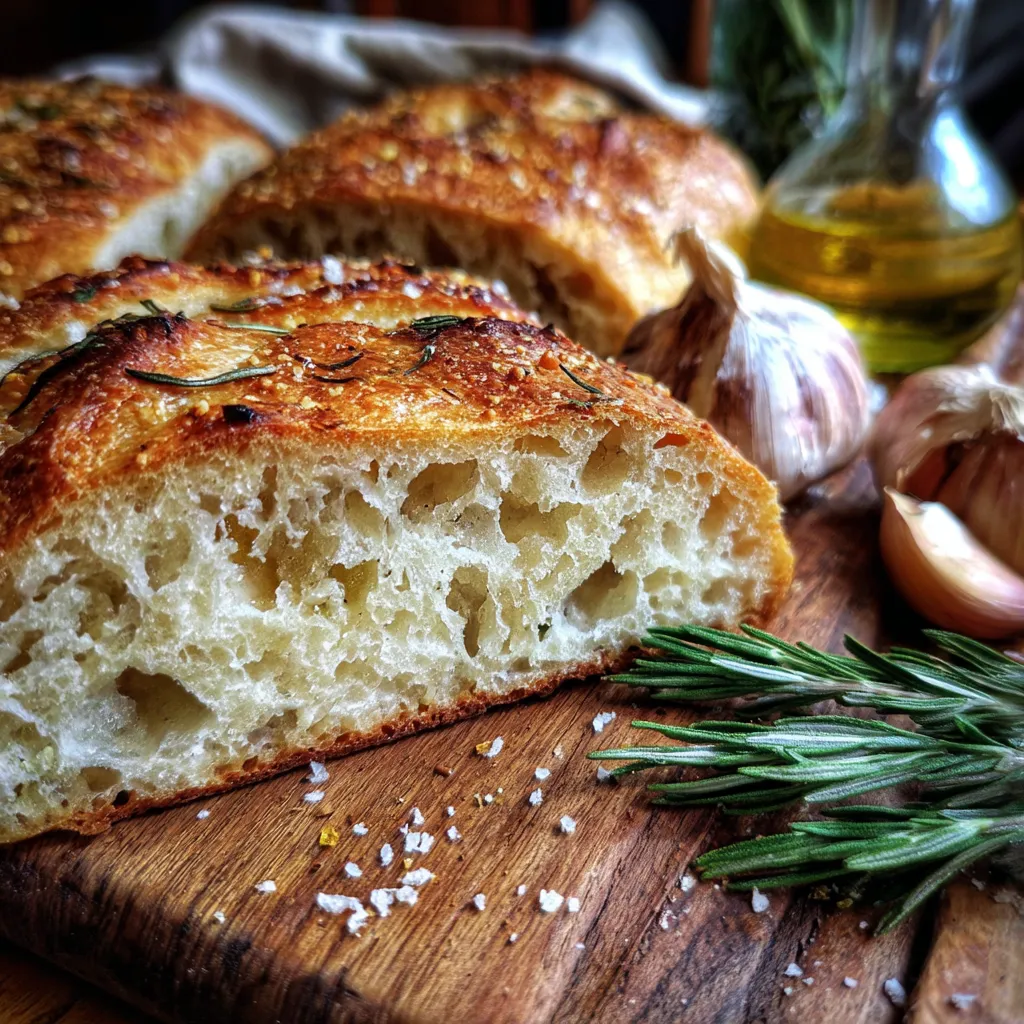
This fragrant Rosemary & Roasted Garlic Artisan Bread is like a warm hug from the oven, with sweet caramelized garlic tucked into every crumb and piney rosemary dancing on the crust. Its soft interior and crackly exterior are perfect for dipping in olive oil or serving alongside your favorite dinner. If you’ve been craving a homemade loaf that feels fancy but is still totally achievable on a weeknight, this recipe is your new best friend. Gather your ingredients and let’s chat about how to bake a loaf that’ll fill your home with mouthwatering goodness.
Before you roll up your sleeves and get your hands doughy, let’s take a quick look at what you’ll need. Each component plays a crucial role in building the aroma, texture, and flavor of this artisan loaf.
Ready to transform these simple ingredients into a golden loaf bursting with flavor? Follow these steps, from roasting garlic to baking, to create a rustic artisan bread that’s both impressive and approachable. Each phase, from yeast activation to the final proof, builds that signature crust and tender crumb.
1. Roast the garlic by preheating your oven to 400°F. Slice off the top of the head to expose the cloves, drizzle with olive oil, then wrap snugly in aluminum foil. Roast for 30–35 minutes until the cloves are soft and golden. Let cool, then squeeze the cloves into a bowl and mash with a fork. Set aside.
2. In a large bowl, combine the warm water, sugar, and active dry yeast. Stir gently and let rest for 5–10 minutes until the mixture is foamy, indicating that the yeast is active.
3. Add the mashed roasted garlic, olive oil, and salt to the yeast mixture. Stir until everything is well incorporated.
4. Gradually sprinkle in the all-purpose flour, one cup at a time, mixing with a wooden spoon or spatula until a shaggy dough forms.
5. Turn the dough onto a lightly floured surface and knead for 8–10 minutes, until it becomes smooth, elastic, and slightly tacky.
6. During the last minute of kneading, fold in the chopped rosemary to distribute it evenly throughout the dough.
7. Place the dough in a greased bowl, cover with a damp cloth, and let it rise in a warm, draft-free spot for 1–2 hours, or until it has doubled in size.
8. Punch down the risen dough to release excess air. Shape it into a round loaf (or your preferred shape) and place it on a parchment-lined baking sheet.
9. Cover the shaped loaf with a cloth again for its second rise, about 30–45 minutes, until it puffs up noticeably.
10. While the dough proofs, preheat your oven to 375°F. Just before baking, make a few shallow slashes on the loaf’s surface to let steam escape and add a rustic look.
11. Bake for 25–30 minutes, until the crust is golden brown and the loaf sounds hollow when tapped on the bottom.
12. Transfer the bread to a wire rack and let it cool completely before slicing to ensure the crumb sets properly.
This artisan bread shines on its own, but pairing it with the right accompaniments can elevate your dining experience. From simple dips to hearty platters, here are a few ways to serve this loaf that will have everyone at the table swooning.
Achieving that perfect crust and tender crumb can feel like alchemy, but a few friendly tricks make it a breeze. From dialing in your garlic punch to customizing the herb mix, these tips will help you nail the texture, flavor, and aroma of your artisan loaf every time.
If you don’t devour this loaf in one sitting (no judgment here!), proper storage will keep it tasting bakery-fresh even days later. Follow these easy methods to lock in moisture, maintain crispness, and enjoy slices whenever the craving strikes.
Here are some quick answers to common queries that pop up while baking this loaf:
The roasted garlic is ready when the individual cloves are soft, golden, and can be easily pierced with a fork. After roasting at 400°F for 30–35 minutes, allow the head to cool sufficiently, then squeeze the cloves out. If any cloves still feel firm or undercooked, return the garlic to the oven in its foil for another 5–10 minutes until fully tender.
Yes. If using instant yeast, you can mix it directly with the flour rather than dissolving in water first. Reduce the amount slightly to about 1¾ teaspoons of instant yeast. Skip the 5–10 minute proofing step; instead, combine the yeast with flour, then proceed by adding warm water, sugar, garlic, oil, and salt as directed.
If the dough is too sticky and sticks to your hands or the work surface, dust lightly with additional flour, adding a tablespoon at a time until the dough is manageable but still soft. If it feels too dry and tears easily, sprinkle in a teaspoon of water at a time and continue kneading until it smooths out. Aim for a pliable, slightly tacky dough that springs back when pressed.
To vary the flavor, add up to 1 tablespoon total of dried herbs (thyme, oregano, or sage) along with or instead of rosemary, folding them into the dough during the last few minutes of kneading. For extra garlic punch, stir in 1–2 additional mashed cloves of roasted garlic. Fresh grated Parmesan or cracked black pepper can also be gently kneaded in for a savory twist.
The first rise is complete when the dough has doubled in volume, which usually takes 1–2 hours in a warm, draft-free spot. It should feel airy and show visible bubbles when you press lightly with your finger. After shaping, the second proof takes 30–45 minutes; you’ll know it’s ready for the oven when the loaf puffs up noticeably and springs back slowly to the touch.
The loaf is done when it turns golden brown and sounds hollow when tapped on the bottom, typically after 25–30 minutes at 375°F. For a crispier crust, you can place a small oven-safe dish of water on the lower rack when you put the bread in. The steam helps form a golden, crackly exterior without overbaking the interior.
To store at room temperature, allow the loaf to cool completely, then wrap it in a clean kitchen towel or place it in an airtight container for up to 3 days. For longer storage, slice the cooled bread, arrange slices in a freezer bag with pieces of parchment between them, and freeze for up to 2 months. Reheat slices directly from frozen in a toaster or wrapped in foil in a 350°F oven for 10–15 minutes.
Not only does this Rosemary & Roasted Garlic Artisan Bread deliver a showstopper loaf with a crispy crust and pillowy interior, it also sneaks in layers of flavor—from the mellow roasted garlic to the aromatic rosemary—that keep each slice exciting. It’s a recipe that works because you master simple techniques like proofing, kneading, and steaming to build that bakery-quality crust at home. Print this out, tuck it into your recipe binder, and next time you crave a slice of comfort, you’ve got everything you need. If you give this loaf a spin, let me know how it turned out or drop any questions below—I’d love to hear your baking adventures!
Soft crumb and crispy crust envelop roasted garlic’s sweet warmth and fragrant rosemary bits. The aroma of fresh herbs and golden garlic make every slice a welcoming canvas for olive oil drizzles.

¡Hola, cocineros! I'm Alba Morales, and welcome to my kitchen where Spanish traditions meet California innovation, and every recipe is a love letter to the flavors that have shaped my culinary journey.