
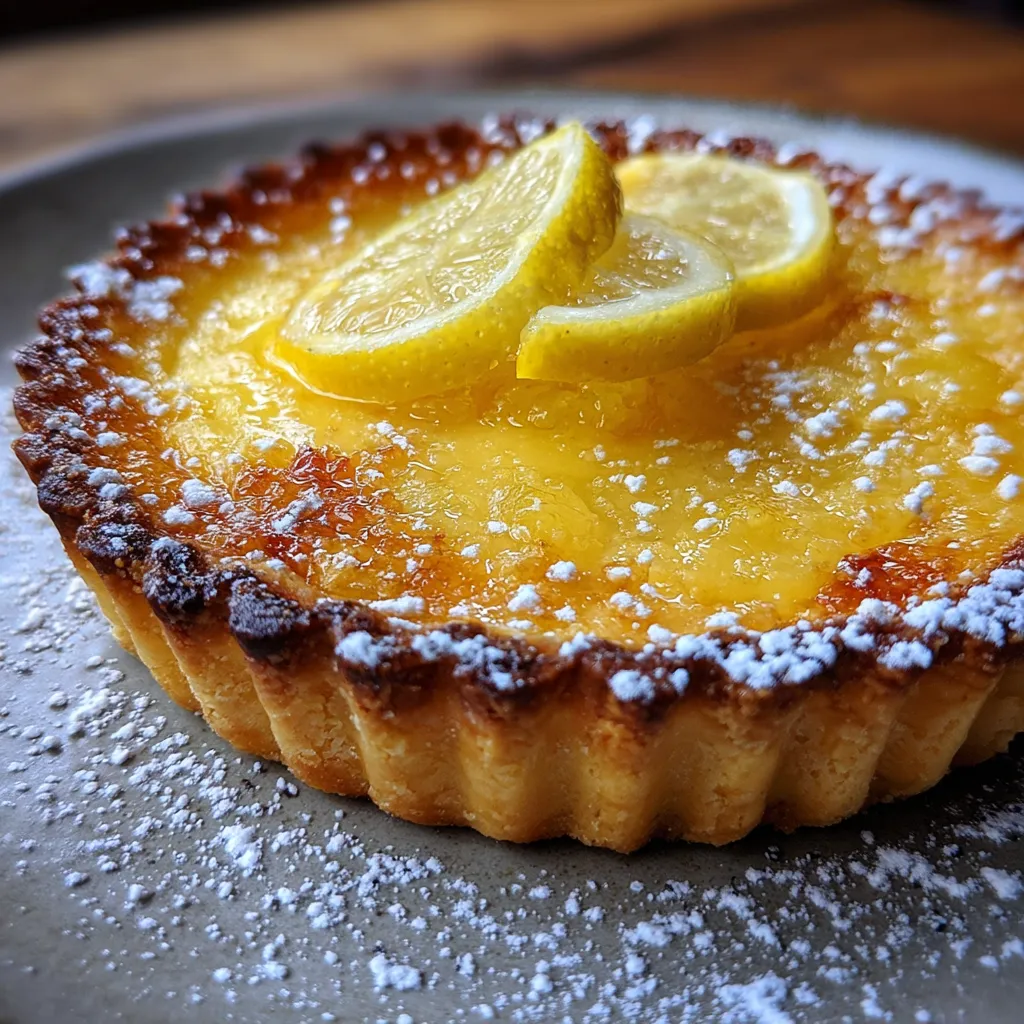
If you’re on the hunt for a dessert that delivers tangy brightness and a buttery, flaky base, the Zesty Buttery Baked Lemon Tart is your new best friend. Bright lemon curd bursting with tangy sunshine swirls into a rich, flaky pastry for a zesty twist on a classic tart. This silky, cream-infused filling pairs with a golden crust that puffs around the edges, each bite bursting with citrus zing and a whisper of vanilla. Trust me, once you try this gem, you’ll be dreaming of lemony perfection.
Before we dive into the kitchen, let’s take a look at the fresh elements that make this tart shine.
Ready to roll up your sleeves? This recipe breaks down every step, from crafting the perfect buttery crust to whisking together that luscious lemon filling. You’ll blind bake the shell to ensure crisp edges, then pour in a silk-smooth curd that sets to a slight wobble before chilling. Follow these detailed instructions, and you’ll end up with a golden, tangy masterpiece that’s equal parts professional-looking and homey.
1. Preheat your oven to 180°C (350°F) and lightly grease a 9-inch tart pan to prevent sticking and ensure even baking.
2. In a bowl, combine all-purpose flour, powdered sugar, and salt, whisking gently to distribute every sprinkle.
3. Cut cold unsalted butter into the flour mixture using a pastry cutter or your fingertips until it resembles coarse crumbs, ensuring pockets of butter for flakiness.
4. Stir in the egg yolk and cold water just until the dough comes together—avoid overmixing to keep the crust tender.
5. Press the dough evenly into the tart pan, pushing it firmly into the edges, then chill in the refrigerator for 15 minutes to firm up.
6. Blind bake the crust with parchment paper and pie weights for 15 minutes, then remove the weights and bake for 5 more minutes until the edges turn lightly golden.
7. Meanwhile, whisk together eggs, granulated sugar, lemon juice, lemon zest, heavy cream, and vanilla extract in a large bowl until the mixture is smooth and homogenous.
8. Pour the lemon filling into the pre-baked crust and bake for 20 to 25 minutes until the filling is set around the edges but still slightly wobbly in the center.
9. Allow the tart to cool to room temperature on a wire rack, then refrigerate for at least 2 hours before slicing and serving.
Once your Zesty Buttery Baked Lemon Tart is perfectly chilled and ready to shine, let’s talk about presentation. These ideas will elevate each slice, adding color, texture, and flair for an unforgettable dessert experience.
Achieving that smooth, creamy filling and a golden, non-shrinking crust is easier than you think. Follow these insider notes to hit every note of zesty perfection on your very first try. From temperature checks to weight tricks, these tips will keep your tart looking professional and tasting incredible.
To keep your Zesty Buttery Baked Lemon Tart tasting as fresh as the day you made it, proper storage is key. Here are a few simple methods to preserve its buttery crust and silky, lemon-infused filling, so you can enjoy slices days later without sacrificing flavor or texture.
Got questions? You’re not alone—here are answers to the most common queries for this lemon tart.
To prevent shrinking, make sure the dough is evenly pressed into the edges of the tart pan and use a tart pan with a removable bottom if possible. Chill the crust for at least 15 minutes before baking—it gives the butter time to firm up and helps the dough retain its shape. Line the chilled crust with parchment paper and fill it with pie weights or dried beans, then bake for 15 minutes. Finally, remove the weights and bake for an additional 5 minutes until the edges are lightly golden. Avoid opening the oven door during these stages to maintain consistent heat.
Yes, you can prepare the dough up to two days in advance. After mixing, shape it into a disk, wrap tightly in plastic wrap, and store in the refrigerator. If you want to freeze it, wrap the disk in plastic and then in aluminum foil, and freeze for up to one month. Thaw overnight in the refrigerator before rolling out and pressing into the tart pan. Proceed with chilling for 15 minutes and blind baking as directed.
Graininess or curdling usually happens when the filling ingredients are too cold or overwhisked at high speed. To fix this, bring your eggs and cream to room temperature before starting. Whisk gently by hand or on low speed until the sugar is dissolved and the mixture is smooth. If the mixture still looks grainy, strain it through a fine-mesh sieve into a clean bowl before pouring into the crust to ensure a silky texture.
You can replace heavy cream with half-and-half or whole milk in the lemon filling, but the texture may be slightly less rich and creamy. For a dairy-free option, use full-fat coconut milk, but expect a subtle coconut flavor. Keep the total liquid volume at 120 ml and whisk thoroughly to incorporate air. Baking time remains the same, but check the filling early—dairy-free alternatives can set faster.
To make the tart sweeter, increase the granulated sugar in the filling by 10 to 20 g and reduce by the same amount if you prefer it tarter. You can also add more lemon zest—up to 1 tsp extra—for an aroma boost without intensifying acidity. If you want milder acidity, substitute 25 ml of lemon juice with an equal amount of orange juice. Taste the filling batter before baking to ensure you’ve achieved the desired flavor balance.
The filling should look mostly firm but still have a slight wobble in the center when you gently shake the pan. It will continue to set as it cools. If the center is too jiggly or liquid, bake for an additional 2–3 minutes, watching carefully to avoid overbaking. A fully set center will not have a liquid sheen and will hold its shape once chilled.
After the tart cools to room temperature, cover it tightly with plastic wrap or place it in an airtight container. Store in the refrigerator for up to 3 days. To serve, let the slice sit at room temperature for about 10 minutes to soften slightly, or garnish with fresh berries and a dollop of whipped cream. Avoid leaving the tart out for more than 2 hours to maintain food safety.
Yes, substitute a 1-to-1 gluten-free baking blend for the all-purpose flour. Make sure your blend contains xanthan gum or add ¼ tsp separately to help bind the dough. Because gluten-free flours absorb moisture differently, you may need to add an extra tablespoon of cold water to achieve the right dough consistency. Chill and blind bake as directed, then proceed with the filling. The crust may be slightly more delicate but will hold its shape once baked.
This Zesty Buttery Baked Lemon Tart brings together the perfect balance of tangy citrus and rich, buttery pastry, thanks to the room-temperature ingredients, blind-baking secrets, and that slight wobble in the filling. The bright lemon curd bursting with sunshine swirls into a flaky shell that’s pure dessert joy. Print this guide, tuck it into your recipe binder, and get ready to impress at brunch or dinner parties—just don’t blame us if your friends demand seconds! Have thoughts or questions? Drop a comment below, and let’s chat about your lemony adventures.
This lemon tart pairs a silky, cream-infused filling with a buttery crust that puffs golden around the edges. Each bite bursts with fresh citrus zing and a whisper of vanilla, cooled to a perfect wobbly set before chilling.

¡Hola, cocineros! I'm Alba Morales, and welcome to my kitchen where Spanish traditions meet California innovation, and every recipe is a love letter to the flavors that have shaped my culinary journey.