

There’s nothing more satisfying than sinking your teeth into a Buttery Flaky Baked Raspberry Danish. Golden, buttery layers of flaky pastry envelope a jewel of tart raspberry, delivering an unforgettable morning pick-me-up. With crisp folds that steam and glisten as you bite through each delicate layer, this homemade treat turns any kitchen into a cozy bakery. Whether you’re sharing with friends or enjoying a quiet weekend breakfast, every tangy-sweet mouthful is pure joy.
Key Ingredients
Before we dive into the lamination and rolling, gather these essentials for perfect layers and bright raspberry filling:
- 2 cups all-purpose flour: The sturdy base that gives structure and chew to your danish dough.
- 1/4 cup granulated sugar: Adds sweetness and helps tenderize the pastry.
- 2 teaspoons active dry yeast: The leavening agent that makes the dough rise and puff up.
- 1/2 teaspoon salt: Balances flavors and strengthens the gluten network.
- 3/4 cup warm milk: Hydrates ingredients and activates the yeast for a foamy proof.
- 1 large egg: Enriches the dough, adding color, flavor, and richness.
- 8 tablespoons cold unsalted butter: Chilled fat that creates those signature flaky layers.
- 1 teaspoon vanilla extract: A hint of warmth and sweetness in every bite.
- 1 cup fresh raspberries: Tart fruit that bursts into sweet, fruity pockets.
- 2 tablespoons granulated sugar: Sweetens and macerates the berries for a jam-like filling.
- 1 tablespoon lemon juice: Brightens the raspberry flavor and balances sweetness.
- 1 large egg beaten: An egg wash that gives the danish a glossy, golden finish.
How To Make Buttery Flaky Baked Raspberry Danish
Turning pantry staples into bakery-quality danishes is easier than you think! The key is a few rounds of gentle rolling and folding, with plenty of chilling time to keep the butter and dough cold. Follow these steps carefully—from proofing the yeast to shaping each square—to achieve light, tender layers that practically melt in your mouth.
1. Combine warm milk and yeast in a bowl and let stand for 5 minutes until foamy.
2. Stir flour, sugar, salt, egg, and vanilla into the yeast mixture to form a soft dough.
3. Knead dough on a floured surface until smooth, shape into a disk, wrap in plastic, and chill for 30 minutes.
4. Place cold butter between parchment paper and roll into a 6×6 inch square, then chill.
5. Roll chilled dough into a 10×10 inch square on a lightly floured surface.
6. Center the butter square on the dough and fold the dough edges over it like an envelope.
7. Turn the dough 90 degrees, roll into a 12×8 inch rectangle, fold into thirds, wrap, and chill for 30 minutes.
8. Repeat the rolling and folding process one more time, then chill for another 30 minutes.
9. Roll the dough into a 12×12 inch rectangle and cut into nine 4×4 inch squares.
10. Mix raspberries with sugar and lemon juice, place a spoonful in the center of each square, and fold opposite corners toward the center.
11. Brush each Danish with beaten egg and chill for 15 minutes while preheating the oven to 400°F.
12. Bake on a lined sheet pan for 15–20 minutes or until golden brown, then cool slightly before serving.
Serving Suggestions
These danishes shine on their own, but you can elevate the experience with a few simple touches. Whether you’re hosting brunch or savoring a solo treat, here are four ways to serve them perfectly:
- Pair with a steaming mug of freshly brewed coffee or robust espresso to balance the sweetness.
- Add a dollop of vanilla bean whipped cream or lightly sweetened crème fraîche for extra richness.
- Dust lightly with powdered sugar just before serving for a pretty snowy finish.
- Garnish with a few extra fresh raspberries and a sprig of mint for color and brightness.
Tips For Perfect Buttery Flaky Baked Raspberry Danish
Getting those layers just right takes a bit of patience, but the payoff is huge. Keep these friendly tips in mind as you go:
- Keep everything well chilled—both the butter and the dough—to create distinct flaky layers.
- Handle the dough gently, using light pressure with your rolling pin to prevent the butter from softening.
- Use fresh raspberries whenever possible; if you opt for frozen, thaw completely and drain off any excess liquid.
- Always serve these danishes warm for the flakiest texture and fullest fruit flavor.
How To Store It
Once you’ve baked up a batch of these beauties, follow these methods to keep them tasting fresh:
- Store at room temperature in an airtight container for up to 2 days—just layer parchment between each Danish to prevent sticking.
- For longer freshness, refrigerate in a sealed container for up to 4 days; reheat in a 350°F oven for 5 minutes to revive the crisp edges.
- Freeze cooled pastries in a freezer-safe bag for up to 1 month; thaw overnight in the refrigerator, then warm in the oven.
- To reheat, pop them into a preheated 350°F oven for 5–7 minutes—this restores that fresh-from-the-bakery crispness.
Frequently Asked Questions
Here are answers to the questions we hear most often:
- How long does it take to prepare and bake the Buttery Flaky Baked Raspberry Danish?
A: Total time is about 2½ to 3 hours. This includes 5 minutes for proofing the yeast, 30 minutes of initial chilling, two additional 30-minute chilling intervals between turns, 15 minutes of final dough chilling, and 15–20 minutes of baking.
- Why is it important to chill both the dough and the butter throughout the process?
A: Chilling prevents the butter from melting into the dough, which ensures distinct layers that puff up during baking. Warm butter will blend with the dough, resulting in a denser texture rather than a flaky Danish.
- Can I use frozen raspberries instead of fresh ones?
A: Yes. Thaw the frozen raspberries fully, then drain any excess liquid before mixing with sugar and lemon juice. Excess moisture can make the Danish soggy, so ensure the berries are as dry as possible.
- How do I handle the dough to prevent butter leakage during lamination?
A: Work in a cool environment, handle the dough gently without overpressing, and keep your hands and rolling pin lightly floured. If the dough or butter starts to soften, return it to the refrigerator for 10–15 minutes before continuing.
- Is there a way to prepare this recipe in advance?
A: You can make the dough up to the first fold, wrap it tightly in plastic, and refrigerate overnight. Continue with the remaining turns and baking steps the next day. Alternatively, freeze the shaped Danish (before the final proof) on a sheet pan, then transfer to a freezer bag—bake from frozen, adding a few extra minutes to the bake time.
- How can I tell when the Danish are perfectly baked?
A: The pastries should be a deep golden brown on top and bottom. The layers will be puffed and crisp when tapped lightly. If the centers are still pale, bake for an additional 2–3 minutes, watching closely to avoid overbrowning.
- What’s the best way to store any leftover Danishes?
A: Store at room temperature in an airtight container for up to 2 days. For longer storage, freeze cooled pastries in a sealed bag for up to 1 month. Reheat in a 350°F oven for 5–7 minutes to refresh the flaky texture and warmth.
What Makes This Special
This Buttery Flaky Baked Raspberry Danish stands out thanks to its homemade laminated dough technique—those repeated folds and chills guarantee pastry layers that practically flake themselves apart. Tangy fresh raspberries mingled with just enough sugar and lemon create a vibrant centerpiece, while the buttery crust offers a tender, airy bite. Feel free to print or save this article for your next baking adventure, and don’t be shy—drop a comment if you tried it, need a hand, or just want to brag about your beautifully golden danishes!
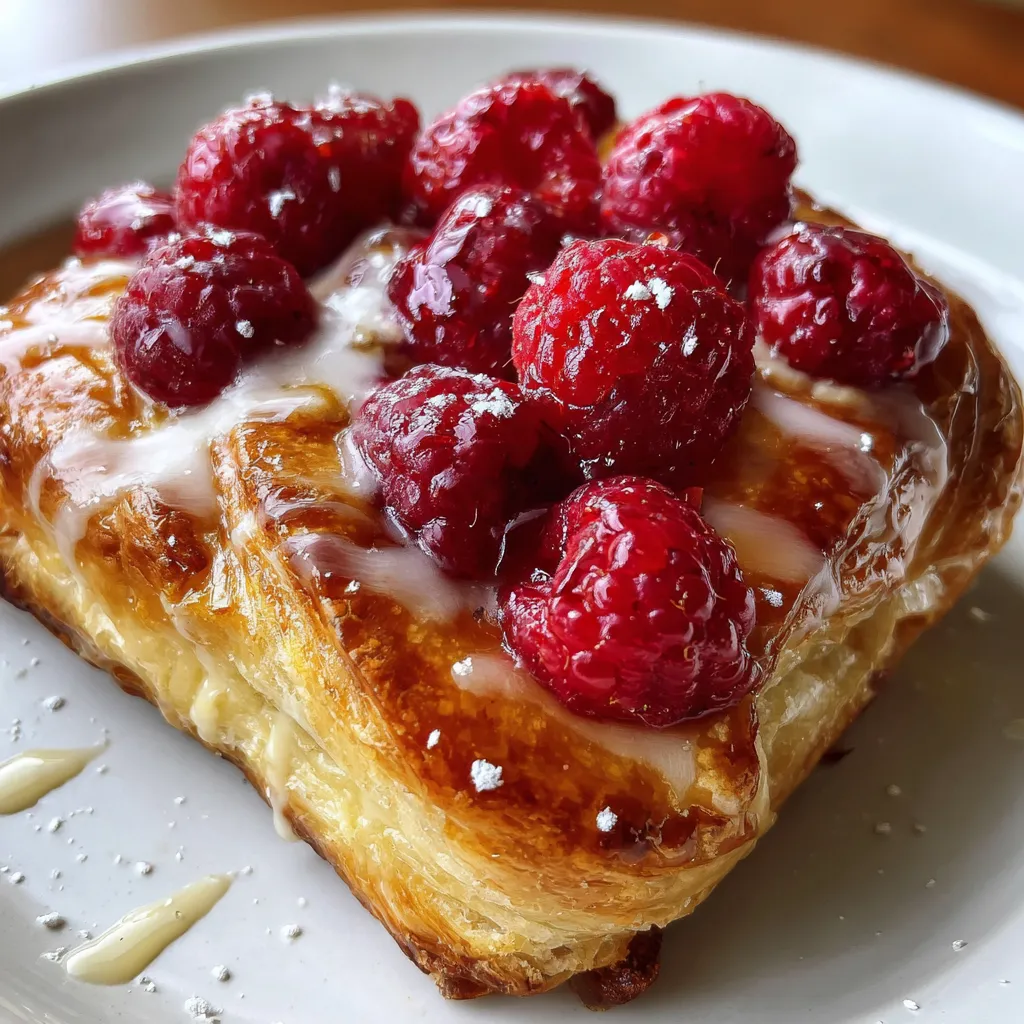

Buttery Flaky Baked Raspberry Danish
Description
Buttery folds crisp in the oven, revealing tangy raspberry pockets that steam and glisten as you bite through each golden, flaky layer.
Ingredients
Instructions
-
Combine warm milk and yeast in a bowl and let stand for 5 minutes until foamy.
-
Stir flour, sugar, salt, egg, and vanilla into the yeast mixture to form a soft dough.
-
Knead dough on a floured surface until smooth, shape into a disk, wrap in plastic, and chill for 30 minutes.
-
Place cold butter between parchment paper and roll into a 6×6 inch square, then chill.
-
Roll chilled dough into a 10×10 inch square on a lightly floured surface.
-
Center the butter square on the dough and fold the dough edges over it like an envelope.
-
Turn the dough 90 degrees, roll into a 12×8 inch rectangle, fold into thirds, wrap, and chill for 30 minutes.
-
Repeat the rolling and folding process one more time, then chill for another 30 minutes.
-
Roll the dough into a 12×12 inch rectangle and cut into nine 4×4 inch squares.
-
Mix raspberries with sugar and lemon juice, place a spoonful in the center of each square, and fold opposite corners toward the center.
-
Brush each Danish with beaten egg and chill for 15 minutes while preheating the oven to 400°F.
-
Bake on a lined sheet pan for 15–20 minutes or until golden brown, then cool slightly before serving.
Note
- Ensure butter and dough are well chilled for distinct flaky layers
- Gently handle the dough to keep the butter from softening
- Fresh raspberries give the best flavor, but frozen can be used if thawed and drained
- Serve warm for the flakiest texture and fullest flavor

