

Every bite of these cheesecake deviled strawberries feels like a mini celebration in your mouth. Fresh, juicy berries take center stage, their vibrant red hues peeking through a cloud of creamy cheesecake filling. With just a handful of simple ingredients—strawberries, cream cheese, a kiss of vanilla, and a sprinkle of graham cracker crumbs—you’re whisked away on a flavor journey that’s both nostalgic and delightfully unexpected. These treats transform ordinary summer strawberries into elegant finger foods that practically sell themselves at brunches, BBQs, or an impromptu weekend sweet craving. No baking required, just about 20 minutes of prep time, a 30-minute chill in the fridge, and voila: twelve stunning, individually portioned desserts ready to wow your taste buds.
I remember the first time I tried these little gems at a friend’s garden party. The tang of the cream cheese filling played in perfect harmony with the sweet-tart pop of strawberry, and the graham cracker crumbs added that irresistible crunch. And because they come together so easily, even beginner home cooks can pull them off with confidence—no oven needed! They clock in at roughly 150 calories per strawberry, making them a guilt-friendly party snack or a whimsical after-school treat. Whether you’re planning a bridal shower, a summer picnic, or simply craving something special to brighten your afternoon, these cheesecake deviled strawberries are the crowd-pleasing solution you’ve been searching for.
KEY INGREDIENTS IN CHEESECAKE DEVILED STRAWBERRIES
To build these irresistible treats, you’ll need fresh produce, creamy dairy, and a handful of pantry staples. Each ingredient plays a unique role in balancing creamy richness with bright fruit flavor, plus a hint of crunch to make every bite a little adventure.
- Strawberries
Ripe, plump berries serve as both the vessel and star of the show. Their natural sweetness and juicy texture complement the tangy cheesecake filling perfectly.
- Cream cheese
Softened to room temperature, this provides the silky base of the filling. It brings that classic cheesecake tang and smooth mouthfeel.
- Powdered sugar
Adds sweetness without grittiness. It blends effortlessly into the cream cheese, helping the mixture whip up light and creamy.
- Vanilla extract
A splash of pure vanilla deepens the flavor profile and enhances the sweetness of strawberries and cream cheese alike.
- Heavy whipping cream
Whipped to stiff peaks, it lightens the filling and gives it a luscious, airy texture.
- Graham cracker crumbs
These crumbs add a nostalgic graham crust note and a touch of crunch atop each strawberry.
- Lemon juice
A small drizzle brightens and balances the sweetness, giving the filling a subtle zing.
- Salt
Just a pinch rounds out the flavors and prevents the cheesecake mixture from tasting flat.
- Extra graham cracker crumbs & mini chocolate chips (optional)
For garnish—sprinkle liberally to add texture and a hint of chocolatey sweetness.
HOW TO MAKE CHEESECAKE DEVILED STRAWBERRIES
Let’s dive into the fun, step-by-step process of turning simple strawberries into bite-sized cheesecake wonders. Follow these detailed instructions, and soon you’ll have a tray of impressive, no-bake treats ready to chill and thrill.
1. Start by washing the strawberries under cool running water. Take care to remove any dirt or debris. Gently pat them dry with a paper towel so they hold their shape when filled.
2. Slice the top off each strawberry with a sharp knife, creating a stable base. Using a small spoon or strawberry corer, carefully hollow out the inner flesh—saving the scooped strawberry bits for smoothies or fruit salsa.
3. In a medium mixing bowl, combine softened cream cheese, powdered sugar, vanilla extract, lemon juice, and a pinch of salt. With an electric mixer set to medium speed, beat until the mixture is completely smooth and free of lumps.
4. In a separate chilled bowl, pour in the heavy cream and whip with clean beaters. Continue whipping until you see stiff peaks that hold their shape and resist falling when you lift the whisk.
5. Gently fold the whipped cream into the cream cheese mixture using a spatula. Do this in slow, sweeping motions to keep as much air in the filling as possible and maintain a light texture.
6. Transfer the cheesecake mixture into a piping bag or use a small spoon. Pipe or spoon the filling into each hollowed-out strawberry, creating a generous, swirled peak on top.
7. Immediately sprinkle a pinch of graham cracker crumbs over each filled strawberry. This adds a delightful crunch and the essence of a classic graham crust with every bite.
8. For an extra touch of indulgence, garnish with mini chocolate chips right after adding the crumbs. The chocolate melts slightly against the cold filling, offering a subtle contrast.
9. Refrigerate the tray of filled strawberries for at least 30 minutes. This rest time allows the flavors to meld and the filling to firm up just enough for clean bites.
10. Serve these cheesecake deviled strawberries chilled and watch your guests’ faces light up as soon as they taste the first bite!
SERVING SUGGESTIONS FOR CHEESECAKE DEVILED STRAWBERRIES
There’s something so celebratory about a platter of cheesecake deviled strawberries. When it’s time to present these little delights, think about how you can accentuate their vibrant colors and textures. Whether you’re setting up a casual picnic, an elegant afternoon tea, or a festive summer soiree, these suggestions will help you serve them at their very best. Take a moment to ensure your serving platter is chilled, arrange the strawberries with a bit of space so each one shines, and consider enhancing the overall aesthetic with fresh mint leaves or delicate edible flowers.
- Colorful Display
Arrange the strawberries on a white or pastel platter for contrast. Scatter fresh mint sprigs or edible flower petals around them to create a bright, eye-catching setup.
- Dip Station
Offer a small bowl of extra graham cracker crumbs and chocolate chips on the side. Guests can customize each strawberry for a fun, interactive dessert experience.
- Beverage Pairing
Serve with a light, fruity drink like rosé, sparkling lemonade, or an iced tea with fresh herbs. The bubbly or herbal notes will complement the creamy, tangy filling perfectly.
- Mini Dessert Bar
Pair these strawberries with other no-bake favorites—think lemon bars, chocolate truffles, or fruit skewers. A themed dessert station invites guests to mix and match flavors.
HOW TO STORE CHEESECAKE DEVILED STRAWBERRIES
These cheesecake deviled strawberries are best enjoyed fresh, but with a few simple precautions, you can keep them tasting nearly as good for up to a day. The key to maintaining that perfect texture—juicy berry plus creamy filling—is minimizing moisture and air exposure. Always chill them promptly after assembly and choose the right storage vessel to prevent sogginess or flavor loss. Avoid long-term storage, as the delicate strawberry walls will eventually release moisture and soften, making the filling slightly watery.
- Airtight Container
Place the strawberries in a single layer inside an airtight container. If you must stack, separate layers with parchment paper to prevent sticking. Seal tightly to keep out excess moisture.
- Refrigeration Only
Store the container in the coldest part of your fridge—usually the back of a shelf. Maintain a consistent temperature (around 38–40°F) and avoid the fridge door, where temperatures fluctuate.
- Separate Garnishes
If you know you won’t serve immediately, skip the final sprinkle of extra graham crumbs or chocolate chips. Store those in a small zip-top bag and add them just before serving to retain maximum crunch.
- No Freezing
Freezing is not recommended for these strawberries, as the fruit’s water content will expand and rupture the structure, creating a watery texture upon thawing.
CONCLUSION
This journey through cheesecake deviled strawberries has shown how a handful of everyday ingredients can transform into a whimsical, crowd-pleasing dessert. You’ve learned how to select and prepare the best berries, whip up a silky cheesecake filling, and assemble each bite-sized treat for maximum wow factor. With a prep time of just 20 minutes, no cooking required, and a brief 30-minute chill, you can have a vibrant platter of 12 strawberries ready whenever that sweet craving or social gathering calls. At around 150 calories per strawberry, these are light enough to serve as party snacks or a delightful personal indulgence. Because they’re so beginner-friendly, everyone from curious new bakers to seasoned home cooks can nail this recipe on the first try.
Feel free to print this article and tuck it into your recipe binder for future reference—or save it digitally for that next summer BBQ or bridal shower. You’ll also find an FAQ section below to answer any lingering questions about substitutions, troubleshooting, or creative twists. If you give these cheesecake deviled strawberries a try, I’d love to hear how they turned out! Leave a comment with your favorite garnish ideas, any hiccups you encountered, or simply let me know if this recipe brightened your day. Your feedback, questions, and cooking stories are always welcome—I’m here to help every step of the way. Enjoy every creamy, fruity bite!
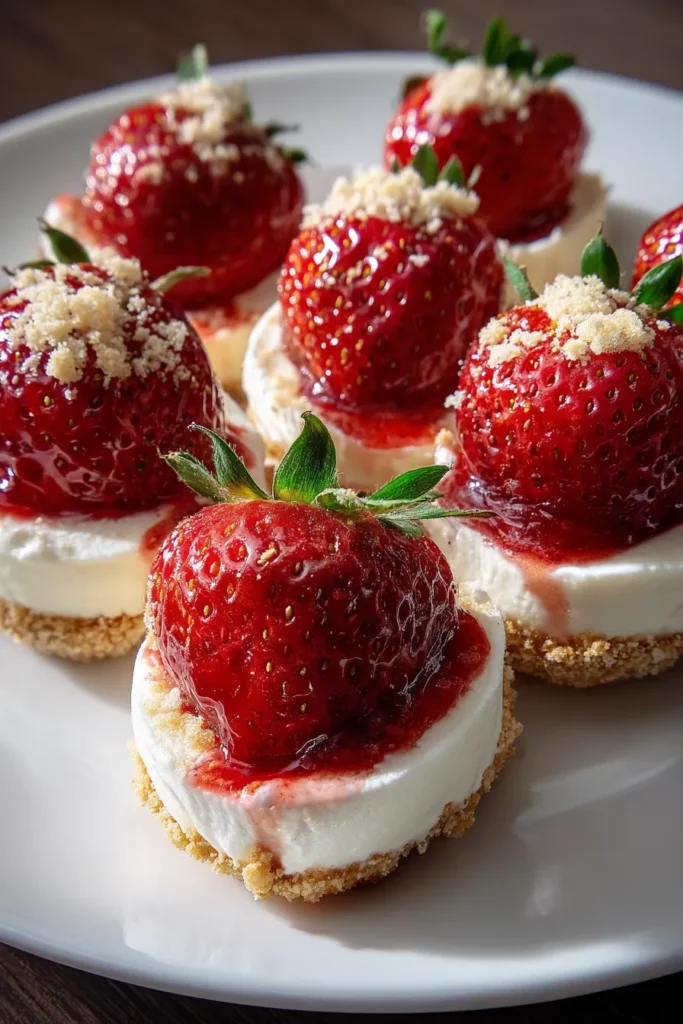

cheesecake deviled strawberries
Description
These cheesecake deviled strawberries burst with creamy, sweet flavors and are wonderfully refreshing. Each bite offers a delightful mix of tart strawberry and rich cheesecake goodness, perfect for any sweet craving.
Ingredients
Instructions
-
Begin by washing the strawberries under cool running water. Gently pat them dry with a paper towel.
-
Carefully slice the top off each strawberry and hollow out the inner flesh using a small spoon or a strawberry corer. Set aside the hollowed strawberries and reserve the strawberry flesh for another use if desired.
-
In a medium mixing bowl, combine the softened cream cheese, powdered sugar, vanilla extract, lemon juice, and a pinch of salt. Use an electric mixer to beat the mixture until smooth and creamy.
-
In a separate bowl, whip the heavy cream until stiff peaks form. Gently fold the whipped cream into the cream cheese mixture until fully combined, being careful not to deflate the whipped cream.
-
Once the filling is smooth and creamy, spoon or pipe the cheesecake mixture into the hollowed strawberries using a piping bag or a small spoon.
-
After filling the strawberries, sprinkle a small amount of graham cracker crumbs on top of each one for added texture and flavor.
-
If desired, add mini chocolate chips on top of the strawberries as an additional garnish.
-
Refrigerate the filled strawberries for at least 30 minutes before serving to allow the flavors to meld and the filling to firm up slightly.
-
Serve chilled and enjoy the delicious cheesecake deviled strawberries!
Note
- These strawberries are best enjoyed fresh but can be stored in the refrigerator for up to a day.
- Experiment with flavor by adding a touch of almond extract or using flavored cream cheese.
- Consider using mini graham cracker cups if you want a no-hassle presentation.
- Perfect for summer gatherings, parties, or as a delightful treat for yourself.

