

Cherry Cheesecake Dump Cake is a simple one-pan dessert marrying creamy cheesecake layers with vibrant cherry filling for a quick, impressive treat. Layers of silky cream cheese and juicy cherry filling get topped with buttery cake mix, baking into a golden crust that crackles and melts into sweet-tart perfection. This easy, beginner-friendly bake brings big flavors with minimal fuss—and you’ll love how it turns pantry staples into a crowd-pleasing celebration in under 90 minutes.
Key Ingredients
Before you start, gather these pantry-friendly stars that make this dump cake a showstopper:
- 21 ounces cherry pie filling: Bright-tart fruit layer that infuses sweetness and moisture.
- 15.25 ounces yellow cake mix: Buttery cakey topping that bakes into a golden, crisp crust.
- 8 ounces cream cheese softened: Silk-smooth cheesecake layer balancing sweetness with creamy texture.
- 1/2 cup granulated sugar: Adds just the right sweetness to the cheesecake layer.
- 1 teaspoon vanilla extract: Enhances the cream cheese flavor and adds warm aromatic depth.
- 1 cup unsalted butter melted: Moistened cake mix for a rich, tender crumb and golden finish.
How To Make Cherry Cheesecake Dump Cake
Turning this one-pan wonder into reality is as straightforward as layering and baking. From preheating the oven to letting the cake rest, every step builds the perfect harmony of creamy cheesecake, sweet-tart cherries, and a buttery crust. Keep your tools close—a mixing bowl, electric mixer, spoon, and a 9×13-inch dish—and follow these detailed steps to assemble and bake your Cherry Cheesecake Dump Cake.
1. Preheat the oven to 350°F and lightly grease a 9×13-inch baking dish with butter or nonstick spray to prevent sticking.
2. Spread the cherry pie filling evenly in the prepared dish, ensuring the fruit covers every corner for consistent flavor.
3. In a medium bowl, use an electric mixer to beat the softened cream cheese with the granulated sugar and vanilla extract until completely smooth and free of lumps, about 1–2 minutes.
4. Dollop the cream cheese mixture over the cherry layer, then gently spread with an offset spatula or spoon, creating a uniform cheesecake layer without mixing into the fruit.
5. Sprinkle the yellow cake mix evenly over the cream cheese, covering it entirely for a crisp, golden topping.
6. Drizzle the melted butter evenly over the cake mix, making sure each dry patch is moistened to achieve a tender, crackly crust.
7. Bake for 45 to 55 minutes, or until the top is golden brown and the filling is bubbly around the edges.
8. Allow the cake to cool for at least 20 minutes before serving so the cheesecake layer can set and slicing becomes neater.
Serving Suggestions
Once your Cherry Cheesecake Dump Cake has cooled and set, it’s time to plate and impress. This dessert is versatile enough to shine at casual weeknight treats or holiday gatherings. Whether you’re craving contrasts, extra creaminess, or a fresh finish, these ideas will make each slice unforgettable:
- Whipped cream topper: Pipe or dollop fresh whipped cream over each warm slice for added lightness and creaminess.
- Vanilla ice cream pairing: Serve a scoop of cold vanilla ice cream alongside to balance the warm, gooey filling.
- Toasted nut crunch: Sprinkle chopped toasted pecans or almonds on top for a crunchy textural contrast.
- Fresh mint garnish: Add a few fresh mint leaves for a pop of color and a refreshing herbal note.
Tips For Perfect Cherry Cheesecake Dump Cake
To get your Cherry Cheesecake Dump Cake just right, here are a few friendly pointers that make the process smoother and the flavor pop. These simple tricks ensure your layers set nicely, your leftovers stay fresh, and you can mix things up whenever creativity strikes.
- Use room-temperature cream cheese for a smoother cheesecake layer.
- Store leftovers covered in the refrigerator for up to 4 days.
- For extra richness, top slices with whipped cream or a scoop of vanilla ice cream.
- You can substitute cherry with other fruit pie fillings like blueberry or apple.
How To Store It
After enjoying a slice (or two) of Cherry Cheesecake Dump Cake, you’ll want to tuck away the rest so it stays moist and flavorful. Proper storage keeps the cheesecake layer silky and prevents the cake topping from drying out. Here are a few easy ways to preserve your leftovers:
- Refrigerator storage: Cover the cooled cake tightly with plastic wrap or foil and refrigerate for up to 4 days.
- Freezing slices: Wrap individual portions in parchment paper, then foil, and freeze for up to 1 month.
- Thawing: Transfer frozen slices to the fridge overnight before serving to maintain texture.
- Reheating: Warm slices in a 300°F oven for about 10 minutes or microwave for 20–30 seconds to revive that just-baked taste.
Frequently Asked Questions
Got questions about this Cherry Cheesecake Dump Cake? You’re not alone—here are some quick answers!
- Q: How long does it take to prepare this Cherry Cheesecake Dump Cake?
Prep time is about 15 minutes—this covers greasing the pan, spreading the cherry filling, beating the cream cheese layer, and assembling the cake. Baking takes 45 to 55 minutes, and you should allow at least 20 minutes of cooling before serving. In total, plan for about 1 hour and 30 minutes from start to finish.
- Q: Can I substitute other pie fillings for the cherry pie filling?
Yes. You can swap in other fruit pie fillings such as blueberry, apple, peach, or mixed berry, using the same 21-ounce quantity. Note that denser or juicier fillings may require a slightly longer bake time to achieve a bubbly center, and you may want to drain excess syrup from very wet fillings before spreading.
- Q: Why is my cheesecake layer lumpy or uneven?
Lumps usually occur if the cream cheese is too cold or under-mixed. Always use room-temperature cream cheese and beat it with the sugar and vanilla until completely smooth and free of lumps. Scrape down the bowl sides periodically to ensure even mixing.
- Q: My cake topping isn’t browning evenly. What can I do?
Drizzle the melted butter as evenly as possible over the cake mix layer so every bit is moistened. If you still see dry patches, gently use a spoon to redistribute butter after drizzling. You can also rotate the pan halfway through baking to promote even browning.
- Q: Can I prepare this dump cake in advance?
Yes. Assemble the layers in the greased baking dish, cover tightly, and refrigerate for up to 12 hours before baking. When you’re ready, bake at 350°F for the same 45 to 55 minutes, adding an extra 5 to 10 minutes if the dish is cold, until the top is golden and the filling bubbles.
- Q: How should I store and reheat leftovers?
Cover leftover cake tightly and store in the refrigerator for up to 4 days. To reheat individual servings, microwave on medium power for 20 to 30 seconds or warm in a 300°F oven for about 10 minutes until heated through. Top with whipped cream or ice cream just before serving.
- Q: Is it okay to use salted butter or a lower-fat alternative?
Unsalted butter is recommended for controlling the salt level and achieving the best texture. If you only have salted butter, omit any additional salt in the recipe and be aware that the cake may taste slightly saltier. Lower-fat spreads or margarine can be used but may result in a less tender crumb and thinner sauce layer.
- Q: What if my filling is still runny after cooling?
Runny filling can happen if the pie filling is very juicy or the cake hasn’t set fully. Make sure you bake until the filling bubbles vigorously at the edges and the top is golden. After baking, allow the cake to cool for at least 20 minutes; the cheesecake layer firms up as it cools. If using fresh fruit fillings, consider stirring in 1 to 2 teaspoons of cornstarch before assembling to help thicken the sauce.
What Makes This Special
This Cherry Cheesecake Dump Cake works because it combines the creamy tang of cheesecake with the bright sweetness of cherries and the crunchy, buttery cake topping in a single, fuss-free dish. It’s almost too easy—no rolling, no layered pans—just dump, bake, and slice into delicious perfection. Whether you’re craving a cozy family dessert or need a showstopper for guests, this recipe delivers every time. Feel free to print and save it for later, and let me know in the comments if you give it a whirl or have any questions!
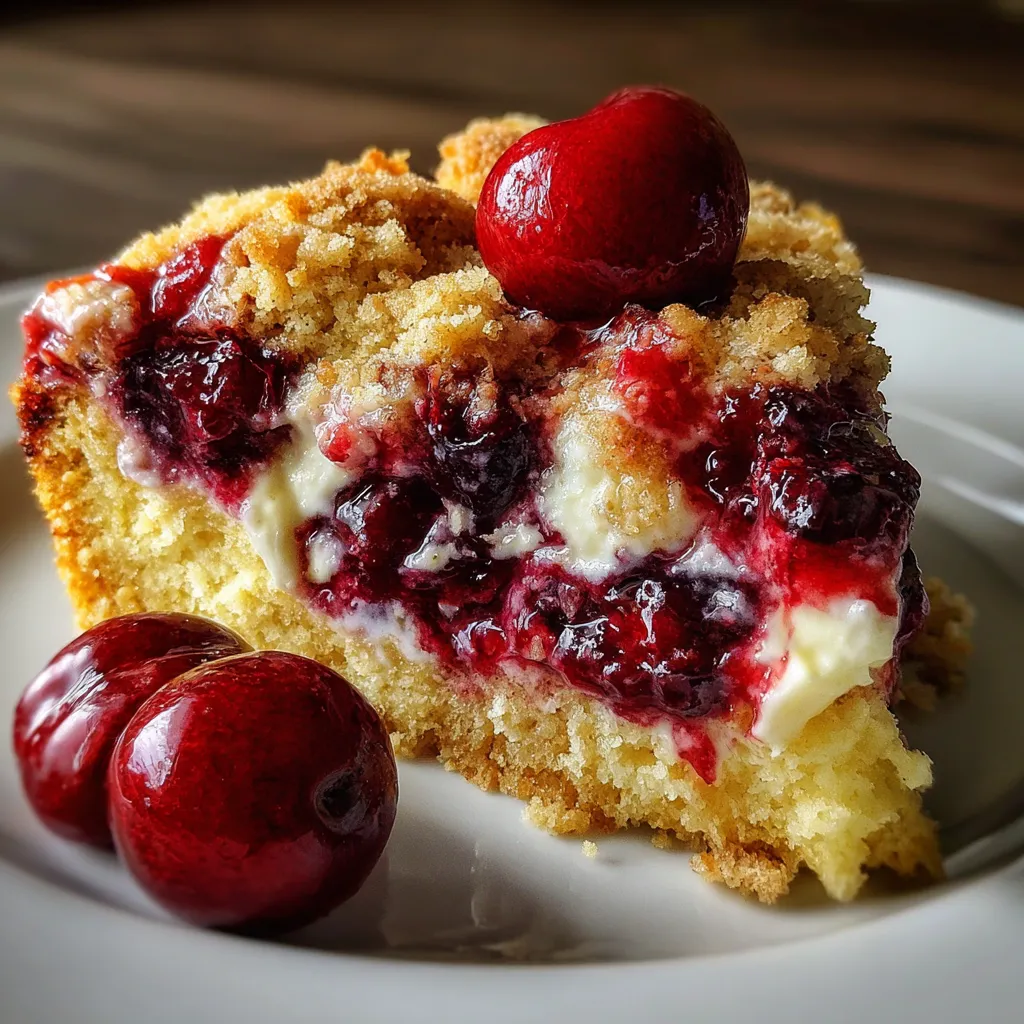

Cherry Cheesecake Dump Cake
Description
Layers of silky cream cheese and juicy cherry filling get topped with buttery cake mix, baking into a golden crust that crackles and melts into sweet-tart perfection.
Ingredients
Instructions
-
Preheat the oven to 350°F and lightly grease a 9x13-inch baking dish.
-
Spread the cherry pie filling evenly in the prepared dish.
-
In a medium bowl, beat the cream cheese with the sugar and vanilla extract until smooth.
-
Dollop the cream cheese mixture over the cherry layer and gently spread to cover.
-
Sprinkle the yellow cake mix evenly over the cream cheese layer.
-
Drizzle the melted butter evenly over the cake mix, covering as much as possible.
-
Bake for 45 to 55 minutes, or until the top is golden and the filling is bubbly.
-
Allow the cake to cool for at least 20 minutes before serving to let layers set.
Note
- Use room-temperature cream cheese for a smoother cheesecake layer.
- Store leftovers covered in the refrigerator for up to 4 days.
- For extra richness, top slices with whipped cream or a scoop of vanilla ice cream.
- You can substitute cherry with other fruit pie fillings like blueberry or apple.

