

There’s something truly irresistible about a dessert that marries the tangy richness of cream cheese with bright, jewel-toned cherries. This Cherry Cheesecake Trifle is exactly that: a scrumptious layered dessert that’s sure to impress at any gathering—from casual potlucks to festive dinner parties! Each spoonful reveals layers of creamy cheesecake filling whipped to airy perfection, tender cubes of buttery pound cake, and luscious cherry pie filling that bursts with sweet-tart flavor. To keep things beginner-friendly, this 100% no-bake sensation takes just 20 minutes to prepare, with zero oven time and only a couple of hours to chill before serving. Best of all, it’s perfectly portioned at around 350 calories per serving, making it an indulgence you can feel good about sharing with friends and family. The hint of vanilla woven into the sweet cream cheese layer combines beautifully with the vibrant cherry compote, delivering a taste experience that feels both nostalgic and utterly new. Whether it’s your first time layering a trifle or you’re a seasoned dessert dynamo, this easy recipe is a staple party food that promises both visual delight and heavenly taste.
When I first tried this trifle, I was hosting a family barbecue and wanted something eye-catching and fuss-free. I tucked the ingredients—cream cheese, powdered sugar, vanilla extract, whipped topping, pound cake, and a can of cherry pie filling—into my cart at the grocery store, humming with anticipation. The process felt like a creative afternoon project: beating the cream cheese until it was silky smooth, gently folding in the fluffy whipped topping, and carefully layering each element in a clear glass bowl so the colors shine through. Seeing my nieces’ eyes widen as they sliced into that top layer of cherries was pure joy. Since then, I’ve made this dessert for holidays, potlucks, and weekend get-togethers, constantly tweaking with crushed graham crackers for a bit of crunch or substituting angel food cake for a lighter twist. If you have fresh cherries on hand, try cooking them down with a pinch of sugar and cornstarch to create a homemade cherry compote—it adds a delightful depth of flavor. I can’t wait to hear how you personalize this recipe, so grab a mixing bowl, text your best friend to help you assemble layers, and let this trifle become your signature showstopper dessert too!
KEY INGREDIENTS IN CHERRY CHEESECAKE TRIFLE
Before we dive into the step-by-step instructions, let’s highlight the essential components that make this trifle shine. Each ingredient brings its own magic to the table, creating a harmonious balance of creamy, sweet, and fruity layers.
- Cream cheese: Provides a tangy, rich base for the cheesecake layer. Softening it at room temperature ensures a lump-free, velvety mixture.
- Powdered sugar: Adds sweetness and helps stabilize the cream cheese filling, giving it a smooth texture that holds up well in layers.
- Vanilla extract: Infuses each bite with warm, aromatic notes, enhancing the overall depth of flavor.
- Whipped topping: Lightens and aerates the cheesecake layer, creating that signature fluffy texture that makes every spoonful feel like a cloud.
- Pound cake: Acts as the sturdy foundation of the trifle. Its buttery crumb soaks up the cheesecake mixture and cherry juices, adding a tender bite.
- Cherry pie filling: Delivers juicy bursts of sweet-tart cherry goodness in every layer, punctuating the creamy cheesecake with fruity brightness.
- Fresh cherries: Optional garnish that adds a pop of color, texture, and a fresh fruit accent to crown your trifle masterpiece.
HOW TO MAKE CHERRY CHEESECAKE TRIFLE
Assembling this trifle is a breeze once you have all your ingredients prepped. Follow these steps in order, and you’ll have a show-stopping dessert in no time.
1. In a large mixing bowl, beat the softened cream cheese with an electric mixer on medium speed until completely smooth and creamy, taking care to scrape down the sides of the bowl so no lumps remain.
2. Gradually add the powdered sugar and vanilla extract to the bowl, continuing to beat on medium speed until the mixture is uniformly combined and silky.
3. Gently fold in the thawed whipped topping using a spatula, working from the bottom up to maintain the airiness, until the mixture is fully incorporated and luxuriously fluffy.
4. Begin assembling the trifle by placing a single layer of pound cake cubes at the bottom of a trifle dish or large glass bowl, arranging them so the entire base is covered.
5. Spread one-third of the cream cheese mixture evenly over the pound cake, using the back of a spoon or an offset spatula to create a smooth, level surface.
6. Spoon one-third of the cherry pie filling over the cream cheese layer, gently nudging the filling to the edges to ensure every bite will have those juicy cherries.
7. Repeat the layers—another round of pound cake, then cheesecake mixture, then cherry filling—two more times, finishing with a glossy layer of cherry pie filling on top.
8. Cover the trifle dish with plastic wrap and place it in the refrigerator to chill for at least 2 hours, allowing flavors to meld and the layers to set firmly.
9. Just before serving, garnish the top with fresh cherries, if desired, to add a final flourish of color and fresh fruit flavor.
SERVING SUGGESTIONS FOR CHERRY CHEESECAKE TRIFLE
When it comes to serving your Cherry Cheesecake Trifle, the presentation is half the fun! Whether you’re dishing it out family-style or offering individual portions, these ideas will help you showcase each delectable layer and help guests savor every moment.
- Offer the trifle in individual parfait glasses so each person can appreciate the rainbow of layers—from creamy cheesecake to bright cherry filling—and enjoy a perfectly portioned treat.
- Sprinkle a handful of crushed graham crackers or toasted chopped nuts on top of each serving for a delightful crunch that contrasts with the soft layers.
- Drizzle a ribbon of chocolate ganache or caramel sauce over the top layer to add an extra touch of indulgence and beautiful streaks that catch the light.
- Serve alongside a small scoop of vanilla ice cream or a dollop of extra whipped topping to amplify the creamy textures and provide a cooling balance to the sweet cherries.
HOW TO STORE CHERRY CHEESECAKE TRIFLE
Storing your trifle correctly ensures it stays fresh, flavorful, and ready to enjoy over the next few days. The cool, creamy layers benefit from gentle handling and airtight protection.
Refrigeration is key—cover the trifle dish tightly with plastic wrap or transfer individual portions into airtight containers to prevent any odors from the fridge from sneaking in. The trifle will keep beautifully for up to 3 days, though it’s best enjoyed within the first 48 hours when the cake is still tender and the layers maintain their integrity. If you’d like to make it even further in advance, assemble the base layers the night before and wait to add the cherry pie filling and garnish until the morning of your event; this prevents the cake from becoming too saturated overnight.
- Store in the refrigerator with the dish wrapped in plastic wrap to retain moisture and prevent a crust from forming.
- For individual servings, place each portion in a seal-able container, pressing down gently before sealing to secure the layers.
- If you want to freeze leftovers, spoon portions into freezer-safe containers and freeze for up to 1 month; thaw overnight in the refrigerator before serving.
- Avoid leaving the trifle at room temperature for more than 2 hours to keep the whipped topping and cheesecake layers at their best.
CONCLUSION
This Cherry Cheesecake Trifle has everything you could want in a no-bake dessert: luscious layers of tangy cream cheese, pillowy whipped topping, tender cake cubes, and vibrant cherry pie filling. It’s a beginner-friendly recipe that takes just 20 minutes of hands-on time, requires zero oven work, and offers about 350 calories per serving of pure pleasure. Whether you’re prepping for a big party, a family gathering, or a cozy night in, this trifle stands out as a visually stunning centerpiece that’s as delicious as it is easy.
Feel free to print out this article and save it for later, or tuck it into your favorite recipe binder. You’ll also find a handy FAQ section below to answer any questions you might have about substitutions, storage tips, or troubleshooting. If you give this Cherry Cheesecake Trifle a try, please leave a comment, ask any questions, or share your feedback—your thoughts help me keep improving and inspire other home cooks to dive into this delightful, no-bake dessert adventure!
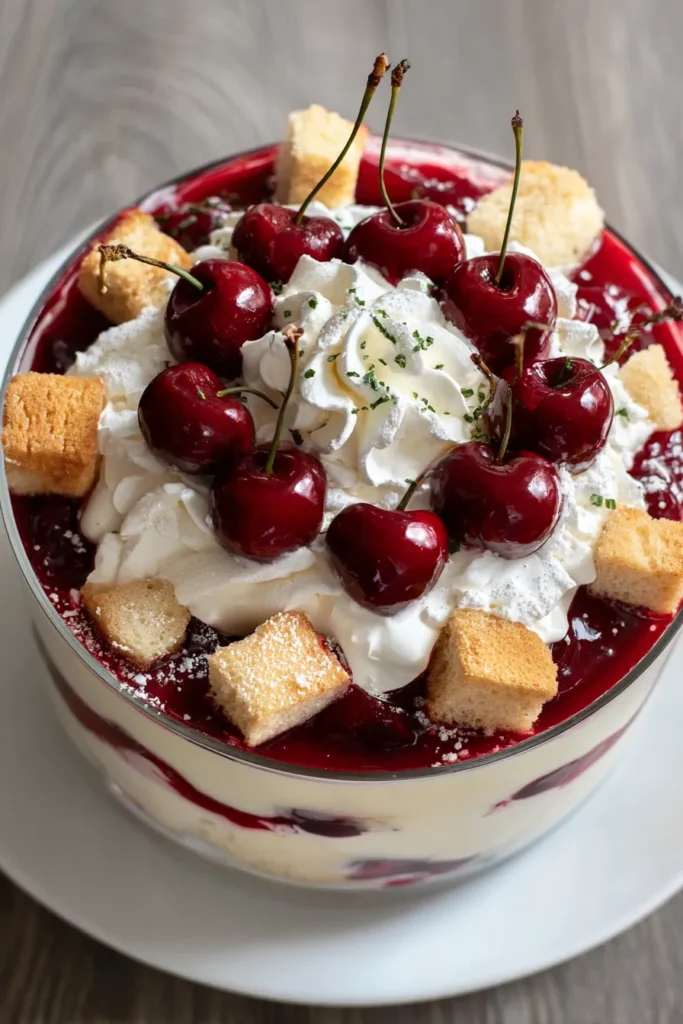

Cherry Cheesecake Trifle
Description
Layers of creamy cheesecake, fluffy whipped topping, and sweet cherry filling combine in this delightful trifle. Perfect for sharing and visually stunning!
Ingredients
Instructions
-
In a large mixing bowl, beat the softened cream cheese with an electric mixer on medium speed until smooth and creamy.
-
Gradually add the powdered sugar and vanilla extract to the cream cheese, continuing to beat until well combined.
-
Gently fold in the thawed whipped topping with a spatula until fully incorporated and fluffy.
-
Begin assembling the trifle by placing a layer of pound cake cubes at the bottom of a trifle dish or large glass bowl.
-
Spread a third of the cream cheese mixture over the layer of cake cubes, smoothing it out evenly.
-
Spoon a third of the cherry pie filling over the cream cheese layer, carefully spreading it to the edges.
-
Repeat the layers of pound cake, cream cheese mixture, and cherry pie filling two more times, ending with cherry pie filling on top.
-
Chill the trifle in the refrigerator for at least 2 hours, allowing the flavors to meld together.
-
Before serving, garnish with fresh cherries, if desired.
Note
- The trifle can be made a day in advance, which allows the flavors to develop even more.
- You can substitute the pound cake with angel food cake for a lighter texture.
- Consider adding a layer of crushed graham crackers for a crunchy texture.
- If you prefer a homemade touch, use fresh cherries cooked down with a bit of sugar and cornstarch for the cherry layer.
- This dessert is great for parties, as it is visually appealing and easy to serve.

