

Crispy Tangy Lemon Chicken Romano brings together golden-crunchy cutlets kissed with bright lemon zest and savory Romano cheese for a tangy twist on a classic favorite. This skillet-fried delight features tender chicken breasts coated in a seasoned breadcrumb–cheese crust, seared to crisp perfection and finished with a squeeze of fresh lemon juice. Whether you’re planning a cozy dinner or entertaining friends, each bite bursts with citrus brightness and nutty richness that will have everyone reaching for seconds.
Key Ingredients
Get ready to gather all the flavorful components that make Crispy Tangy Lemon Chicken Romano so irresistible.
- 1 pound chicken breasts: Tender protein that becomes succulent under the crispy coating.
- 1 cup all-purpose flour: Base for the seasoned dredge that helps the breadcrumbs adhere.
- 2 large eggs: Creates a sticky layer to bind the breadcrumb–cheese mixture.
- 1 cup plain breadcrumbs: Provides the signature crunch in every bite.
- ½ cup grated Romano cheese: Adds nutty, savory depth to the crust.
- 1 tablespoon lemon zest: Delivers bright citrus notes throughout.
- 3 tablespoons lemon juice: Infuses the chicken with tangy brightness.
- 1 teaspoon garlic powder: Imparts a warm, aromatic depth.
- 1 teaspoon onion powder: Contributes gentle sweetness and savory flavor.
- ½ teaspoon paprika: Offers a hint of smoky warmth and rich color.
- ½ teaspoon salt: Enhances and balances all the flavors.
- ¼ teaspoon black pepper: Adds a touch of heat and complexity.
- 3 tablespoons olive oil: Provides the perfect medium for a golden, crisp sear.
- Fresh lemon wedges for serving: Allow diners to add extra citrus tang to taste.
How To Make Crispy Tangy Lemon Chicken Romano
This recipe comes together in just a few simple stages that transform everyday ingredients into a spectacular dish. You’ll pound and season the chicken, set up a classic three-step dredging station, then pan-fry until each cutlet is golden-brown and perfectly cooked. With straightforward techniques like whisking, dredging, and searing, you’ll have Crispy Tangy Lemon Chicken Romano on the table in under 30 minutes.
1. Pound the chicken breasts to an even thickness: Place each breast between plastic wrap and gently pound with a meat mallet or rolling pin until about ½ inch thick, then pat dry with paper towels to ensure a crisp crust.
2. Prepare the seasoned flour: In a shallow bowl, whisk together all-purpose flour, salt, black pepper, garlic powder, onion powder, and paprika until evenly combined.
3. Whisk the egg–lemon mixture: In a second bowl, beat the eggs with lemon juice and lemon zest until smooth and frothy.
4. Combine breadcrumbs and Romano: In a third bowl, stir plain breadcrumbs together with grated Romano cheese for a flavorful coating.
5. Dredge the chicken: Coat each breast first in the seasoned flour, shaking off excess, then dip into the egg–lemon mix, and finally press into the breadcrumb–cheese mixture to fully cover.
6. Heat the skillet: Add olive oil to a large skillet over medium heat and warm until shimmering but not smoking.
7. Pan-fry the cutlets: Carefully add the chicken and cook 4 to 5 minutes per side until golden brown and an instant-read thermometer reads 165°F.
8. Drain excess oil: Transfer cooked cutlets to a paper towel–lined plate to absorb any extra oil.
9. Slice and serve: If desired, slice the chicken on the bias and plate with fresh lemon wedges for squeezing over each piece.
Serving Suggestions
Once your Crispy Tangy Lemon Chicken Romano is ready, these serving ideas will elevate the meal and round out the flavors:
- Pair with a zesty garden salad of mixed greens, cherry tomatoes, and a light lemon vinaigrette for refreshing contrast.
- Serve alongside creamy garlic mashed potatoes to soak up every tangy drop of lemon juice.
- Plate on a bed of buttered linguine tossed with parsley and a drizzle of olive oil for an Italian-inspired feast.
- Garnish with chopped fresh parsley and extra lemon wedges to enhance the bright, citrusy profile.
Tips For Perfect Crispy Tangy Lemon Chicken Romano
These friendly pointers will help you nail every crispy, tangy bite and customize the recipe to your taste:
- For extra crispiness, bake coated chicken at 400°F for 10 minutes after pan-frying.
- Adjust lemon zest and juice for a milder or stronger tang based on personal preference.
- Substitute panko breadcrumbs for a lighter, crunchier texture that shatters deliciously with each bite.
- Store leftovers in an airtight container in the fridge for up to 3 days to enjoy later.
How To Store It
Keeping your Crispy Tangy Lemon Chicken Romano fresh and flavorful is easy with the right storage methods. Follow these guidelines to maintain crispness and tang:
- Refrigerate in an airtight container for up to 3 days, allowing the flavors to meld without losing texture.
- Freeze for longer storage: Wrap individual portions tightly in plastic wrap and foil, then freeze for up to 1 month. Thaw overnight in the fridge before reheating.
- Reheat in the oven: Preheat to 350°F, place chicken on a baking sheet, and heat for 8–10 minutes to restore crispness.
- Avoid the microwave: It can make the coating soggy, so stick to the oven or a hot skillet for best results.
Frequently Asked Questions
Got questions? Here are quick answers to help you master this recipe.
- Q: How long does it take to prepare this recipe?
A: It takes about 25 to 30 minutes from start to finish. Preparation—including pounding the chicken to an even thickness, seasoning, dredging, and preheating the skillet—takes around 10 to 15 minutes. Cooking the chicken for 4 to 5 minutes per side adds another 8 to 10 minutes. Draining and slicing add a few more minutes before serving.
- Q: How can I make the chicken extra crispy?
A: After pan-frying, transfer the chicken to a baking sheet and bake at 400°F for 10 minutes. Using panko breadcrumbs instead of plain breadcrumbs also boosts crunch, and ensuring the oil is shimmering hot before adding the chicken prevents sogginess. Let the cooked pieces rest on a wire rack over paper towels to allow air circulation and drain excess oil.
- Q: Can I adjust the tanginess of the lemon flavor?
A: Yes. For a milder tang, reduce the lemon juice to 2 tablespoons and use only half of the lemon zest. For a stronger citrus punch, increase the zest to 1½ tablespoons and add an extra tablespoon of juice. You can also serve with more fresh lemon wedges so diners can squeeze to taste.
- Q: What internal temperature should the chicken reach for safe consumption?
A: The chicken should register 165°F at its thickest point. Use an instant-read thermometer inserted into the center of the breast. Once it hits 165°F, remove it from the skillet, as carryover heat will finish cooking while the chicken rests.
- Q: Can I substitute panko breadcrumbs or gluten-free alternatives?
A: Yes. Panko breadcrumbs create an even lighter, crunchier exterior. For gluten-free, use a certified gluten-free flour blend in place of all-purpose flour and choose gluten-free breadcrumbs. Ensure all seasonings and cheese are also labeled gluten-free.
- Q: How do I store and reheat leftovers?
A: Store cooled chicken in an airtight container in the refrigerator for up to three days. To reheat and preserve crispiness, preheat your oven to 350°F, place chicken on a baking sheet, and heat for about 10 minutes or until warmed through. Avoid the microwave, which can make the coating soggy.
- Q: Is it possible to assemble the coated chicken in advance?
A: Yes. After dredging the chicken in flour, egg, and breadcrumbs, place the pieces on a parchment-lined tray, cover loosely with plastic wrap, and refrigerate for up to 1 hour. Bring them back to room temperature for 10 minutes before frying to ensure even cooking.
What Makes This Special
Crispy Tangy Lemon Chicken Romano stands out thanks to its perfect blend of textures and flavors: a golden, crunchy shell infused with zesty lemon and the savory bite of Romano cheese. The simple dredging and frying technique makes it achievable any night of the week, yet it feels special enough for company. Don’t forget to print this recipe and save it for later—your future self will thank you. Drop a comment below if you whip it up or have any questions; I’d love to hear how it turns out!
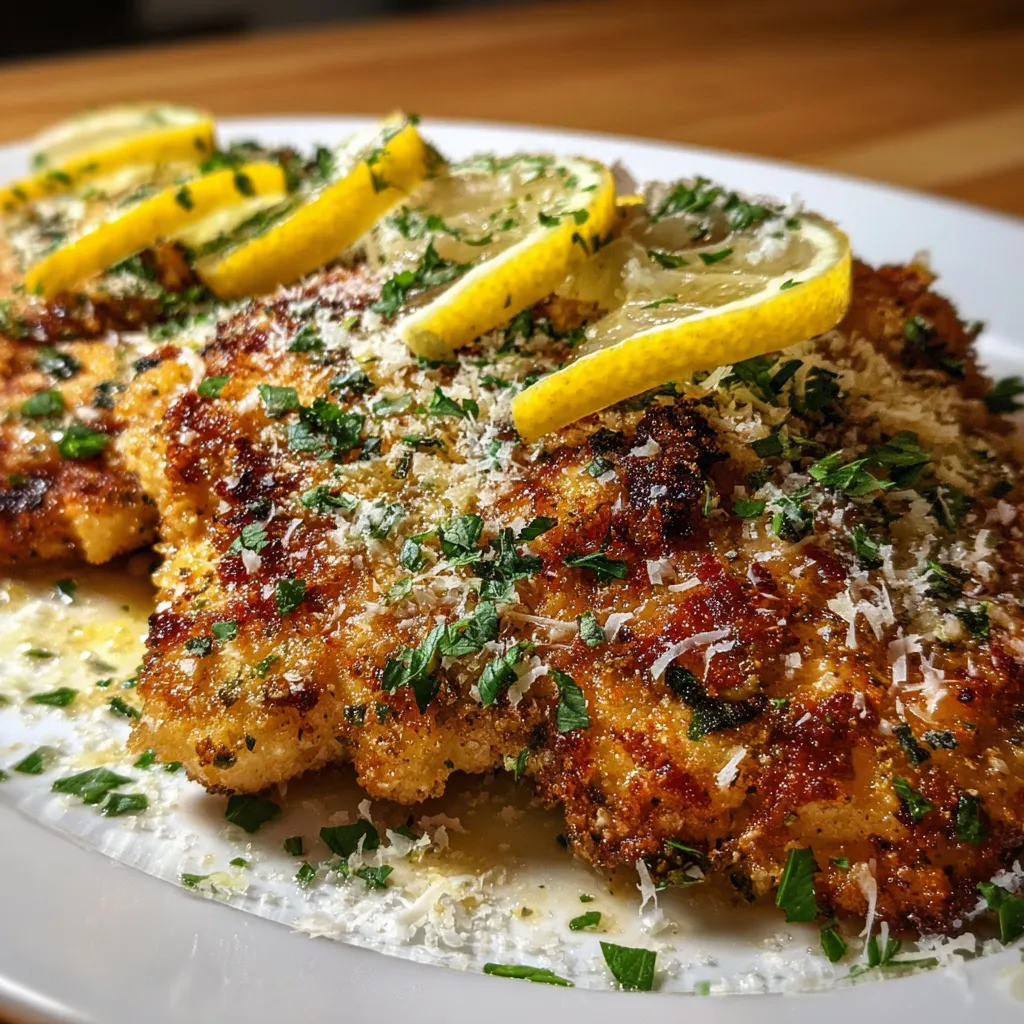

Crispy Tangy Lemon Chicken Romano
Description
Crisp breaded chicken seared to golden perfection, topped with zesty lemon juice and nutty Romano cheese. Each bite bursts with tangy citrus notes and savory richness, making this skillet-fried favorite irresistibly bright and crunchy.
Ingredients
Instructions
-
Pound the chicken breasts to an even thickness and pat dry with paper towels.
-
In a shallow bowl combine flour, salt, pepper, garlic powder, onion powder, and paprika.
-
In a second bowl whisk the eggs with lemon juice and lemon zest.
-
In a third bowl mix breadcrumbs and grated Romano cheese.
-
Dredge each chicken breast first in the seasoned flour, then dip in the egg mixture, and finally coat evenly with the breadcrumb–cheese mixture.
-
Heat olive oil in a large skillet over medium heat until shimmering.
-
Cook the chicken breasts 4 to 5 minutes per side until golden brown and cooked through.
-
Transfer to a paper towel–lined plate to drain excess oil.
-
Slice the chicken if desired and serve with fresh lemon wedges.
Note
- For extra crispiness, bake coated chicken at 400°F for 10 minutes after pan-frying.
- Adjust lemon zest and juice for a milder or stronger tang.
- Substitute panko breadcrumbs for a lighter, crunchier texture.
- Store leftovers in an airtight container in the fridge for up to 3 days.

