

This dreamy raspberry cheesecake feels like a hug from the inside out, silky cream cheese swirled with bright raspberry ribbons on a crisp graham crust. Every bite balances tangy berry sweetness and velvety richness, then chills into a perfectly sliceable delight. Whether you’re gathering friends for a celebration or treating yourself after a long day, this dessert never disappoints. Trust me, once you give it a try, you’ll have everyone lining up for seconds.
Key Ingredients
Every ingredient in this raspberry cheesecake works together to create that perfect balance of crunchy, creamy, and fruity. Here’s what you’ll need:
- 1 ½ cups graham cracker crumbs: Forms a sturdy, flavorful base with a satisfying crunch.
- ½ cup unsalted butter, melted: Binds the crumbs together and adds rich, buttery flavor.
- 1 tablespoon granulated sugar: Sweetens the crust and helps it hold its shape.
- 24 ounces cream cheese, softened: Provides a smooth, creamy foundation for the filling.
- 1 cup granulated sugar: Sweetens the filling and keeps the texture light.
- 1 teaspoon vanilla extract: Enhances the overall flavor with warm vanilla notes.
- 3 large eggs: Adds structure and richness to the cheesecake.
- 1 cup sour cream: Brings tanginess and a silky texture to the filling.
- ½ cup fresh raspberries: Creates bursts of juicy fruit and vibrant color.
- ½ cup raspberry puree: Infuses the filling with intense berry flavor and visual swirls.
- 2 tablespoons cornstarch: Stabilizes the filling and prevents a runny center.
- Pinch of salt: Balances the sweetness and enhances depth of flavor.
- Optional: Fresh raspberries and mint leaves for garnish: Adds a fresh, decorative touch before serving.
How To Make Dreamy Raspberry Cheesecake
Ready to transform these ingredients into a show-stopping dessert? With a well-baked crust, creamy filling, and pretty berry swirls, this step-by-step guide will walk you through baking the perfect cheesecake. Take your time with each phase—from pressing the crust to gently folding in raspberries—to ensure every layer turns out silky and delicious.
1. Preheat your oven to 325°F (160°C). Grease a 9-inch springform pan thoroughly, coating the sides and bottom, then set it aside while you prepare the crust.
2. In a medium bowl, combine the graham cracker crumbs, melted butter, and 1 tablespoon granulated sugar. Mix until the mixture resembles wet sand, ensuring all crumbs are evenly moistened.
3. Press the crust mixture firmly into the bottom of the prepared springform pan to create an even layer. Bake in the preheated oven for 10 minutes, then remove and let it cool completely to set the base.
4. In a large mixing bowl, beat the softened cream cheese with an electric mixer on medium speed until smooth and creamy, about 2–3 minutes, stopping to scrape down the sides of the bowl.
5. Gradually add 1 cup granulated sugar and continue to beat on medium speed until the mixture is fully incorporated and fluffy, about 2 minutes.
6. Mix in the vanilla extract, then add the eggs one at a time, mixing well after each addition and scraping down the bowl to maintain a smooth texture.
7. Add the sour cream, raspberry puree, cornstarch, and a pinch of salt. Mix on low speed just until combined, avoiding overmixing to prevent excess air bubbles.
8. Gently fold in the fresh raspberries using a spatula, creating ribbon-like swirls without breaking the berries too much.
9. Pour the cheesecake batter over the cooled crust in the springform pan, then smooth the top with a spatula for an even finish.
10. Bake in the preheated oven for 50–60 minutes, or until the center appears set but still slightly jiggly when you gently shake the pan.
11. Turn off the oven and crack the oven door open slightly. Allow the cheesecake to cool inside for 1 hour to prevent sudden temperature changes.
12. After the hour, remove the cheesecake from the oven and let it cool to room temperature. Then refrigerate for at least 4 hours, preferably overnight, for the best texture.
13. Before serving, run a knife around the edges of the cake to loosen it from the pan, then carefully remove the sides of the springform pan.
14. Garnish with additional fresh raspberries and mint leaves if desired, then slice and serve chilled.
Serving Suggestions
This raspberry cheesecake shines on its own, but you can add a few finishing touches to make each slice even more memorable. Whether you’re aiming for extra flavor, a pop of color, or a playful presentation, these ideas will have your guests swooning. Pick one or try them all to match the vibe of your gathering and watch the compliments roll in.
- Fresh Berry Medley: Plate each slice with a handful of assorted fresh berries like blueberries and sliced strawberries to complement the raspberry flavor.
- Raspberry Sauce Drizzle: Warm extra raspberry puree into a sauce and drizzle over the top in a zigzag pattern for an elegant touch.
- Whipped Cream Rosettes: Pipe or dollop soft whipped cream around the edges for added lightness and visual appeal.
- Citrus Zest Sprinkle: Grate a bit of lemon or orange zest over each slice to add a bright, aromatic finish.
Tips For Perfect Dreamy Raspberry Cheesecake
Nailing the ideal texture and flavor balance in a cheesecake can feel like a science experiment, but with a few simple pointers, you’ll breeze through it. I still remember the first time I made this to impress my book club—those berry swirls stole the show and had everyone asking for seconds! The key is in temperature control, gentle mixing, and thoughtful variations that suit your taste. Follow these friendly tips to avoid common pitfalls and make your version of this dreamy raspberry cheesecake the talk of every dessert table.
- Room Temperature Cream Cheese: Ensuring the cream cheese is at room temperature before mixing prevents lumps and creates a velvety filling.
- Berry Substitutions: Swap raspberries for strawberries or blueberries if you want a different flavor profile—just adjust the puree’s consistency with a little extra cornstarch if needed.
- Extra Raspberry Drizzle: Amplify the berry punch by adding a raspberry sauce drizzle on top right before serving for visual drama and tangy flavor.
- Refrigerate Properly: Store your baked cheesecake in the refrigerator for up to 5 days, tightly covered to preserve moisture and prevent odor absorption.
- Freezing Tips: For longer storage, wrap individual slices or the whole cake in plastic wrap and foil, then freeze for up to 2 months. Thaw in the refrigerator overnight before serving.
How To Store It
After all that baking magic, keeping your cheesecake fresh and flavorful is a must. Proper storage not only preserves the creamy texture but also helps the flavors meld beautifully over time. Whether you plan to enjoy it within a day or save leftovers for later, follow these methods to maintain that just-baked taste and appearance.
- Refrigerate Whole: Once chilled, cover the cake tightly with plastic wrap or place it in an airtight container. Store in the fridge for up to 5 days.
- Slice and Store: Pre-slice the chilled cheesecake and lay the pieces in a single layer on a tray. Cover with plastic wrap and refrigerate for quick individual servings.
- Freeze for Longer: Wrap the entire cake or individual slices first in plastic wrap, then in aluminum foil. Freeze for up to 2 months without sacrificing texture.
- Thaw Gradually: Transfer frozen slices to the refrigerator and let them thaw overnight. This gentle thawing preserves the creamy consistency and prevents moisture build-up.
Frequently Asked Questions
Here are answers to some common questions to make your cheesecake journey smoother:
- How long does it take to prepare and chill the cheesecake?
A: Preparation including making the crust and filling takes about 30 minutes. You’ll bake the crust for 10 minutes, then bake the assembled cheesecake for 50–60 minutes. After baking, cool it in the oven for 1 hour, then refrigerate for at least 4 hours or preferably overnight before serving.
- How can I ensure a smooth, crack-free cheesecake surface?
A: Make sure your cream cheese is fully at room temperature before mixing. Beat on medium speed until smooth, add eggs one at a time on low speed, and avoid overmixing once you’ve added the sour cream and raspberry puree. Cooling the cake gradually in the turned-off oven with the door slightly open also helps prevent cracks.
- What’s the best way to fold in fresh raspberries without crushing them?
A: After the filling is blended, use a silicone spatula and gently fold in the raspberries just until they’re evenly distributed. Aim for visible swirls and avoid pressing or stirring vigorously to keep the berries intact.
- Why is cornstarch included in the filling?
A: Cornstarch helps stabilize the cheesecake filling by absorbing excess moisture from the raspberries and sour cream. This results in a firmer texture and reduces the risk of a runny center or weeping.
- Can I make the raspberry puree ahead of time, and how should I store it?
A: Yes. You can prepare the puree up to 2 days in advance. Store it in an airtight container in the refrigerator and stir well before adding it to the filling.
- How do I prevent the crust from becoming soggy?
A: Press the graham cracker mixture firmly and evenly into the pan, then bake it for 10 minutes and let it cool completely before pouring in the filling. This pre-bake seals the crust and helps it stay crisp.
- Can I substitute other berries for the raspberries?
A: Absolutely. You can swap in strawberries or blueberries for both the fresh berries and the puree. Adjust cornstarch slightly if the berries are very juicy to maintain the right filling consistency.
- How should I store and freeze leftover cheesecake?
A: For up to 5 days, cover the chilled cheesecake tightly in the refrigerator. To freeze, wrap individual slices or the whole cake in plastic wrap followed by foil, then freeze for up to 2 months. Thaw overnight in the refrigerator before serving.
What Makes This Special
This raspberry cheesecake truly stands out because it nails that irresistible combo of tangy berry brightness, velvety creaminess, and satisfying crunch—all in one slice. The buttery graham crust lays a perfect foundation for swirling in fresh raspberry puree and jewels of berries, creating a dessert that’s as eye-catching as it is delicious. After an overnight chill, you get firm, clean slices every time, making serving a breeze. Feel free to print or save this recipe for your next gathering, and share your results—questions, comments, or your own fun twists are always welcome!
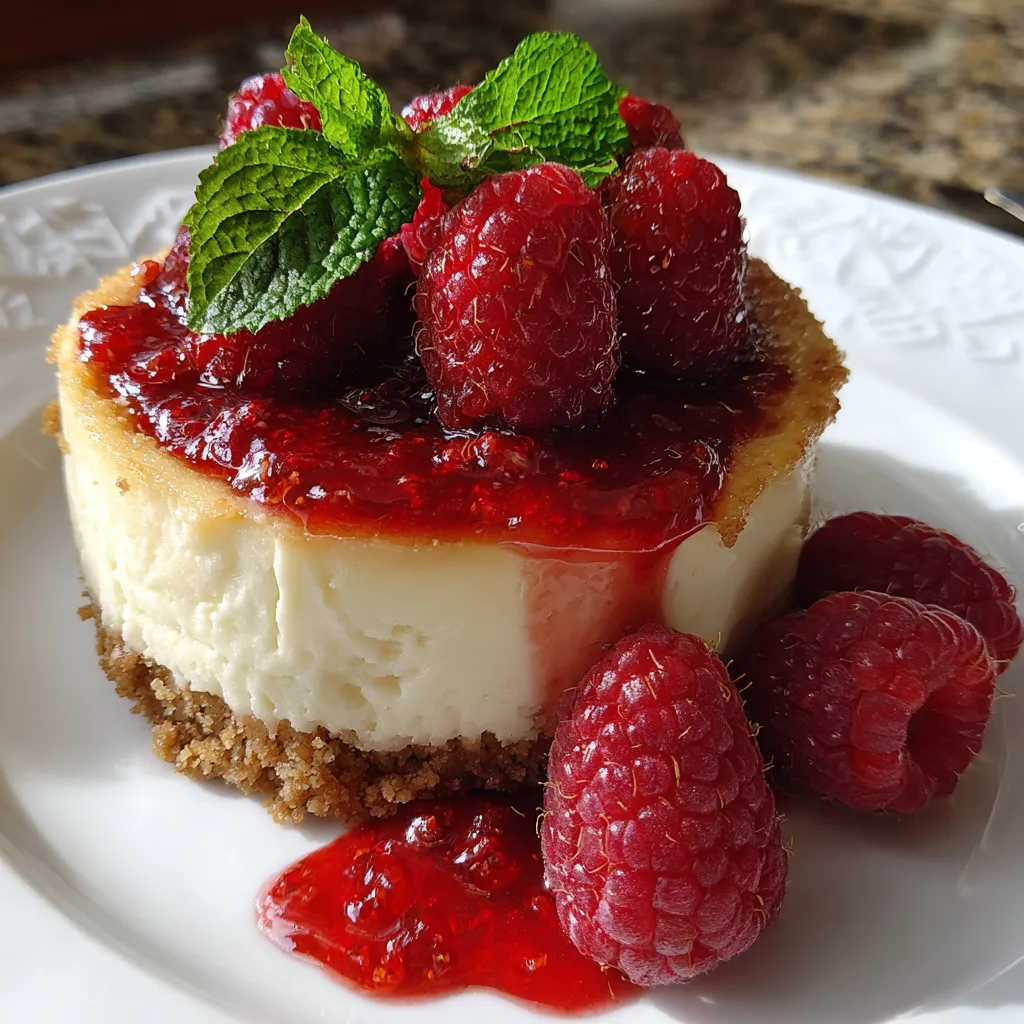

Dreamy Raspberry Cheesecake
Description
Silky cream cheese bathed in raspberry ribbons, nestled on a buttery graham crust. Each forkful balances tangy fruit notes and velvety richness, then chills to a firm, sliceable delight with fresh berry garnish.
Ingredients
Instructions
-
Preheat your oven to 325°F (160°C). Grease a 9-inch springform pan and set aside.
-
In a medium bowl, combine the graham cracker crumbs, melted butter, and 1 tablespoon granulated sugar. Mix until the mixture resembles wet sand.
-
Press the crust mixture firmly into the bottom of the prepared springform pan to create an even layer. Bake in the preheated oven for 10 minutes, then remove and let it cool.
-
In a large mixing bowl, beat the softened cream cheese with an electric mixer until smooth and creamy, about 2-3 minutes.
-
Gradually add 1 cup granulated sugar and continue to beat until fully incorporated and fluffy, about 2 minutes.
-
Mix in the vanilla extract, followed by the eggs, one at a time. Be sure to mix well after each addition, scraping down the sides of the bowl as needed.
-
Add the sour cream, raspberry puree, cornstarch, and a pinch of salt. Mix on low speed until just combined, ensuring you don’t overmix.
-
Gently fold in the fresh raspberries using a spatula, creating swirls without breaking up the berries too much.
-
Pour the cheesecake batter over the cooled crust in the springform pan, smoothing the top with a spatula.
-
Bake in the preheated oven for about 50-60 minutes, or until the center appears set but still slightly jiggly.
-
Turn off the oven and crack the oven door open slightly. Allow the cheesecake to cool in the oven for 1 hour.
-
After cooling, remove the cheesecake from the oven and let it cool to room temperature. Refrigerate for at least 4 hours, preferably overnight, for best results.
-
Before serving, run a knife around the edges of the cake to loosen it from the pan, then carefully remove the sides of the springform pan.
-
Garnish with additional fresh raspberries and mint leaves if desired. Slice and serve.
Note
- For a smoother texture, make sure the cream cheese is at room temperature before mixing.
- You can substitute the raspberries with strawberries or blueberries for a different flavor.
- Adding a raspberry sauce drizzle on top can elevate the presentation when serving.
- This cheesecake can be stored in the refrigerator for up to 5 days.
- Freezing the cheesecake is possible; wrap leftovers tightly and freeze for up to 2 months.

