

Crunchy cucumber bites meet jalapeño heat and mustard seeds in a vibrant, tangy condiment that’s as fun to make as it is to eat. This Fermented Cucumber Relish combines bright cucumber chunks and crunchy onions with a spicy jalapeño kick and fragrant mustard and coriander seeds. The slow lacto-fermentation process adds a delightful fizz and probiotic punch, making it perfect for topping burgers, sandwiches, or grilled fish. Give it a try—you’ll love how a humble jar can transform your meals with zesty flavor and gut-friendly benefits!
Key Ingredients
Before we dive into the bubbling brine, let’s look at what goes into this tangy relish:
- 2 pounds cucumbers: Crisp cucumbers that form the crunchy, hydrating base of the relish.
- 1 medium onion: Adds sweet sharpness and depth of flavor.
- 1 small jalapeno pepper: Brings a warm, spicy kick—adjust seeds for heat control.
- 2 cloves garlic: Infuses aromatic pungency and savory undertones.
- 1 tablespoon pickling salt: Ensures proper fermentation by drawing moisture and creating a stable brine.
- 4 cups water: Dilutes the salt evenly, preserving the right brine concentration.
- 1 tablespoon mustard seeds: Contributes a tangy pop and subtle nutty aroma.
- 1 tablespoon coriander seeds: Lends citrusy, floral notes to balance the heat.
- 1 teaspoon turmeric: Gives vibrant color and gentle earthy warmth.
- 1 teaspoon celery seeds: Enhances savory depth with a light, herbal character.
How To Make Fermented Cucumber Relish
Transforming fresh vegetables into a probiotic powerhouse is simple when you follow these steps. From cleaning and chopping to packing into your fermenting jar, you’ll create a live culture relish that’s bursting with flavor. The key is to maintain an anaerobic environment and monitor the fermentation daily, ensuring the vegetables stay submerged and any scum or gases are managed. Let’s walk through the process step by step so you get a perfect tangy, crunchy relish every time:
1. Wash cucumbers, onion, jalapeno pepper, and garlic under cold running water to remove any dirt.
2. Chop cucumbers, onion, jalapeno pepper, and garlic into small uniform pieces for even fermentation and texture.
3. In a separate bowl, dissolve pickling salt in 4 cups water to create a clear, balanced brine.
4. Combine chopped vegetables and all spices in a mixing bowl and stir until everything is coated evenly.
5. Pack the vegetable mixture tightly into a clean fermenting jar and pour the brine over, ensuring all pieces are fully submerged under the liquid.
6. Cover the jar with a lid set loosely or a cloth secured with a rubber band to allow gases to escape while keeping out dust.
7. Check daily to press down vegetables with a clean utensil and release built-up gases; skim off any scum if it appears.
8. Once the relish reaches your desired tanginess (usually 5–7 days), seal the jar with a tight lid and refrigerate to slow fermentation.
Serving Suggestions
Ready to enjoy your vibrant Fermented Cucumber Relish? This tangy, crunchy condiment pairs beautifully with a variety of dishes. You can spoon it over hot items or serve it cold—its bright flavor will elevate any meal. Whether you’re craving a spicy crunch on a creamy base or a zesty topping that brings a lively kick, these suggestions will inspire you to get creative in the kitchen.
- Top grilled burgers with a generous spoonful for a refreshing, spicy twist.
- Serve alongside crackling roast pork to cut through rich, fatty flavors.
- Mix into tuna or chicken salad for added crunch and a probiotic boost.
- Offer as part of a charcuterie board, pairing with cheeses and cured meats.
Tips For Perfect Fermented Cucumber Relish
Getting your ferment just right can feel like a science experiment, but with a few simple pointers, you’ll master this relish in no time. Keep things consistent, stay attentive, and don’t be afraid to tweak small details to suit your taste. Every jar can be a little different, so embrace the process and enjoy the tangy, fizzy results!
- Use non-iodized salt such as pickling or kosher salt for best results.
- Ensure all vegetables remain fully submerged in brine to prevent mold.
- Burp the jar once a day to release built-up fermentation gases.
- Fermentation time may vary with room temperature and personal taste.
How To Store It
Once your relish has reached peak tanginess and you’ve sealed it with a tight lid, proper storage is key to retaining its flavor and crunch. Keeping the environment cold and oxygen-free will slow fermentation, maintain probiotic benefits, and preserve that vibrant color. Here are some reliable ways to store your relish so you can enjoy it over weeks or even months.
- Seal in a glass jar and refrigerate immediately to slow fermentation; it will stay delicious for up to two months.
- Divide into smaller air-tight jars to minimize air exposure each time you open a container.
- Use a fermentation weight or a clean small jar to keep vegetables submerged and maintain anaerobic conditions.
- For longer storage, freeze portions in freezer-safe containers for up to six months (texture may soften slightly).
Frequently Asked Questions
Here are some quick answers to the top questions about making and enjoying this relish:
- How long should I ferment the cucumber relish before it’s ready to eat?
Fermentation typically takes between 5 to 7 days at room temperature. You’ll know it’s ready when the relish develops a pleasant tangy aroma, the brine becomes slightly cloudy, and small bubbles form as gases escape. Taste a small spoonful each day starting on day five until it reaches your desired level of sourness.
- Which type of salt is best for this fermentation, and why can’t I use table salt?
Non-iodized salts such as pickling salt or kosher salt are recommended because they contain no anti-caking agents or iodine, both of which can inhibit the growth of beneficial bacteria and affect flavor and texture. Table salt often has additives that can make the ferment cloudy or slow the fermentation process.
- How can I tell if mold has formed, and what should I do if I see it?
A thin layer of white or cream-colored scum (kahm yeast) is common and can be skimmed off with a clean spoon. However, fuzzy spots in colors like black, green, or pink indicate harmful mold. If you spot fuzzy mold, discard the entire batch immediately. Always remove any scum and press the vegetables back under the brine to maintain a safe anaerobic environment.
- What is the best way to store the relish after fermentation, and how long will it last?
Once the relish reaches your preferred tanginess, seal the jar with a tight lid and move it to the refrigerator. Cold storage slows fermentation and preserves flavor. Properly sealed and refrigerated, the relish will keep its quality for up to two months. Over time it may become more sour but will remain safe to eat.
- Can I adjust the spiciness or other flavors in this recipe?
Absolutely. To increase heat, add more jalapeno slices or include seeds. For milder relish, remove the seeds and membranes from the jalapeno or substitute with a small sweet pepper. You can also experiment with additional spices like dill seeds or red pepper flakes, but maintain the basic brine ratio of one tablespoon of salt per four cups of water to ensure safe fermentation.
- Why is it important to keep the vegetables fully submerged under the brine?
Vegetables submerged in brine create the anaerobic environment needed for lactic acid bacteria to thrive and prevent exposure to oxygen, which encourages mold growth. If any vegetables float above the brine, gently press them down with a fermentation weight or a clean, small jar to ensure complete submersion throughout the process.
- How often and why should I “burp” the jar during fermentation?
You should carefully open the lid or loosen the cover once a day to release built-up carbon dioxide. This “burping” prevents excessive pressure from accumulating, which could cause brine to overflow or crack the jar. After releasing gas, re-tighten the lid or secure the cloth for continued fermentation.
What Makes This Special
This Fermented Cucumber Relish shines because it’s equal parts crunchy, tangy, and probiotic-packed—plus it’s a breeze to make in your own kitchen. The magic of lacto-fermentation transforms simple ingredients into a lively condiment that wakes up any dish with a spirited zing. Keep it on hand in the fridge, print this recipe for future reference, and watch it disappear faster than you’d expect. I’d love to hear how your batch turned out, so drop a comment if you have questions or simply want to share your tangy triumph!
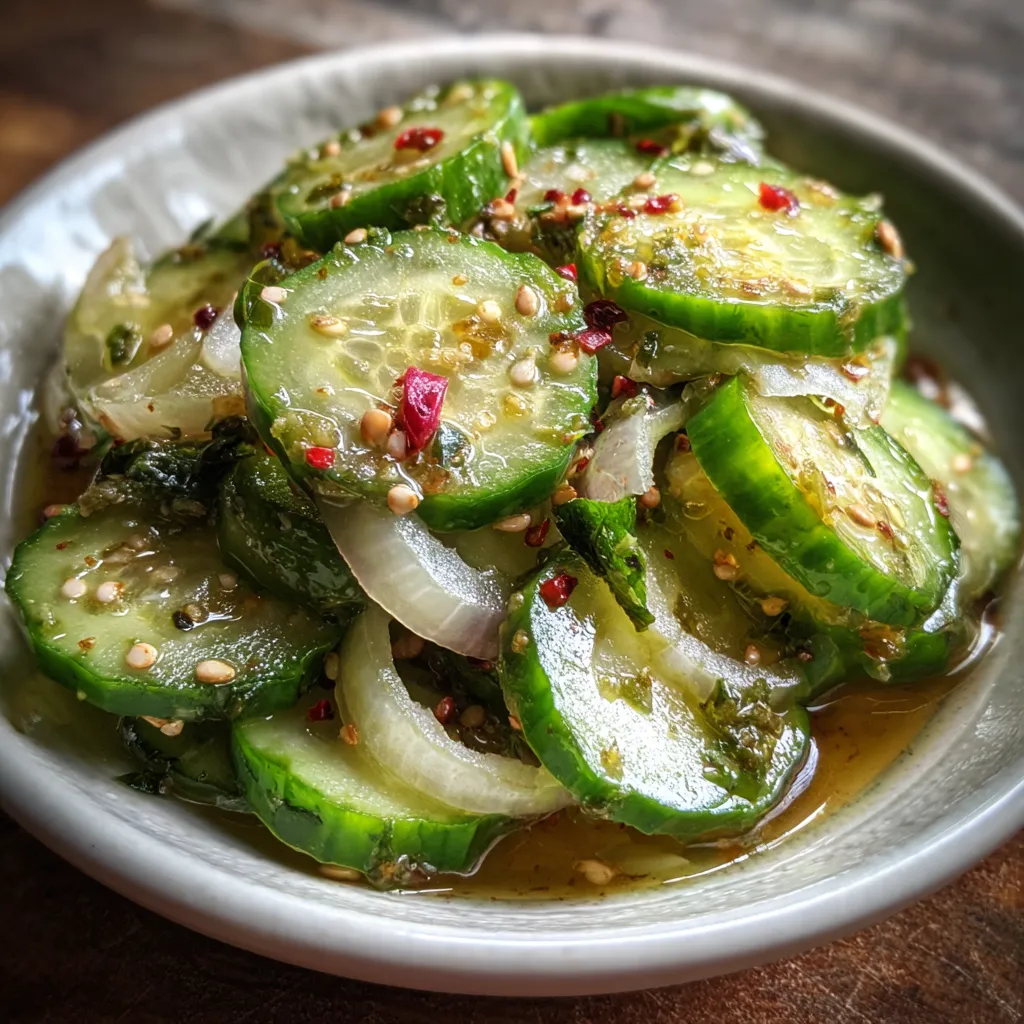

Fermented Cucumber Relish
Description
Bright cucumber chunks and crunchy onions mingle with a spicy jalapeño kick and fragrant mustard and coriander seeds. The slow ferment brings a tangy fizz, perfect for topping burgers, sandwiches, or grilled fish.
Ingredients
Instructions
-
Wash cucumbers, onion, jalapeno pepper, and garlic under cold running water to remove any dirt.
-
Chop cucumbers, onion, jalapeno pepper, and garlic into small uniform pieces.
-
In a separate bowl, dissolve pickling salt in water to create a brine.
-
Combine chopped vegetables and spices in a mixing bowl and stir to distribute evenly.
-
Pack the vegetable mixture tightly into a clean fermenting jar and pour brine over, ensuring vegetables are fully submerged.
-
Cover the jar with a lid set loosely or a cloth secured with a rubber band and let ferment at room temperature for 5 to 7 days.
-
Check daily to press down vegetables and release gases; skim off any scum if it appears.
-
Once the relish reaches desired tanginess, seal the jar with a tight lid and refrigerate.
Note
- Use non-iodized salt such as pickling or kosher salt for best results.
- Ensure all vegetables remain fully submerged in brine to prevent mold.
- Burp the jar once a day to release built-up fermentation gases.
- Fermentation time may vary with room temperature and personal taste.

