

These Festive Mini Vanilla Candle Cakes are tiny vanilla sponges crowned with dripping buttercream and a wafer candle for instant festive fun. Fluffy vanilla cupcakes topped with dual-tone frosting that oozes like melting wax make every bite playful and bright. Whether you’re hosting a holiday gathering or simply craving a sweet project, these bite-sized delights bring cheer with each candle-like cake—perfect for spreading smiles and making memories.
Key Ingredients
Before we light up the kitchen, let’s round up the stars of our show!
- 120 g all-purpose flour: Provides the soft, tender crumb that’s the foundation of each mini cake.
- 1 tsp baking powder: Leavening agent that helps the cakes rise light and fluffy.
- 1/4 tsp salt: Balances sweetness and enhances the vanilla flavor.
- 50 g unsalted butter, softened: Adds rich moisture and a melt-in-your-mouth texture to the batter.
- 75 g granulated sugar: Sweetens and helps create a tender cake crumb.
- 1 large egg: Binds ingredients and contributes to the cake’s structure.
- 1/2 tsp vanilla extract: Infuses classic vanilla aroma and flavor into the sponge.
- 60 ml milk: Moistens the batter and keeps the cakes soft.
- 100 g powdered sugar: The base of our frosting for a smooth, creamy finish.
- 1 tbsp unsalted butter, softened: Creates a silky, rich buttercream.
- 1/2 tsp vanilla extract: Boosts the buttery frosting with extra vanilla goodness.
- 1 tbsp milk: Adjusts frosting consistency for piping.
- 1 tsp yellow gel food coloring: Brings bright, sunny hues to half of the frosting.
- 1 tsp orange gel food coloring: Adds a warm, festive tone to the other half.
- 12 wafer rolls: Serve as edible “candles,” adding a crisp, fun crunch.
How To Make Festive Mini Vanilla Candle Cakes
Get ready for a step-by-step baking adventure that transforms simple pantry staples into adorable, candle-like treats. You’ll warm your oven, whip up a fluffy batter, bake perfect minis, and then swirl on two-tone buttercream frosting before inserting the wafer “candles.” Follow along for foolproof results and joyful decorating!
1. Preheat the oven to 180°C and line a 12-cup mini muffin tin with paper liners, ensuring even heat circulation and easy cake removal.
2. In a bowl, whisk together the flour, baking powder, and salt until evenly combined, breaking up any lumps for a smooth batter.
3. In a separate large bowl, beat the softened butter and granulated sugar on medium speed until light, fluffy, and pale in color—about 2–3 minutes.
4. Add the egg and vanilla extract to the butter mixture, mixing on low speed until fully incorporated and the mixture is smooth.
5. Gradually add the dry ingredients to the wet mixture, alternating with milk, beginning and ending with the flour mixture. Mix on low speed just until combined, being careful not to overmix.
6. Divide the batter evenly among the prepared liners, filling each about two-thirds full to allow room for rising.
7. Bake for 12–15 minutes or until a toothpick inserted into the center comes out clean; then transfer the tin to a wire rack and let the mini cakes cool completely.
8. To make frosting, beat powdered sugar, softened butter, vanilla extract, and milk on low speed until ingredients come together, then increase to medium-high until the frosting is smooth and creamy.
9. Divide frosting into two bowls; stir yellow gel food coloring into one and orange gel food coloring into the other, creating vibrant, separate hues.
10. Load both colors side by side into a piping bag fitted with a round tip, maintaining distinct bands of color. Pipe frosting atop each mini cake in small circular drips to mimic melting wax, then immediately insert a wafer roll vertically into the center as the candle.
Serving Suggestions
Once your mini candle cakes are ready, think about how to present these festive bites to wow your guests. Here are some fun ideas to elevate your dessert display:
- Arrange on a festive platter lined with holly leaves or edible glitter to highlight each cake’s dripping “wax.”
- Serve alongside a cup of hot cocoa or mulled cider for a cozy, holiday pairing that warms everyone’s hands—and hearts.
- Place individual cakes in clear cellophane bags tied with ribbon as delightful party favors or stocking stuffers.
- Garnish the tops with a sprinkle of edible glitter or chopped nuts around the base for extra sparkle and texture.
Tips For Perfect Festive Mini Vanilla Candle Cakes
These tips will help you bake like a pro and make your candle cakes shine even brighter! Trust me, you’ll feel like the host with the most when everything turns out just right.
- Store cakes in an airtight container at room temperature for up to 3 days to keep them soft and flavorful.
- Gel food coloring provides vibrant hues without altering frosting consistency, so you get those bright drips every time.
- Substitute wafer rolls with candy sticks or pretzel rods for different textures and fun flavor twists.
- Dust with edible glitter or sprinkles around the base for extra festivity and a cheerful crunch.
How To Store It
Proper storage ensures your mini candle cakes stay fresh, moist, and just right for snacking any time this festive season. Follow these methods to maintain that playful drip and tender crumb:
- Room Temperature Storage: Place cakes in an airtight container at cool room temperature away from direct sunlight. They’ll stay fresh for up to 3 days without the frosting losing its creamy texture.
- Refrigeration: If your kitchen is warm, store cakes in the fridge in a sealed container. The frosting will firm up, so bring them to room temperature for 15–20 minutes before serving to restore that soft melt-in-your-mouth feel.
- Freezing: For longer storage, freeze unfrosted mini cakes in a single layer on a tray until solid, then transfer to a freezer bag for up to 1 month. Thaw at room temperature, then frost.
- Frosting Freshness: Keep tinted frosting in an airtight container in the fridge for up to 2 days. Re-whip briefly before piping to breathe back its light, airy texture.
Frequently Asked Questions
Got questions? I’ve got answers! Here’s a quick FAQ guide to make your candle-cake journey even smoother:
- How long does it take to prepare and bake these mini vanilla candle cakes?
It takes about 25 minutes to prepare the batter and preheat the oven, plus 12–15 minutes of baking time. Cooling on a wire rack adds another 10 minutes, so plan for roughly 45 minutes total from start to finish.
- Can I substitute non-dairy milk in the batter and frosting?
Yes, you can replace the 60 ml of milk in the batter and the 1 tbsp in the frosting with almond, soy, or oat milk using a 1:1 ratio. Non-dairy milks may impart a subtle flavor but should not affect the overall texture.
- How can I ensure the mini cakes don’t stick to the liners or pan?
Lining the muffin tin with paper liners is usually sufficient. If you prefer not to use liners, lightly grease each cup with butter or nonstick spray. Allow the cakes to cool fully (about 10 minutes) before gently lifting them out to retain their shape.
- What’s the best way to achieve the dripping candle wax effect with two frosting colors?
Divide your frosting into two bowls and tint one batch yellow and the other orange with gel coloring. Spoon each color side by side into a piping bag fitted with a round tip so the colors remain separate. Apply steady pressure as you pipe, moving in small circular motions to create overlapping drips that resemble melting wax.
- My cakes sank slightly after baking. What might have gone wrong?
Sinking can occur if the oven temperature is too low, if the batter was overmixed, or if you opened the oven door before the cakes set. Use a calibrated oven thermometer to ensure a consistent 180 °C, mix until ingredients are just combined to avoid overdeveloping gluten, and resist opening the door during the first 10 minutes of baking.
- Can I prepare the batter and frosting in advance?
Yes. You can mix the batter up to 24 hours ahead and store it covered in the refrigerator—bring it back to room temperature before baking for even rising. The frosting can be made and tinted up to 2 days in advance; store it in an airtight container in the fridge and re-whip briefly before piping.
- How should I store and serve these festive mini cakes?
Store the finished cakes in an airtight container at room temperature for up to 3 days. If your kitchen is very warm, refrigeration is okay but will firm the frosting—just allow the cakes to sit at room temperature for 15–20 minutes before serving to soften the buttercream.
What Makes This Special
There’s something downright magical about biting into a mini cake that looks like a glowing candle—complete with drips of buttercream “wax” and a crisp wafer flame. These Festive Mini Vanilla Candle Cakes work because they balance fluffy vanilla sponge, smooth dual-tone frosting, and playful crunch all in one cute package. Perfect for holiday gatherings or a whimsical treat at home, they’re easy to make yet impressive enough to steal the show. Feel free to print this recipe, tuck it into your festive binder, and come back whenever you need a quick dose of cheer. Let me know how yours turn out or if you have any questions—I’d love to hear from you!
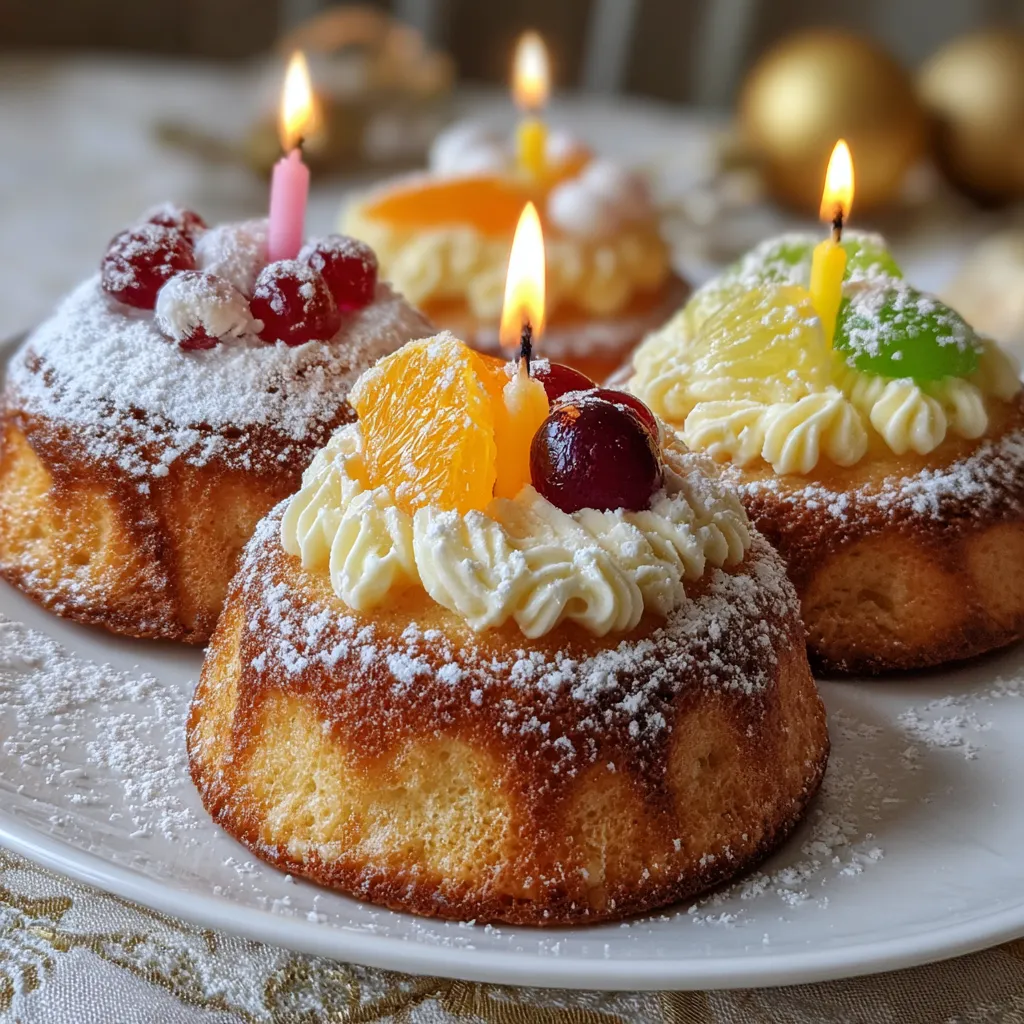

Festive Mini Vanilla Candle Cakes
Description
Fluffy vanilla cupcakes are topped with dual-tone frosting that oozes like melting wax. A crisp wafer roll adds candle flair and playful crunch—bite-sized delights that brighten any celebration.
Ingredients
Instructions
-
Preheat the oven to 180°C and line a 12-cup mini muffin tin with paper liners.
-
In a bowl, whisk together flour, baking powder, and salt until evenly combined.
-
In a separate bowl, beat softened butter and granulated sugar until light and fluffy.
-
Add the egg and vanilla extract to the butter mixture and mix until smooth.
-
Gradually add the dry ingredients to the wet mixture, alternating with milk, mixing until just combined.
-
Divide the batter evenly among the prepared liners, filling each about two-thirds full.
-
Bake for 12–15 minutes or until a toothpick inserted into the center comes out clean; then cool cakes on a wire rack.
-
To make frosting, beat powdered sugar, softened butter, vanilla extract, and milk until smooth and creamy.
-
Divide frosting into two bowls; stir yellow food coloring into one and orange into the other, then load both colors side by side into a piping bag.
-
Pipe frosting atop each mini cake to mimic dripping wax and insert a wafer roll into the center of each as the candle.
Note
- Store cakes in an airtight container at room temperature for up to 3 days.
- Gel food coloring provides vibrant hues without altering frosting consistency.
- Substitute wafer rolls with candy sticks or pretzel rods for different textures.
- Dust with edible glitter or sprinkles around the base for extra festivity.

