

There’s something magical about the Flourless Chocolate Torte in your dessert repertoire. Sink your fork into a deeply rich, flourless chocolate torte with a crackly top and melt-in-your-mouth center, perfect for a showstopping dessert. Velvety and dense, this flourless torte greets you with an intoxicating aroma of dark chocolate and a crisp crackled top that gives way to a luxuriously smooth, fudge-like center melting on your tongue. Whether you’re celebrating a special occasion or craving a decadent gluten-free treat, this torte will impress at first bite.
Key Ingredients
Before diving into the steps, let’s gather the essentials for this Flourless Chocolate Torte:
- 8 oz dark chocolate: Delivers that intense, rich chocolate flavor and velvety texture.
- 1 cup unsalted butter: Adds creamy richness and helps achieve a smooth, silky batter.
- 1 cup granulated sugar: Sweetens the torte and balances the natural bitterness of dark chocolate.
- 1/4 tsp salt: Enhances chocolate depth and rounds out the sweetness.
- 1 tbsp vanilla extract: Infuses warm, aromatic notes for a well-rounded flavor profile.
- 5 large eggs: Provide structure and richness, creating the torte’s signature dense, fudgy center.
How To Make Flourless Chocolate Torte
Creating this indulgent torte is all about simple steps and precise timing. Start by preheating and prepping your pan for easy release. Melt chocolate and butter together, then whisk in sugar, salt, and vanilla. Gently incorporate eggs one at a time for a glossy, uniform batter. After a quick bake to achieve that signature crackly top, allow the torte to cool, then chill it until perfectly set. Follow these detailed instructions to master an elegant, flour-free dessert everyone will rave about.
1. Preheat the oven to 375°F (190°C). Grease a 9-inch springform pan and line the bottom with parchment paper to prevent sticking and ensure easy removal.
2. Melt the chocolate and butter together. Place both in a heatproof bowl set over simmering water. Stir constantly until fully melted and smooth, then remove the bowl from heat to avoid overheating.
3. Combine the sugar, salt, and vanilla. Stir these into the warm chocolate mixture until completely incorporated, creating a sweet, balanced base for your batter.
4. Whisk in eggs one at a time. Crack each egg into the bowl and whisk thoroughly after each addition until the batter is glossy and lump-free.
5. Pour batter into the pan. Transfer the smooth mixture into the prepared springform pan, using a spatula to spread and level the top evenly.
6. Bake for 25–30 minutes. Let it bake until the center is just set and the edges develop a delicate crackle—this contrast is key to the torte’s charm.
7. Cool in the pan for 10 minutes. Place the pan on a wire rack, run a knife around the edge, release the springform, and then allow the torte to cool completely for a stable structure.
8. Chill for at least 2 hours. Refrigerate the fully cooled torte to firm up its fudgy center, ensuring clean, professional-looking slices when serving.
Serving Suggestions
This Flourless Chocolate Torte shines on its own, but pairing it with complementary elements takes it over the top. Lightly dust the top with powdered sugar or cocoa powder for an elegant finish, then arrange slices on a crisp white plate. Serve each slice with a dollop of whipped cream lightly sweetened with vanilla. Fresh berries like raspberries or strawberries add a pop of color and bright acidity—perfect balance for the decadent cake. For an extra indulgence, drizzle a ribbon of raspberry coulis or salted caramel sauce around each portion.
- Elegant dusting: Lightly sprinkle powdered sugar or cocoa powder over the chilled torte for a refined, professional look.
- Whipped cream pairing: Add a gentle spoonful of vanilla-scented whipped cream to cut through the richness.
- Fresh berries: Top with juicy raspberries or strawberries to introduce a bright, fruity contrast.
- Sauce drizzle: Enhance each slice with a thin ribbon of raspberry coulis or salted caramel for added flavor depth.
Tips For Perfect Flourless Chocolate Torte
Nailing the perfect texture and presentation is all about precision and quality ingredients. This torte’s beauty lies in its simplicity, but a few tried-and-true pointers will ensure you wow every time:
- Use high-quality dark chocolate for the richest flavor
- Ensure the torte is fully cooled and chilled for clean slices
- Dust the top lightly with powdered sugar or cocoa powder before serving
- Store in an airtight container in the refrigerator for up to 3 days
How To Store It
Proper storage preserves the torte’s dense, fudgy texture and prevents it from drying out or absorbing unwanted odors. After chilling and slicing, transfer leftovers to a suitable container:
- Refrigerator storage: Place slices in an airtight container and refrigerate for up to 3 days to maintain moisture and flavor.
- Freezer option: Wrap the torte tightly in plastic wrap and foil, then freeze for up to one month. Thaw overnight in the refrigerator before serving.
- Reheat briefly: If you prefer a slightly warm center, microwave individual slices for 5–10 seconds on low power to soften gently.
- Avoid strong odors: Keep the torte away from pungent foods in the fridge and ensure the storage container is sealed well.
Frequently Asked Questions
Here are answers to your top queries about this flourless chocolate torte:
- How long does it take to prepare and serve the flourless chocolate torte?
From start to finish, this recipe takes about 3 hours. You’ll spend around 15 minutes preparing and melting the chocolate and butter, 5 minutes mixing in sugar, salt, vanilla, and eggs, and 25–30 minutes baking. After baking, allow the torte to cool in the pan for 10 minutes, then cool completely out of the pan before chilling for at least 2 hours in the refrigerator.
- Can I substitute any of the ingredients in this recipe?
For best results, use high-quality dark chocolate and unsalted butter as specified. You can swap in semisweet chocolate if you prefer a slightly sweeter torte, but avoid milk chocolate or lower cacao percentages to maintain the rich flavor. If you only have salted butter, reduce the added salt by half. Vanilla extract may be replaced with almond extract for a nutty note, but keep the amount to 1 tablespoon to preserve balance.
- Why is chilling the torte in the refrigerator important before slicing?
Chilling for at least 2 hours allows the torte to fully set and firm up, which gives you clean, sharp slices and a dense, fudgy texture. If you cut the torte while still warm or only slightly cool, the center can stick to the knife and will be looser, leading to uneven portions and a less refined presentation.
- How can I prevent the center from collapsing or cracking too much?
Bake the torte at 375°F (190°C) for 25–30 minutes, removing it when the center is just set and the edges have a slight crackle. Overbaking will dry it out and cause deep cracks, while underbaking can make the center too liquid and collapse as it cools. Use an oven thermometer to ensure accurate temperature, and avoid opening the oven door frequently during baking to maintain even heat.
- What’s the best way to get clean, professional-looking slices?
Once the torte is fully chilled, run a sharp knife along the springform edge to loosen it, then release the pan. Wipe the knife clean between each slice, dipping it in warm water and drying it before cutting again. This technique prevents crumbs or sticky batter from clinging to the blade and ensures each slice has smooth edges.
- How should I store leftover torte, and how long will it keep?
Place any leftover slices in an airtight container and store them in the refrigerator for up to 3 days. The airtight seal prevents the torte from absorbing other fridge odors and helps maintain its moist, dense texture. Before serving, let slices rest at room temperature for 10–15 minutes to soften slightly and enhance the flavor.
- Can I add toppings or variations to the basic torte?
Absolutely. A light dusting of powdered sugar or cocoa powder, as noted, adds an elegant finish. You can also serve slices with fresh berries, a dollop of whipped cream, or a drizzle of raspberry or salted caramel sauce for contrast. For a subtle coffee flavor, stir in 1 teaspoon of instant espresso powder with the sugar before mixing.
What Makes This Special
This Flourless Chocolate Torte is special because it brings together gluten-free simplicity and decadent indulgence in every bite. The crisp, crackled top contrasts beautifully with the lush, fudge-like interior, making every slice a showstopper. It’s perfect for celebrations or when you simply need a chocolate fix that feels both rustic and elegant. Feel free to print this article and save it for your next dessert moment, and share your feedback or questions below if you give it a try—I’d love to hear how it turns out!
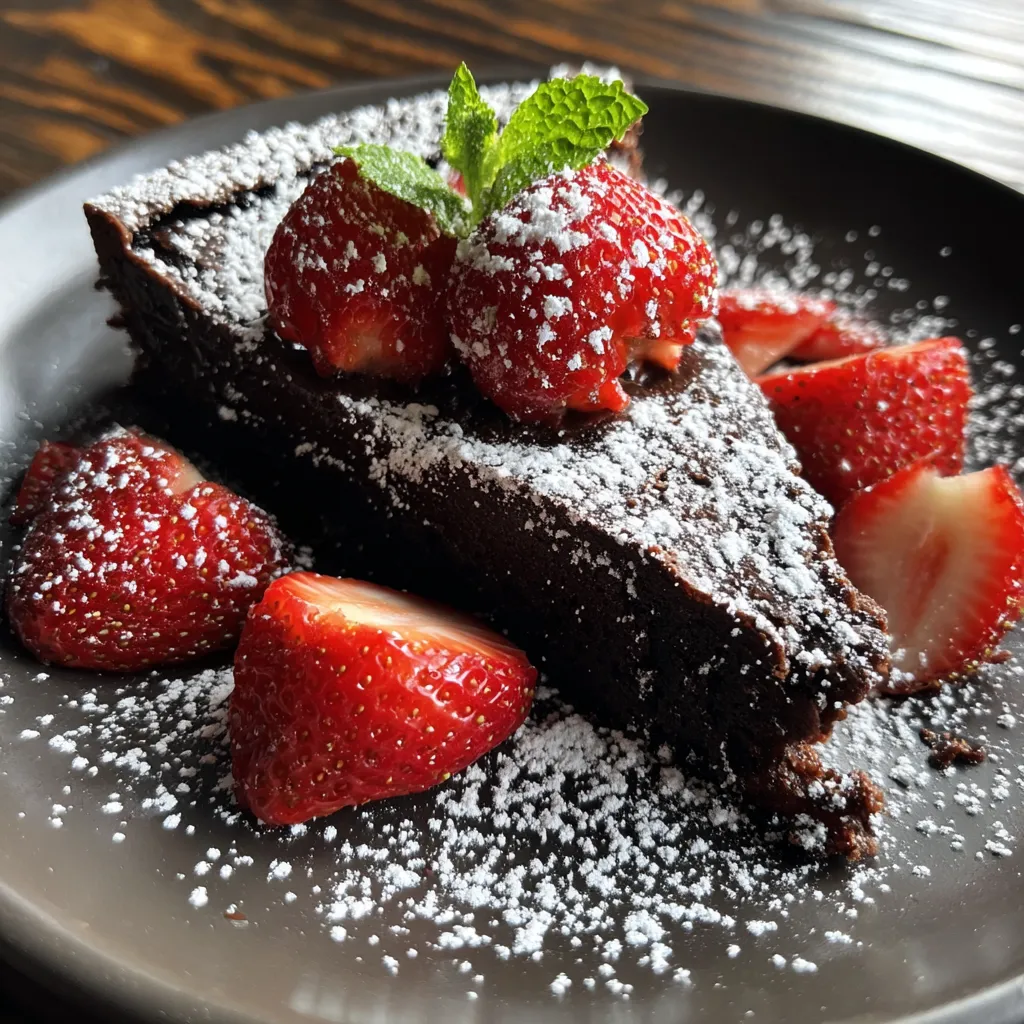

Flourless Chocolate Torte
Description
Velvety and dense, this flourless torte greets you with an intoxicating aroma of dark chocolate. A crisp crackled top gives way to a luxuriously smooth, fudge-like center that melts on your tongue.
Ingredients
Instructions
-
Preheat the oven to 375°F (190°C). Grease a 9-inch springform pan and line the bottom with parchment paper.
-
Place the chocolate and butter in a heatproof bowl set over a pot of simmering water. Stir until fully melted and smooth, then remove from heat.
-
Stir the sugar, salt, and vanilla extract into the melted chocolate mixture until combined.
-
Crack the eggs into the bowl one at a time, whisking thoroughly after each addition until the batter is smooth.
-
Pour the batter into the prepared pan, smoothing the top with a spatula.
-
Bake for 25–30 minutes, or until the center is set and the edges have a slight crackle.
-
Allow the torte to cool in the pan on a wire rack for 10 minutes. Run a knife around the edge, release the springform, and let cool completely.
-
Chill in the refrigerator for at least 2 hours before slicing and serving.
Note
- Use high-quality dark chocolate for the richest flavor
- Ensure the torte is fully cooled and chilled for clean slices
- Dust the top lightly with powdered sugar or cocoa powder before serving
- Store in an airtight container in the refrigerator for up to 3 days

