

Honey Garlic Chicken delivers sweet and savory chicken thighs glazed in a golden honey-garlic sauce, finished with scallions and sesame seeds for a simple weeknight feast. Juicy thighs sizzle to a caramelized crisp before bathing in a sticky glaze bursting with fragrant garlic, tangy soy, and nutty sesame. Ready in under 30 minutes, it’s a beginner-friendly dinner everyone will love!
Key Ingredients
Before we dive in, let’s gather the simple ingredients that make this dish shine:
- 1 pound boneless skinless chicken thighs: Tender, juicy thighs that crisp beautifully and soak up the honey garlic glaze.
- 1/2 teaspoon salt: Enhances the chicken’s natural flavor.
- 1/4 teaspoon black pepper: Adds a subtle spicy kick.
- 2 tablespoons vegetable oil: For searing the chicken to a golden brown.
- 4 cloves garlic: Infuses the dish with fragrant garlic goodness.
- 1/2 cup honey: Sweet base for the sticky glaze.
- 1/4 cup soy sauce: Brings savory umami depth to the sauce.
- 2 tablespoons rice vinegar: Adds bright acidity for balance.
- 1 tablespoon sesame oil: Introduces a nutty aroma and flavor.
- 1 tablespoon cornstarch: Thickens the sauce to a glossy finish.
- 2 tablespoons water: Helps create the cornstarch slurry for perfect consistency.
- 2 stalks green onions: Fresh garnish that adds color and mild onion flavor.
- 1 teaspoon sesame seeds: Gives a crunchy, toasty finish.
How To Make Honey Garlic Chicken
Bringing this Honey Garlic Chicken together is all about layering flavors and mastering simple techniques. You’ll season and sear the thighs to lock in juices, then build the sauce by whisking honey, soy, vinegar, and sesame oil. A quick garlic sauté adds that irresistible aroma before simmering the mixture and finishing with a cornstarch slurry to achieve a luscious sheen. Follow these detailed steps and you’ll have perfectly caramelized chicken in no time:
1. Season the chicken thighs with salt and pepper on both sides to ensure even seasoning.
2. In a small bowl, whisk together honey, soy sauce, rice vinegar, and sesame oil until smooth and well combined.
3. Heat vegetable oil in a large skillet over medium-high heat until it shimmers.
4. Add the chicken to the skillet and cook until golden brown on both sides, about 4 minutes per side, flipping only once for even browning.
5. Add minced garlic to the pan and cook for 30 seconds until fragrant, stirring constantly to prevent burning.
6. Pour the honey mixture into the skillet and bring to a gentle simmer, scraping up any browned bits from the bottom.
7. In a separate bowl, mix cornstarch and water into a slurry and stir it into the sauce until it thickens, about 1–2 minutes, whisking constantly.
8. Garnish with sliced green onions and sesame seeds before serving for a fresh, crunchy finish.
Serving Suggestions
While this Honey Garlic Chicken shines on its own, pairing it with complementary sides can elevate your meal into a truly well-rounded feast. The sweet-salty glaze calls out for grains that soak up every drop, crisp veggies that add freshness, and contrasting textures to keep each bite exciting. Whether serving it over rice, alongside greens, or with crunchy garnishes, these ideas will help you plate an irresistible dinner that wows every time.
- Steamed rice: Use fluffy white or brown rice to soak up every bit of sauce.
- Sautéed vegetables: Quick-fry broccoli, bell peppers, or snap peas in a splash of oil and garlic for vibrant color.
- Cucumber salad: Toss thinly sliced cucumbers with rice vinegar, a pinch of sugar, and sesame seeds for a cool contrast.
- Crusty bread: Serve warm slices to mop up the extra glaze for a fun, hands-on twist.
Tips For Perfect Honey Garlic Chicken
Even a straightforward recipe can benefit from a few insider adjustments to reach peak flavor and texture. With Honey Garlic Chicken, tiny tweaks—like balancing sweetness and salt, ensuring uniform chicken pieces, and selecting the right garnishes—can make a big difference in your final dish. These friendly tips will help you fine-tune the sauce, streamline your prep, and ensure each thigh is evenly cooked and deeply flavored before it reaches the table.
- Adjust the amount of honey or soy sauce to suit your sweetness and saltiness preferences.
- Serve this dish over steamed rice or alongside sautéed vegetables for a complete meal.
- Make sure chicken pieces are similar in size to ensure even cooking.
- Store any leftovers in an airtight container in the refrigerator for up to 3 days.
How To Store It
Once you’ve devoured your dinner, you’ll want to save any leftovers for later—but storing sticky, saucy chicken properly is key to preserving flavor and texture. Whether you plan to enjoy a quick lunch the next day or stash portions for a future weeknight, these storage strategies will keep your Honey Garlic Chicken fresh and delicious. Follow these simple methods to cool, pack, and reheat without losing that signature glossy glaze.
- Refrigerate in an airtight container: Cool the chicken completely before sealing to prevent condensation. Store for up to 3 days.
- Freeze in portions: Place cooled chicken in freezer-safe containers, removing excess air. Freeze for up to 2 months.
- Label and date: Always mark your containers to keep track of freshness.
- Reheat gently: Warm in a skillet over medium heat, adding a splash of water if the sauce has thickened too much.
Frequently Asked Questions
Got questions? Here are some quick answers to help you master Honey Garlic Chicken:
- How long does it take to prepare and cook this Honey Garlic Chicken recipe?
Preparation takes about 10 minutes, including seasoning the chicken, mincing garlic, and whisking the sauce. Cooking requires roughly 10–12 minutes: about 8 minutes to brown the chicken (4 minutes per side) and 2–4 minutes to simmer the sauce and thicken it with the cornstarch slurry. In total, plan for about 20–22 minutes from start to finish.
- Can I substitute chicken breasts for chicken thighs?
Yes. If using boneless skinless chicken breasts, cut them into evenly sized pieces about 1 inch thick to ensure even cooking. Sear over medium-high heat for 3–4 minutes per side until golden and cooked through, then proceed with the garlic and sauce. Note that breasts may cook slightly faster and can dry out if overcooked, so monitor closely.
- What should I do if my sauce doesn’t thicken properly?
First confirm that you’ve whisked the cornstarch and water into a smooth slurry without lumps. Add it gradually to the simmering sauce while stirring constantly. If it’s still too thin after 2 minutes, prepare another small slurry (about 1 teaspoon cornstarch mixed with 1 tablespoon water) and stir it in. Continue simmering until you reach the desired consistency. Remember that the sauce will thicken slightly as it cools.
- How can I adjust the sweetness or saltiness of the sauce?
To reduce sweetness, lower the honey by 1–2 tablespoons or use a mix of half honey and half brown sugar for a milder flavor. To increase sweetness, add an extra tablespoon of honey. For saltiness, adjust the soy sauce: reduce by 1–2 tablespoons for a less salty taste or increase by 1 tablespoon if you prefer a stronger savory profile. Always taste the sauce before adding the slurry to fine-tune the balance.
- What side dishes pair well with this Honey Garlic Chicken?
This chicken is delicious served over steamed white or brown rice to soak up the sauce. You can also serve it alongside stir-fried or roasted vegetables such as broccoli, bell peppers, snap peas, or bok choy. A simple cucumber salad or steamed greens like spinach or kale adds freshness and balances the rich flavors.
- Can I make this recipe ahead of time or freeze leftovers?
You can prepare the full recipe, cool it, and then store leftovers in an airtight container in the refrigerator for up to 3 days. To reheat, warm gently in a skillet over medium heat, adding a splash of water if the sauce has thickened too much. For freezing, place cooled portions in freezer-safe containers, removing as much air as possible. Freeze for up to 2 months. Thaw in the refrigerator overnight before reheating.
- How do I ensure the chicken pieces cook evenly?
Cut chicken thighs into uniform pieces—about 1 to 1½ inches thick—so they brown and cook at the same rate. Pat them dry with paper towels before seasoning to help achieve a golden crust. Arrange the pieces in a single layer in the skillet without crowding; if needed, cook in two batches so each piece has direct contact with the hot surface.
What Makes This Special
This Honey Garlic Chicken stands out thanks to its perfect balance of sweet honey, aromatic garlic, tangy soy, and nutty sesame—plus the crispy caramelized edges on each tender thigh. It’s beginner-friendly, comes together in minutes, and delivers maximum flavor with minimal fuss. Feel free to print and save this article for future weeknights, and let me know in the comments if you tried it, tweaked the sauce, or have any questions as you cook!
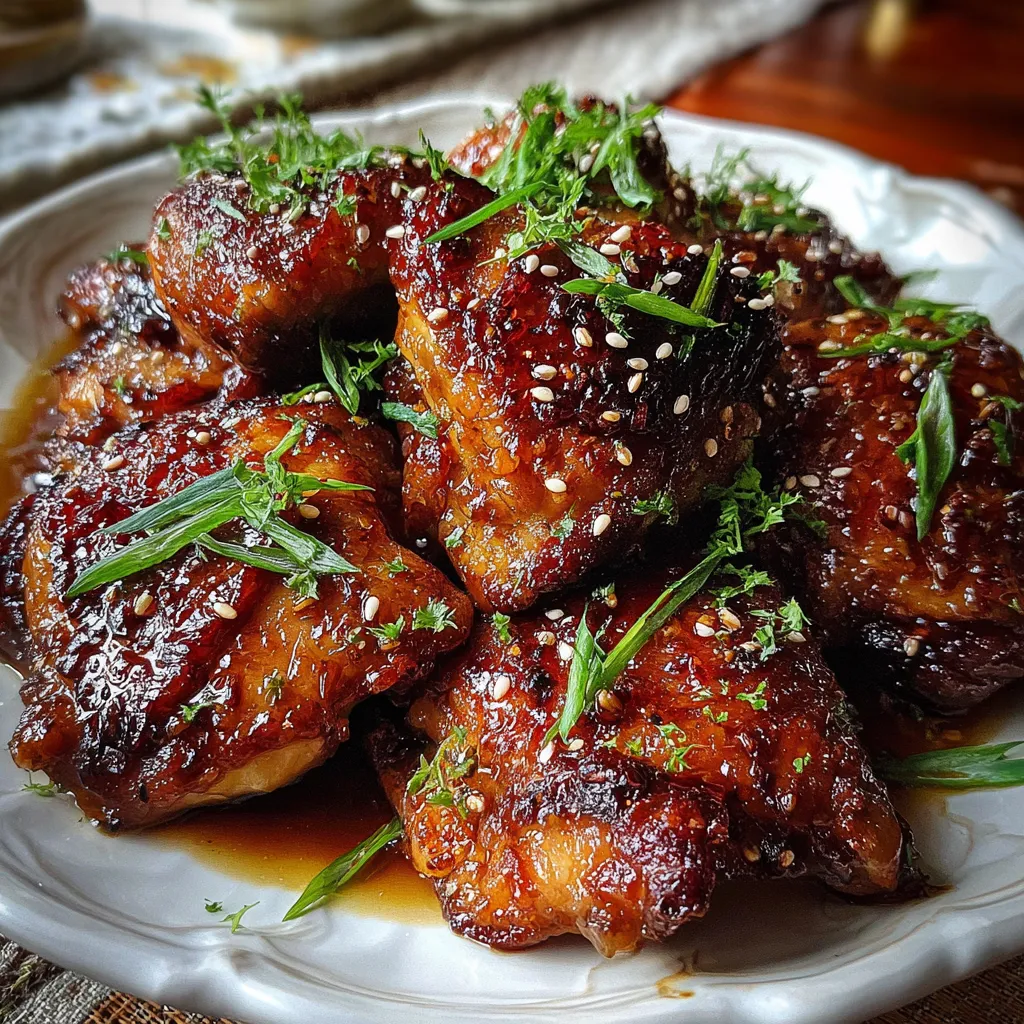

Honey Garlic Chicken
Description
Golden chicken thighs sizzle to a caramelized crisp, then bathe in a sticky honey-garlic glaze. Fragrant garlic, tangy soy, and a hint of sesame enrich every bite.
Ingredients
Instructions
-
Season the chicken thighs with salt and pepper.
-
In a small bowl, whisk together honey, soy sauce, rice vinegar, and sesame oil.
-
Heat vegetable oil in a large skillet over medium-high heat.
-
Add the chicken to the skillet and cook until golden brown on both sides, about 4 minutes per side.
-
Add minced garlic to the pan and cook for 30 seconds until fragrant.
-
Pour the honey mixture into the skillet and bring to a gentle simmer.
-
In a separate bowl, mix cornstarch and water into a slurry and stir it into the sauce until it thickens, about 1–2 minutes.
-
Garnish with sliced green onions and sesame seeds before serving.
Note
- Adjust the amount of honey or soy sauce to suit your sweetness and saltiness preferences.
- Serve this dish over steamed rice or alongside sautéed vegetables for a complete meal.
- Make sure chicken pieces are similar in size to ensure even cooking.
- Store any leftovers in an airtight container in the refrigerator for up to 3 days.

