

Italian Grinder Sliders are mini Italian sandwiches bursting with layers of Genoa salami, capicola, ham, and melted provolone, topped with crisp lettuce, juicy tomato slices, and tangy pepperoncini. Warm slider buns cradle savory meats and gooey cheese before a quick bake, then get finished with a bright oregano vinaigrette for every bite to pop. Perfect for casual lunches, party platters, or game-day snacking, these beginner-friendly sliders pack authentic deli flavor into a fun, handheld treat you’ll want to make again and again.
Key Ingredients
To make these Italian Grinder Sliders pop with authentic deli flavor, grab high-quality Italian meats, fresh produce, and simple seasonings. Each element plays a key role in building layers of taste and texture:
- 12 slider buns: Soft mini buns that hold all the layers and deliver a pillowy bite.
- 12 slices Genoa salami: Savory, slightly spiced meat that lays a flavorful foundation.
- 12 slices cooked ham: Mild, tender protein that balances the salty salami and capicola.
- 12 slices capicola: Spicy, cured pork that adds a punch of heat and depth.
- 6 slices provolone cheese: Melty, creamy cheese that brings a rich binder between meats.
- 1 cup shredded lettuce: Crisp greens for fresh crunch and color contrast.
- 1 medium tomato, sliced: Juicy slices adding bright sweetness and moisture.
- 1 small red onion, thinly sliced: Sharp onion rings for bite and zing.
- 1/4 cup pepperoncini, sliced: Tangy, mild heat to perk up every mouthful.
- 3 tablespoons olive oil: Base for the oregano vinaigrette, providing a smooth mouthfeel.
- 1 tablespoon red wine vinegar: Adds bright acidity to balance the oil in the dressing.
- 1 teaspoon dried oregano: Classic Italian herb to infuse the vinaigrette with earthy flavor.
- Salt to taste: Enhances all the ingredients and seasons the dressing.
- Black pepper to taste: Provides subtle heat and seasoning in the vinaigrette.
How To Make Italian Grinder Sliders
These Italian Grinder Sliders come together in just a few simple steps, combining baking and assembly for maximum flavor. First, you’ll warm the buns and melt the cheese in the oven, then whisk up a quick oregano vinaigrette. Finally, you’ll stack the fresh veggies and drizzle the dressing for a perfect balance of warm and crisp. Follow these detailed steps to ensure each mini sandwich is loaded evenly and ready to devour.
1. Preheat your oven to 350°F and line a baking sheet with parchment paper to prevent sticking.
2. Slice each slider bun horizontally, keeping the two halves intact so you can easily add fillings.
3. Layer two slices of Genoa salami, one slice of cooked ham, one slice of capicola, and a slice of provolone on each bottom half of the buns.
4. Arrange the assembled sliders on the prepared baking sheet and bake for 5 minutes until the cheese is fully melted and bubbly.
5. In a small bowl, whisk together olive oil, red wine vinegar, dried oregano, salt, and black pepper to create a bright vinaigrette.
6. Remove the sliders from the oven and immediately top each with shredded lettuce, tomato slices, red onion, and sliced pepperoncini.
7. Drizzle the oregano vinaigrette evenly over the sliders, ensuring every bite gets a zing of flavor.
8. Close each slider with the top bun halves and serve warm for best results.
Serving Suggestions
These Italian Grinder Sliders shine on their own but also play wonderfully with complementary sides and beverages. Whether you’re feeding a crowd or just yourself, here are a few creative ways to present and enjoy your sliders:
- Serve with marinara dipping sauce: Warm a small bowl of marinara alongside the sliders for dunking each mini sandwich.
- Pair with Italian soda: Refreshing blood orange or lemon soda balances the rich meats and tangy dressing.
- Accompany a light salad: Toss arugula or mixed greens in balsamic vinaigrette for a crisp, palate-cleansing side.
- Display on a charcuterie board: Surround the sliders with olives, cheeses, and cured meats for a festive appetizer spread.
Tips For Perfect Italian Grinder Sliders
Nailing these sliders is all about quality ingredients and smart prep. A good deli selection, fresh produce, and a killer vinaigrette make all the difference. With a few simple tricks, you’ll maximize flavor, texture, and make assembly a breeze. Whether you’re feeding a crowd or meal-prepping for the week, these tips will keep your sliders delicious and stress-free.
- Use a mix of Italian deli meats for a traditional grinder flavor.
- Prepare the sliders a few hours in advance to allow the flavors to meld.
- Feel free to swap provolone with mozzarella or gouda for a different cheese profile.
- Keep extra dressing on hand for dipping or adding moisture right before serving.
How To Store It
Proper storage ensures your Italian Grinder Sliders stay fresh and flavorful for later enjoyment. Whether you’re prepping ahead for a party or saving leftovers, follow these methods to keep everything crisp and tasty:
- Refrigerate assembled: Wrap sliders individually in plastic wrap or place in an airtight container and refrigerate for up to 3 days.
- Store components separately: Keep buns, meats, cheese, and veggies in separate containers for up to 2 days to maintain optimal freshness.
- Keep the dressing in a jar: Seal extra oregano vinaigrette in a small container in the fridge for up to 1 week.
- Freeze for longer storage: Wrap baked sliders tightly in plastic wrap then foil; freeze for up to 1 month and thaw overnight in the refrigerator.
Frequently Asked Questions
Here are some quick answers to common questions about Italian Grinder Sliders:
- How long does it take to prepare and bake these Italian grinder sliders?
From start to finish you’ll need about 20 minutes of active prep time and 5 minutes of baking. Prep includes slicing the buns, layering the meats and cheese, and whisking up the dressing. Once assembled on the baking sheet, the sliders need only 5 minutes in a 350°F oven to melt the provolone before you add the fresh veggies and dressing.
- Can I prepare the sliders in advance, and how should I store them until serving?
Yes, you can assemble the sliders a few hours ahead to let the flavors meld. After baking and adding the fresh toppings, close the buns, then wrap the entire baking sheet or each slider individually in plastic wrap. Keep them refrigerated for up to 3 hours. Remove the wraps 10 minutes before serving to let the buns return to room temperature, then drizzle any extra dressing just before serving.
- What are some suitable substitutions if I don’t have provolone or want a different flavor profile?
You can swap provolone with mozzarella for a milder, creamier bite or gouda for a slightly smoky undertone. For more tang, try fontina. If you’d like a spicier kick, substitute for pepper jack. Just ensure any alternate cheese melts well in a short 5-minute bake.
- How can I make these sliders vegetarian or accommodate dietary restrictions?
For a vegetarian version, replace the Genoa salami, ham, and capicola with grilled zucchini, roasted red peppers, and marinated artichoke hearts. Use your favorite vegetarian cheese slice or vegan cheese alternative and follow the same layering and baking steps. For gluten-free diets, simply use certified gluten-free slider buns.
- What’s the best way to reheat leftover sliders without drying them out?
Preheat your oven to 300°F and place the sliders on a baking sheet lined with parchment paper. Cover them loosely with aluminum foil to retain moisture and bake for 8 to 10 minutes until warmed through. If you have extra dressing, drizzle a bit on top after reheating to freshen up the veggies and bread.
- How can I adjust the flavor or spice level of the dressing to suit different tastes?
To mellow the vinaigrette, reduce the red wine vinegar by half and increase the olive oil. For a sweeter dressing, whisk in a teaspoon of honey or maple syrup. If you prefer more heat, add a pinch of crushed red pepper flakes or swap in pepperoncini juice for a tangy zip. Taste and adjust salt, pepper, and oregano to achieve your ideal balance.
- Is there a recommended way to layer ingredients to prevent sogginess?
Yes. Place the cheese directly on top of the meats so it melts and creates a moisture barrier. After baking, immediately top with lettuce, tomato, onion, and pepperoncini. Drizzle the dressing last, then close the buns. This sequence keeps the bread from absorbing too much dressing and maintains a crisp crumb.
What Makes This Special
These Italian Grinder Sliders work because each layer brings its own personality—from savory, spiced meats to creamy, melted provolone and bright, crunchy veggies. The quick oven melt unites the flavors, while the oregano vinaigrette adds a zesty finishing touch. They’re fun to assemble, perfect for sharing, and simple enough for beginner cooks. Go ahead and print this recipe, save it for your next gathering, and drop a comment if you give it a whirl or have any questions—I’d love to hear your feedback!
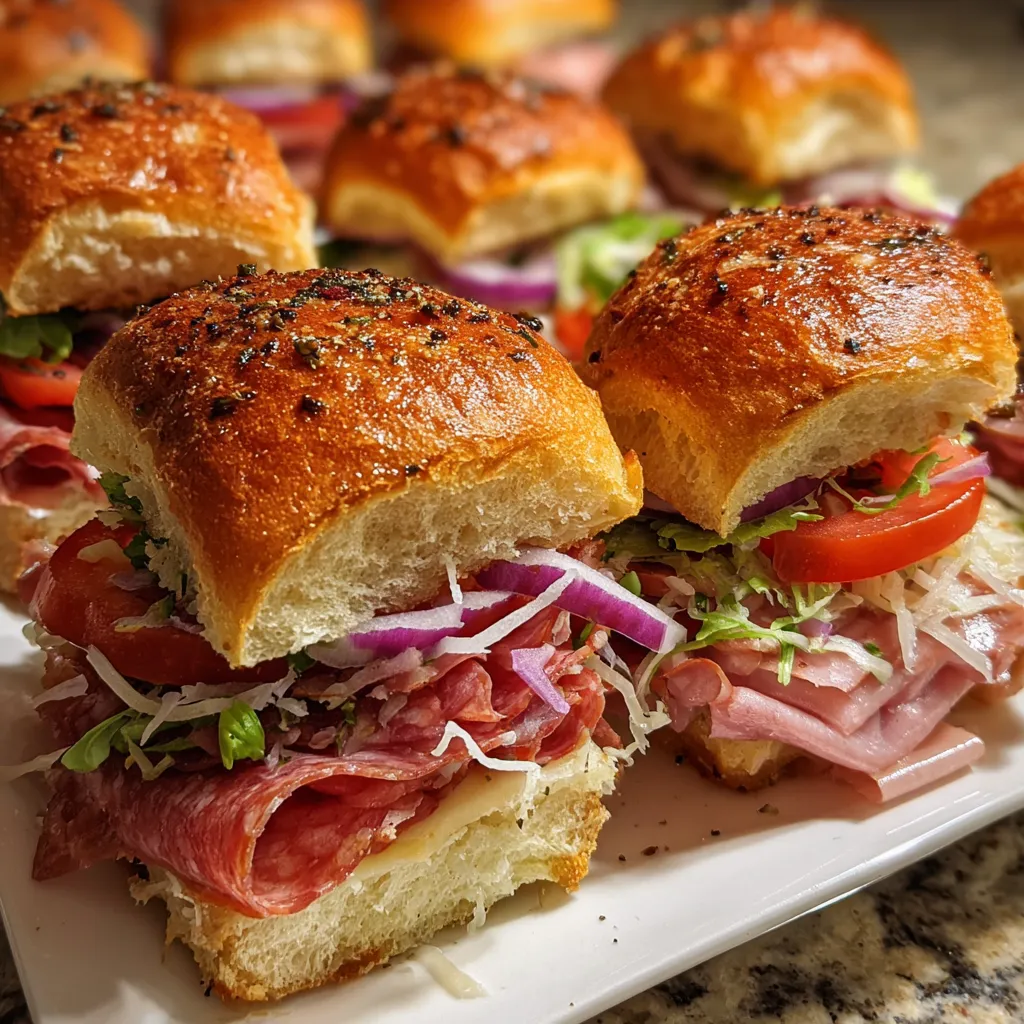

Italian Grinder Sliders
Description
Warm slider buns hold layers of savory Genoa salami, capicola and ham, with gooey provolone. Crisp lettuce, juicy tomato and zesty pepperoncini dunked in oregano vinaigrette add crunch and tang in every bite.
Ingredients
Instructions
-
Preheat the oven to 350°F and line a baking sheet with parchment paper.
-
Slice each slider bun horizontally, keeping the halves intact.
-
Layer two slices of Genoa salami, one slice of ham, one slice of capicola, and a slice of provolone on the bottom halves of the buns.
-
Arrange the sliders on the prepared baking sheet and bake for 5 minutes until the cheese melts.
-
In a small bowl whisk together olive oil, red wine vinegar, dried oregano, salt, and black pepper to create the dressing.
-
Remove the sliders from the oven and top each with shredded lettuce, tomato slices, red onion, and pepperoncini.
-
Drizzle the dressing evenly over the sliders and close with the top bun halves.
-
Serve the sliders warm.
Note
- Use a mix of Italian deli meats for a traditional grinder flavor.
- Prepare the sliders a few hours in advance to allow the flavors to meld.
- Feel free to swap provolone with mozzarella or gouda.
- Keep extra dressing on hand for dipping.

