

Get ready to experience a candyland twist on the classic snowball cookie: buttery mint-spiked dough flecked with mini chocolate chips and optional peppermint crunch, all wrapped in a snowy coat of powdered sugar. Each bite starts with a crisp sugar shell that gives way to cool minty bliss and pockets of melting chocolate, making these cookies an instant holiday favorite. With simple steps and everyday ingredients, you’ll be whipping up dozens in no time and impressing friends and family. Dive in—these Mint Chocolate Chip Snowball Cookies are destined to become your new go-to festive treat!
Key Ingredients
Before we roll in the snow, let’s gather everything needed to create these cool, minty delights. Each ingredient plays a role for texture, flavor, and that signature snowy finish:
- 1 cup unsalted butter, softened: Provides a rich, tender base and helps create a light, melt-in-your-mouth texture in every cookie.
- 1/2 cup powdered sugar, plus extra for rolling: Sweetens the dough and forms that signature white, snowy coating around each cookie.
- 1 teaspoon vanilla extract: Adds warm, floral notes that balance the cool mint flavor.
- 1 teaspoon mint extract: Infuses the dough with refreshing minty brightness—adjust to taste.
- 2 cups all-purpose flour: Gives structure and stability to the cookies while keeping them tender.
- 1/4 teaspoon salt: Enhances all flavors and prevents the sweetness from becoming cloying.
- 1 cup mini chocolate chips: Provides pockets of melted chocolate in every bite for a rich contrast.
- 1/4 cup crushed peppermint candies (optional): Adds festive crunch and extra peppermint pop.
How To Make Mint Chocolate Chip Snowball Cookie
Transforming simple ingredients into festive snowball cookies is easier than you might think. From mixing and scooping to baking and that final snowy dusting, each step ensures a perfect balance of mint, chocolate, and buttery goodness. Follow these detailed instructions to achieve crisp edges, soft centers, and that irresistible snow-like coating.
1. Preheat your oven to 350°F (175°C) and line a baking sheet with parchment paper to prevent sticking.
2. In a large mixing bowl, cream the softened butter and powdered sugar together until the mixture is light and fluffy, about 3–4 minutes.
3. Add the vanilla extract and mint extract to the butter-sugar mixture, and mix until well combined.
4. In a separate bowl, whisk together the all-purpose flour and salt. Gradually add the dry ingredients to the wet ingredients, mixing on low speed just until incorporated.
5. Gently fold in the mini chocolate chips and crushed peppermint candies, if using, until evenly distributed in the dough.
6. Using a tablespoon or cookie scoop, portion the dough into small balls (about 1 inch in diameter) and place them on the prepared baking sheet, spacing them about 2 inches apart.
7. Bake the cookies in the preheated oven for 12–15 minutes, or until the edges are lightly golden. The centers may look slightly underbaked but will firm up as they cool.
8. Remove the cookies from the oven and allow them to cool on the baking sheet for about 5 minutes.
9. While the cookies are still warm, roll them in powdered sugar to coat. Allow them to cool completely on a wire rack.
10. Once cooled, give them another roll in powdered sugar if desired for an extra snowy look.
Serving Suggestions
When it’s time to show off your Mint Chocolate Chip Snowball Cookies, serve them in style to highlight their snowy, festive look and mint-chocolate goodness. Whether you’re hosting a holiday gathering, afternoon tea, or simply indulging your sweet tooth, these serving ideas will elevate the experience. Grab your prettiest platter or festive tin and follow these simple tips to make every bite feel special and picture-perfect.
- Festive Cookie Platter: Arrange cookies on a decorative platter lined with holly-patterned wax paper for a seasonal touch.
- Mint Hot Chocolate Pairing: Serve alongside steaming mugs of hot chocolate topped with whipped cream and a sprinkle of crushed peppermint for a match made in winter heaven.
- Dipped in Chocolate: Half-dip each cooled cookie in melted dark, white, or mint chocolate, then let them set on parchment for an extra chocolaty flair.
- Gift Tin Presentation: Stack cookies in a holiday tin, layering each tier with parchment paper, and tie with a ribbon for a delightful homemade gift.
Tips For Perfect Mint Chocolate Chip Snowball Cookie
Creating flawlessly tender, minty snowballs every time is all about small tweaks and smart choices. From perfecting the dough texture to balancing the mint intensity, these tips will help you avoid common pitfalls and unlock the ultimate melt-in-your-mouth experience. Keep the tone festive and the sugar coating thick for that classic snowball look.
- These cookies are perfect for the holiday season or any festive occasion.
- Experiment with different types of chocolate chips, such as dark chocolate or white chocolate, for varying flavor profiles.
- The mint flavor can be adjusted by adding more or less mint extract according to personal preference.
- For an added crunch, consider adding finely chopped nuts to the dough.
- Store the cookies in an airtight container at room temperature for up to a week.
How To Store It
As soon as your Mint Chocolate Chip Snowball Cookies are coated in their final dusting, you’ll want to keep them at their best until the last crumb is gone. Proper storage will maintain that delicate snowy finish, buttery interior, and chocolatey pockets. Whether you’re saving them for a cookie swap, gift, or a cozy evening at home, follow these simple storage methods to lock in freshness and crunch for days or even months.
- Room Temperature: Place cooled cookies in an airtight container lined with parchment paper; they stay fresh for up to one week.
- Freezer Option: Spread cookies on a baking sheet and freeze until solid before transferring to a freezer-safe bag; freeze for up to three months.
- Layering Tips: Separate cookie layers with parchment or wax paper to prevent sticking and preserve the snowy sugar coating.
- Thawing Advice: Bring frozen cookies to room temperature for about 30 minutes before serving; re-roll in powdered sugar if the coating has dulled.
Frequently Asked Questions
Here are answers to the most common questions about making these minty snowballs, so you can bake with confidence every time.
- How do I know when the Mint Chocolate Chip Snowball Cookies are done baking?
The cookies should bake for 12–15 minutes at 350°F (175°C). You’ll notice the edges turning a light golden hue while the centers remain slightly underbaked—that’s normal. They’ll firm up as they cool on the baking sheet. Avoid overbaking, which can dry them out.
- Can I prepare or freeze the dough ahead of time?
Yes. Scoop the dough into balls and arrange them on a baking sheet in a single layer. Freeze for about an hour, then transfer to an airtight container or freezer bag for up to 3 months. When ready to bake, place frozen dough on parchment-lined sheets, add 1–2 minutes to the baking time, and proceed as usual. You can also refrigerate the dough for up to 48 hours before baking.
- How can I adjust the mint flavor intensity?
The recipe calls for 1 teaspoon of mint extract for a subtle minty note. For a more pronounced mint flavor, increase the extract by ¼ teaspoon increments, mixing and tasting a small dough sample each time. Be cautious: too much mint extract can turn bitter or soapy.
- What are some alternatives to crushed peppermint candies?
If you don’t have peppermint candies, you can omit them or substitute with finely chopped candy canes. For a different crunch, try chopped nuts (like pecans or almonds), or skip the mix-in for a classic mint chocolate chip profile.
- How many cookies does this recipe yield?
Using a 1-inch cookie scoop yields about 36–40 snowball cookies. If you make them slightly larger or smaller, your total count will adjust accordingly. Keep spacing of about 2 inches between each dough ball on the baking sheet.
- Why do the cookies need to be rolled in powdered sugar twice?
The first roll while the cookies are still warm allows the sugar to melt slightly and adhere, creating that initial “snowy” coat. After they cool completely, a second roll builds up a thicker, more pronounced white dusting and prevents the sugar from absorbing moisture and disappearing.
- Can I make these cookies larger or smaller, and how should I adjust baking time?
Yes. For larger cookies (about 2 tablespoons of dough), extend baking time to 15–18 minutes and increase spacing to 2½ inches. For smaller ¾-inch bites, reduce baking time to 10–12 minutes. Always watch for lightly golden edges as your doneness indicator.
- What’s the best way to store finished snowball cookies and how long will they stay fresh?
Store fully cooled cookies in an airtight container at room temperature for up to one week. Layer parchment paper between tiers to prevent sticking. For longer storage, freeze the baked cookies (after chilling) in a sealed container for up to three months, then re-roll in powdered sugar before serving if the coating has dulled.
What Makes This Special
Under that snowy sugar crust lies a symphony of mint and chocolate magic—each cookie balances buttery softness with refreshingly crisp peppermint crunch. What makes this recipe special is its perfect simplicity: straightforward steps lead to professional-worthy results, even for baking beginners. The optional crushed peppermint candies add joyful color and texture, while the double dusting of powdered sugar creates a whimsical look that’s hard to resist. Feel free to print and save this article for your holiday binder or gift it to a friend. I can’t wait to hear how your kitchen fills with mint-chocolate cheer—drop a comment or question if you try these snowballs or need baking tips. Enjoy every snowy bite!
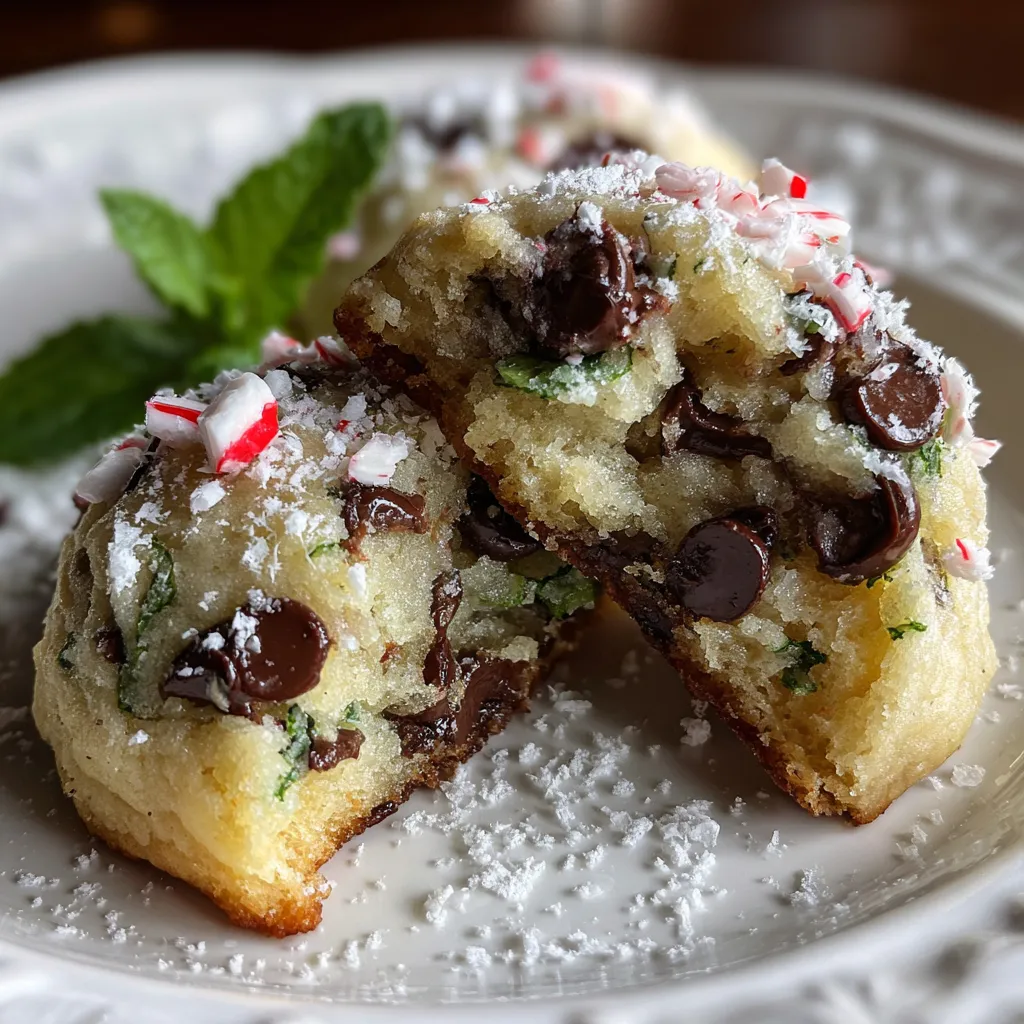

Mint Chocolate Chip Snowball Cookie
Description
A crisp sugar shell gives way to a soft, buttery mint-spiked cookie dotted with melted chocolate chips and crunchy peppermint, each bite melting on your tongue with cool sweetness.
Ingredients
Instructions
-
Preheat your oven to 350°F (175°C) and line a baking sheet with parchment paper.
-
In a large mixing bowl, cream the softened butter and powdered sugar together until the mixture is light and fluffy, about 3-4 minutes.
-
Add the vanilla extract and mint extract to the butter-sugar mixture, and mix until well combined.
-
In a separate bowl, whisk together the all-purpose flour and salt. Gradually add the dry ingredients to the wet ingredients, mixing on low speed just until incorporated.
-
Gently fold in the mini chocolate chips and crushed peppermint candies, if using, until evenly distributed in the dough.
-
Using a tablespoon or cookie scoop, portion the dough into small balls (about 1 inch in diameter) and place them on the prepared baking sheet, spacing them about 2 inches apart.
-
Bake the cookies in the preheated oven for 12-15 minutes, or until the edges are lightly golden. The centers may look slightly underbaked but will firm up as they cool.
-
Remove the cookies from the oven and allow them to cool on the baking sheet for about 5 minutes.
-
While the cookies are still warm, roll them in powdered sugar to coat. Allow them to cool completely on a wire rack.
-
Once cooled, give them another roll in powdered sugar if desired for an extra snowy look.
Note
- These cookies are perfect for the holiday season or any festive occasion.
- Experiment with different types of chocolate chips, such as dark chocolate or white chocolate, for varying flavor profiles.
- The mint flavor can be adjusted by adding more or less mint extract according to personal preference.
- For an added crunch, consider adding finely chopped nuts to the dough.
- Store the cookies in an airtight container at room temperature for up to a week.

