

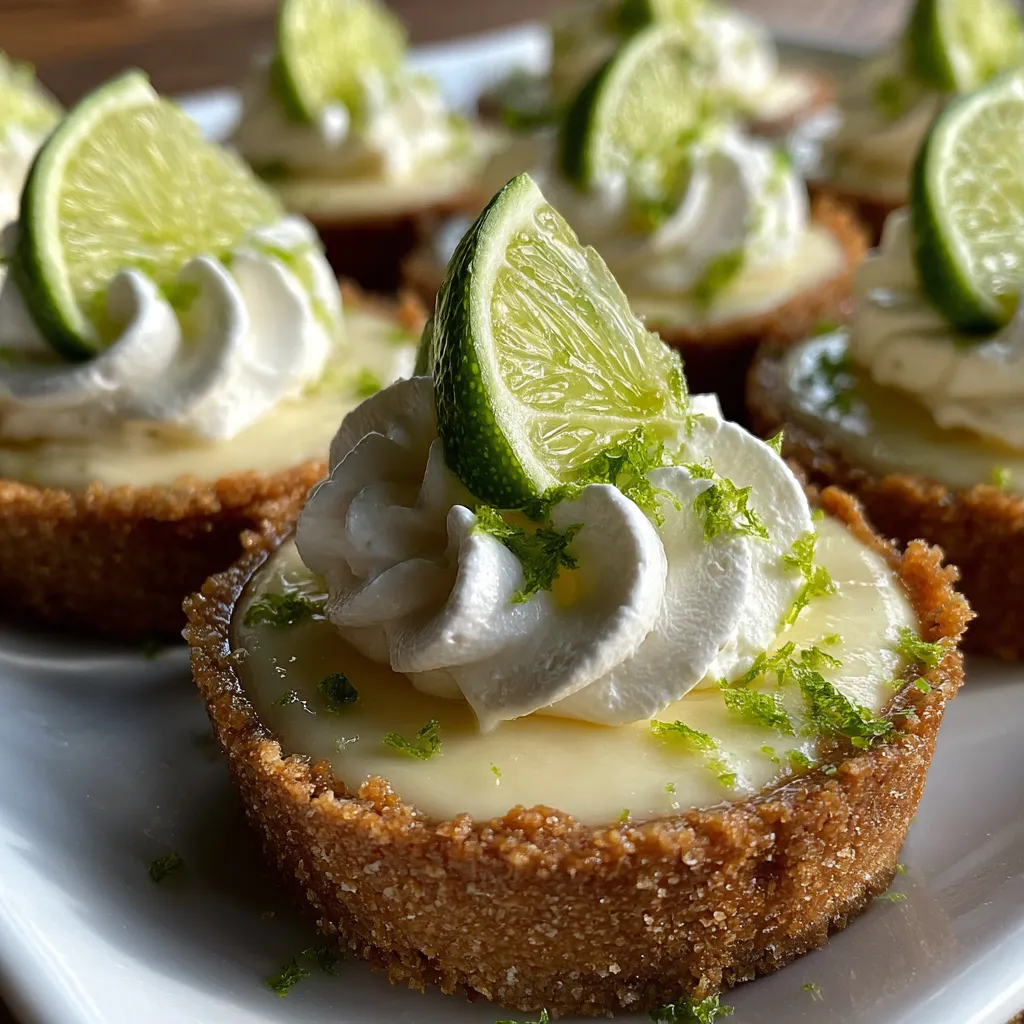
No-Bake Mini Key Lime Pies deliver a burst of tart key lime curd and fluffy whipped cream nestled in crisp graham cracker cups. This recipe is perfect for summer gatherings or whenever you’re craving a quick citrusy pick-me-up thanks to its bright flavor and easy, no-fuss assembly. In just minutes you can whip up these zesty bite-size treats, let them set, and serve a crowd-pleasing dessert that feels fancy without the oven.
Key Ingredients
Gathering the right components is key for achieving that perfect balance of tart, creamy, and crunchy in these mini pies:
- 1 1/2 cups graham cracker crumbs: Creates a crunchy, buttery base that holds the lime filling.
- 1/3 cup granulated sugar: Sweetens the crust and helps bind the crumbs together.
- 6 tablespoons unsalted butter melted: Coats the crumbs for structure and adds rich flavor.
- 14 ounces sweetened condensed milk: Provides a smooth, sweet base for the tangy key lime curd.
- 1/2 cup key lime juice: Delivers bright citrus flavor and sets the filling.
- 2 tablespoons lime zest: Intensifies the lime aroma and adds extra zing.
- 1 teaspoon vanilla extract: Rounds out the tartness with warm, sweet undertones.
- 1 cup heavy whipping cream: Whips into airy peaks for a light, fluffy filling.
- 2 tablespoons powdered sugar: Stabilizes the whipped cream and adds gentle sweetness.
How To Make No-Bake Mini Key Lime Pies
Let’s dive into how to assemble these vibrant mini pies step by step. From prepping the crusts to folding in lightened whipped cream, each stage brings you closer to a refreshing dessert that's ready in no time. Follow these detailed steps and you'll have 12 perfect no-bake delights chilled and set for serving.
1. Line a 12-cup mini muffin tin with paper liners, ensuring each cup is ready to hold the crust without sticking.
2. In a bowl combine graham cracker crumbs and granulated sugar, then stir in melted butter until the mixture resembles wet sand for a sturdy base.
3. Press about 2 tablespoons of the crumb mixture into the bottom of each liner, forming a compact crust, then chill in the freezer or fridge for 10 minutes to set.
4. In another bowl whisk together sweetened condensed milk, key lime juice, lime zest, and vanilla extract until perfectly smooth and well blended.
5. In a separate bowl whip heavy whipping cream with powdered sugar until medium-stiff peaks form, then gently fold the whipped cream into the lime mixture to keep it light and airy.
6. Spoon the filling evenly into the chilled crusts, smoothing the tops with the back of a spoon or an offset spatula for a clean finish.
7. Cover the mini pies and refrigerate for at least 2 hours or until completely set before serving.
Serving Suggestions
These No-Bake Mini Key Lime Pies shine when served with a few thoughtful touches that highlight their vibrant color and creamy texture. Whether you’re hosting a backyard barbecue, planning a brunch spread, or simply treating yourself to a citrusy indulgence, these zesty bites adapt easily to any occasion. A delightful combination of tangy key lime filling, fluffy whipped cream, and a crunchy graham base deserves the right presentation. Here are some fun ways to showcase these mini delights and make every mouthful a memorable experience:
- Whipped Cream Swirl: Pipe a small dollop of freshly whipped cream on top of each pie for a classic finish and extra creaminess.
- Zest Garnish: Sprinkle a pinch of lime zest over the whipped cream to boost citrus aroma and add a pop of vibrant green.
- Fresh Berries: Serve alongside a few mixed berries like raspberries or blueberries to contrast the tart filling with natural sweetness.
- Mint Leaves: Top each mini pie with a small fresh mint leaf for a burst of color and an herbaceous note.
Tips For Perfect No-Bake Mini Key Lime Pies
These mini key lime pies are simple at first glance, but a few clever tricks can take them from good to unforgettable. Zest is your best friend for a bright pop of citrus—just remember to adjust the amount if you prefer a milder tang. Swapping liners for silicone molds makes for trouble-free removal, letting you showcase smooth-edged pies without tearing. If you’re planning ahead, storing the pies properly ensures they stay fresh and hold their shape. And if you’re looking to lighten things up, a whipped topping works wonders while still delivering creaminess. Let’s dive into these quick tips to boost flavor, streamline prep, and guarantee perfect mini pies every time:
- Lime zest adds extra tang; adjust according to taste.
- Use silicone molds instead of paper liners for easy removal.
- Store pies covered in the refrigerator up to 3 days.
- For a lighter version, use whipped topping instead of heavy cream.
How To Store It
Proper storage is key to keeping these mini pies as fresh and flavorful as the day you made them. The combination of crumb crust and creamy filling can soften over time if exposed to air, so planning ahead will preserve their texture and taste. Whether you’re prepping in advance or saving leftovers, these easy methods will help maintain the pies’ vibrant citrus punch and delicate structure. Follow the tips below and enjoy these bite-size treats at their best, even days after assembly:
- Refrigerate in an airtight container: Place the pies in a single layer and cover tightly to prevent moisture loss; they’ll stay fresh for up to 3 days.
- Individual wrapping: Wrap each mini pie in plastic film before storing to keep crust crisp and filling protected from fridge odors.
- Silicone mold storage: If made in silicone molds, cover the entire tray with a lid or plastic wrap to avoid contact with other foods.
- Freeze for longer storage: Remove liners and flash freeze the pies on a baking sheet, then transfer to a freezer-safe bag; thaw overnight in the fridge before serving.
Frequently Asked Questions
Got a few questions? Here are quick answers to help you nail these mini pies with confidence:
- Q: How long does it take to prepare these mini key lime pies?
A: It takes about 25–30 minutes to prepare, including lining the tins, making the crust, chilling the crusts for 10 minutes, whisking the filling, whipping the cream, and assembling the pies. Then refrigerate for at least 2 hours to set.
- Q: Can I use regular limes instead of key limes for the juice and zest?
A: Yes. Regular Persian limes work fine but have slightly less intense flavor. Use the same amount of juice (1/2 cup) and zest (2 tablespoons), then taste and adjust zest or juice to reach your desired tang.
- Q: What if I don’t have paper liners—can I use silicone molds?
A: Absolutely. Lightly grease the molds for easier removal. Press the crumb mixture directly into each cavity, chill, fill, and once set, gently pop out each pie by pushing from the bottom of the silicone mold.
- Q: How can I prevent the crust from becoming soggy?
A: Press the graham crumb mixture firmly and evenly into each liner, then chill for the recommended 10 minutes before adding filling. The brief chilling firms the butter, creating a barrier so the filling won’t seep into the crumbs.
- Q: How do I know when my whipped cream has reached medium-stiff peaks?
A: Lift the whisk or beaters from the cream: medium-stiff peaks will hold their shape and curl slightly at the tip without being too stiff or grainy. They should stand nearly straight but still be pliable enough to fold gently.
- Q: Can I substitute whipped topping for heavy whipping cream to lighten the recipe?
A: Yes. Use an equal amount of whipped topping in place of heavy cream. Whipped topping is lighter and whips easily, but the filling may be a touch less rich and slightly sweeter, so you may want to reduce the powdered sugar by a tablespoon.
- Q: How should I store these mini pies, and how long will they last?
A: Cover the assembled pies with plastic wrap or place them in an airtight container and refrigerate. They will stay fresh up to 3 days. For best texture, consume within 48 hours.
- Q: Can I make these pies ahead of time or freeze them?
A: You can assemble the pies and refrigerate for up to 24 hours before serving. To freeze, remove paper liners, place pies on a baking sheet to freeze solid, then transfer to a freezer bag. Thaw overnight in the refrigerator before serving; the texture may soften slightly.
What Makes This Special
Between the buttery graham crust, tangy key lime curd, and pillowy whipped topping, these No-Bake Mini Key Lime Pies are a playful twist on classic pie that works every time. The no-bake method makes them a breeze for any level of home cook, while those bright citrus notes are just right for summer or whenever you crave a refreshing treat. Feel free to print this recipe and tuck it into your favorite binder for easy access next time. If you try them out or have any questions (or secret serving hacks!), drop a comment below—I’d love to hear how yours turn out.

No-Bake Mini Key Lime Pies
Description
Tart key lime curd and fluffy whipped cream come together in crisp graham cracker shells for a cool, zesty bite. Mini pies set in just a couple hours, perfect for summer gatherings or a quick citrusy pick-me-up.
Ingredients
Instructions
-
Line a 12-cup mini muffin tin with paper liners.
-
In a bowl combine graham cracker crumbs and granulated sugar then stir in melted butter until mixture resembles wet sand.
-
Press about 2 tablespoons of crumb mixture into the bottom of each liner to form a crust then chill for 10 minutes.
-
In another bowl whisk sweetened condensed milk, key lime juice, lime zest, and vanilla extract until smooth.
-
In a separate bowl whip heavy whipping cream with powdered sugar until medium-stiff peaks form then gently fold into the lime mixture.
-
Spoon the filling evenly into the chilled crusts and smooth the tops.
-
Cover and refrigerate for at least 2 hours or until set.
Note
- Lime zest adds extra tang; adjust according to taste.
- Use silicone molds instead of paper liners for easy removal.
- Store pies covered in the refrigerator up to 3 days.
- For a lighter version, use whipped topping instead of heavy cream.

