

Pressed Italian Picnic Sandwich Loaf is a stacked delight brimming with Italian meats, cheeses, and crisp veggies, all infused with garlicky olive oil and pressed into a neat, sliceable feast. This beginner-friendly loaf makes an unforgettable lunch or party appetizer—easy to assemble, perfect for picnics, and even better after a night of pressing. Grab your favorite deli selections and get ready for flavor-packed slices that everyone will rave about!
Key Ingredients
Before we dive into assembly, let’s meet the stars of this loaf:
- 1 large Italian bread loaf: Provides a sturdy shell to cradle all the layers without collapsing.
- 2 tbsp olive oil: Forms the base of the garlic oil, sealing in moisture and adding richness.
- 1 clove garlic, minced: Infuses every slice with bright, savory flavor.
- 150 g sliced pepperoni: Adds a spicy, cured-meat kick.
- 150 g sliced salami: Contributes bold, herbal depth.
- 150 g sliced ham: Offers a mild, savory balance to the spicier meats.
- 200 g provolone cheese, sliced: Melts slightly and lends a tangy creaminess.
- 200 g mozzarella cheese, sliced: Brings gooey, milky richness to each bite.
- 1 roasted red pepper, thinly sliced: Imparts sweet, smoky notes and vibrant color.
- 1 small red onion, thinly sliced: Gives a crisp, sharp crunch.
- 1 medium tomato, thinly sliced: Adds juicy freshness and acidity.
- 50 g lettuce, shredded: Offers a light, leafy texture.
- 3 tbsp Italian dressing: Drizzled over fillings for zesty brightness.
- 1 tsp dried oregano: Mixed into the oil for earthy, aromatic lift.
- Pinch salt: Enhances overall flavor.
- Pinch black pepper: Adds a gentle heat to balance the layers.
How To Make Pressed Italian Picnic Sandwich Loaf
Ready to build this beauty? These steps will guide you through hollowing, layering, and pressing your loaf into a compact, flavor-filled masterpiece.
1. Cut off the top crust of the bread loaf and hollow out the interior, leaving a 1 cm thick shell to support the fillings.
2. In a small bowl, mix olive oil, minced garlic, dried oregano, salt, and pepper until well combined.
3. Brush the garlic oil mixture generously inside the hollowed bread and on the removed top crust for flavor and moisture seal.
4. Layer half of the pepperoni, salami, and ham evenly along the bottom of the loaf to create a sturdy meat base.
5. Top the meats with provolone and mozzarella slices, ensuring full coverage for creamy binding.
6. Add roasted red pepper, red onion, tomato, and shredded lettuce in even layers for color and crunch.
7. Drizzle Italian dressing over the vegetables and cheeses to tie all the flavors together.
8. Place the bread top back on and wrap the entire loaf tightly in plastic wrap to prepare for pressing.
9. Set weights or heavy canned goods on top and refrigerate for at least 4 hours or overnight to compress and meld flavors.
10. Unwrap, slice crosswise into servings with a sharp serrated knife, and enjoy perfect, uniform pieces.
Serving Suggestions
When it’s time to serve your pressed loaf, here are a few creative ideas to elevate the presentation and taste:
- Charcuterie Board Pairing: Slice the loaf and arrange on a wooden board with olives, pickles, and extra dipping sauces for a stunning appetizer display.
- Picnic-Ready Packs: Wrap individual slices in parchment paper and twine, then tuck into a basket alongside fresh fruit and iced drinks for an effortless outdoor meal.
- Family Lunch Spread: Place slices on a platter with small bowls of extra Italian dressing, mustard, or pesto for guests to customize each bite.
- Party Platter: Fan out the slices in overlapping rows on a large tray, garnished with fresh basil leaves and lemon wedges for a pop of color.
Tips For Perfect Pressed Italian Picnic Sandwich Loaf
Mastering this loaf is all about technique and ingredient freshness. Keep these friendly tips in mind:
- For best results use a fresh, sturdy loaf to hold all the fillings.
- Feel free to swap or add your favorite deli meats, cheeses and veggies.
- Pressing overnight enhances flavor melding and makes slicing neater.
- Serve chilled or at room temperature with extra dressing on the side.
How To Store It
Proper storage ensures your sandwich loaf stays just as delicious for days:
- Refrigerate: Wrap any leftover portions tightly in plastic wrap and store in the fridge to keep layers intact.
- Airtight Container: Transfer slices to a sealed container to prevent drying out and odor absorption.
- Bring to Room Temperature: Remove from the fridge about 15 minutes before serving for optimal texture and flavor.
- Do Not Freeze: Avoid freezing the assembled loaf, as ice crystals will compromise the bread’s structure and lead to sogginess.
Frequently Asked Questions
Here are quick answers to common queries about your new favorite sandwich loaf:
- Q: How long does it take to prepare and press the Pressed Italian Picnic Sandwich Loaf?
A: You’ll spend about 15 to 20 minutes hollowing the loaf, mixing the garlic oil, brushing it on, layering meats, cheeses and vegetables, and wrapping it up. After assembly you need to refrigerate the wrapped loaf under weight for at least 4 hours to allow the flavors to meld and the sandwich to compress, though pressing overnight (8 to 12 hours) yields the best texture and easier slicing.
- Q: What type of bread works best for this recipe and why?
A: A fresh, sturdy Italian bread loaf with a firm crust and soft but resilient crumb is ideal. The outer shell must be thick enough (about 1 cm) to hold fillings without collapsing, while the interior yields just enough give to compress snugly. Avoid overly airy or flimsy loaves, as they may tear when you remove the top or compress the sandwich.
- Q: Can I substitute or add other meats, cheeses, or vegetables?
A: Absolutely. The recipe is very forgiving: swap pepperoni, salami or ham for prosciutto, capicola, roast beef or turkey. Provolone and mozzarella can be replaced with fontina, Swiss, cheddar or burrata for creaminess. Feel free to add cucumber slices, roasted eggplant, sun-dried tomatoes or fresh basil. Just be mindful of moisture content; pat wet ingredients dry to prevent sogginess.
- Q: Why is the garlic oil mixture important and how can I adjust it?
A: Brushing the interior and top crust with olive oil, minced garlic, oregano, salt and pepper flavors the bread and helps seal it against moisture. You can adjust by adding a pinch of red pepper flakes for heat, swapping dried oregano for fresh basil or parsley, or using flavored olive oil (like lemon-infused) for a bright twist. Make sure to distribute the mixture evenly so every slice carries that savory garlic hit.
- Q: How do I ensure neat, even slices when serving?
A: Chill the pressed loaf well—cold temperatures firm up the fats in meats and cheeses, preventing ingredients from slipping. Use a long, sharp serrated knife; saw gently with light, even strokes rather than pressing down hard. Wipe the knife blade between cuts to remove any buildup. Aim for slices about 2 cm thick for sturdy portions that hold together.
- Q: What’s the best way to store leftovers and how long will they keep?
A: Wrap any unused portion tightly in plastic wrap or place in an airtight container and refrigerate. It will stay fresh for up to 3 days, though optimal texture and flavor peak within 24 to 48 hours. Serve cold or let slices come to room temperature for about 15 minutes before enjoying. Avoid freezing the assembled loaf, as ice crystals will ruin the bread’s texture and the sandwich may become soggy when thawed.
- Q: Can I prepare this sandwich loaf ahead of time for an event?
A: Yes. Assemble and press the loaf up to 24 hours before your event to maximize flavor melding. Keep it under weight in the refrigerator until about 30 minutes prior to serving, then unwrap and slice. If you need more portability, wrap the whole chilled loaf in foil over the plastic wrap—this double layer keeps it secure during transport.
What Makes This Special
This Pressed Italian Picnic Sandwich Loaf stands out because every slice is a perfect cross-section of meats, cheeses, and veggies, all soaked in garlic oil and pressed to harmonious perfection. The hands-off pressing melds flavors overnight, so you wake up to an appetizer or lunch that practically assembles itself. It’s fun to slice, share, and savor—plus it’s so neat, you’ll want to print and save this recipe for future gatherings. Let me know how your loaf turns out or drop any questions below!
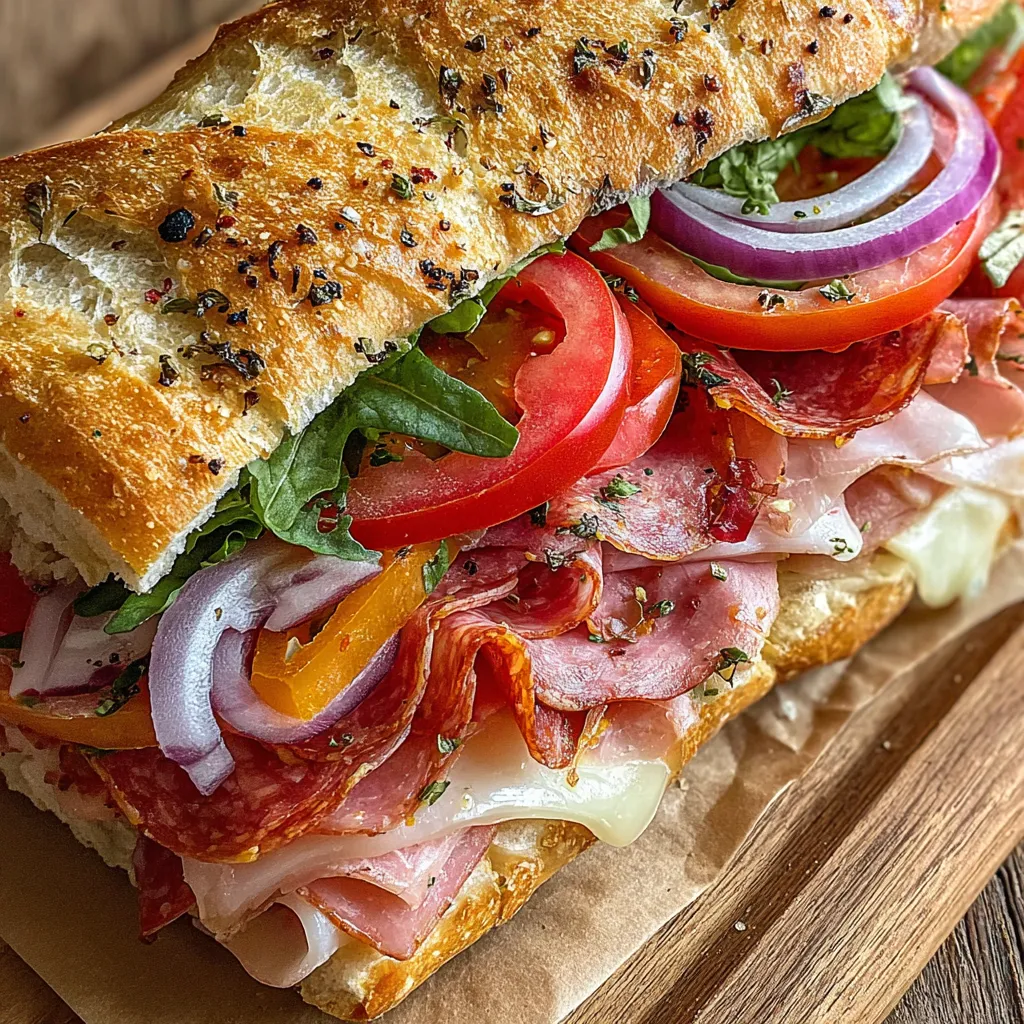

Pressed Italian Picnic Sandwich Loaf
Description
Experience layers of pepperoni, salami, ham, provolone and mozzarella nestled with roasted peppers, tomato and lettuce in a garlic-oiled bread shell, pressed overnight for easy, flavor-packed slices.
Ingredients
Instructions
-
Cut off the top crust of the bread loaf and hollow out the interior, leaving a 1 cm thick shell.
-
In a small bowl mix olive oil, minced garlic, dried oregano, salt and pepper.
-
Brush the garlic oil mixture inside the hollowed bread and on the removed top crust.
-
Layer half of the pepperoni, salami and ham evenly on the bottom of the loaf.
-
Top the meats with provolone and mozzarella slices.
-
Add roasted red pepper, red onion, tomato and shredded lettuce.
-
Drizzle Italian dressing over the vegetables and cheeses.
-
Place the bread top back on and wrap the entire loaf tightly in plastic wrap.
-
Set weights or heavy canned goods on top and refrigerate for at least 4 hours or overnight.
-
Unwrap, slice crosswise into servings and enjoy.
Note
- For best results use a fresh, sturdy loaf to hold all the fillings.
- Feel free to swap or add your favorite deli meats, cheeses and veggies.
- Pressing overnight enhances flavor melding and makes slicing neater.
- Serve chilled or at room temperature with extra dressing on the side.

