

Crunchy pumpkin spice meets velvety cream cheese in a little bite-sized treat that feels like autumn wrapped up in a hug. These Pumpkin Oreo Balls are the perfect example of Sweet, Seasonal Treats: No-Bake Pumpkin Oreo Balls for All Occasions! They combine the familiar crunch of Pumpkin Spice Oreo cookies with a creamy center that melts in your mouth. Once you roll them in white chocolate and sprinkle on crushed graham crackers, you’ve got a delightful fusion of creamy pumpkin spice goodness and a crunchy chocolate coating that’s simply irresistible. This recipe is a guaranteed crowd-pleaser, whether you’re hosting a cozy fall gathering, celebrating Halloween, or just indulging in a sweet treat on a crisp afternoon.
Beyond the delicious flavor, these Pumpkin Oreo Balls are a breeze to prepare. With a Preparation Time of 15 minutes, Cooking Time of 5 minutes (mostly for melting chocolate), and a Rest Time totaling about 1 hour, you’ll have 24 irresistible balls ready to serve. Each bite clocks in at around 130 calories, making them a reasonable indulgence for a dessert course that’s beginner-friendly. No fancy techniques are required — just a food processor, a little mixing, and your hands to roll these beauties into perfect spheres. Let’s dive into the ingredients and get ready to whip up these seasonal delights!
KEY INGREDIENTS IN PUMPKIN OREO BALLS
Before you embark on this no-bake adventure, let’s take a closer look at what makes these little treats so special. Each ingredient plays a unique role in creating the perfect balance of texture, flavor, and visual appeal. From the spiced cookie base to the glossy white chocolate shell, here’s why each component is indispensable.
- Pumpkin Spice Oreo cookies
These iconic sandwich cookies provide both structure and flavor. When pulsed into fine crumbs, they form the base of the dough, infusing every bite with warm pumpkin spice notes.
- Cream cheese
Softened to room temperature, cream cheese binds the cookie crumbs into a smooth, dough-like mixture. Its tangy richness balances the sweetness of the Oreo crumbs and white chocolate, creating a luscious, creamy center.
- White chocolate chips
Melted and combined with coconut oil, white chocolate forms the glossy outer shell that encases each ball. It adds a sweet, mellow contrast to the spiced filling and gives a professional, dessert-shop finish.
- Coconut oil
A small addition of coconut oil thins out the melted white chocolate, ensuring it coats each Oreo ball evenly and sets with a smooth sheen.
- Ground cinnamon (optional)
A pinch of extra cinnamon can be stirred into the dough for an even deeper layer of spice, enhancing that classic pumpkin-pie vibe.
- Crushed graham crackers (for garnish)
Sprinkled on the wet chocolate coating, these crumbs add a subtle crunch and a hint of buttery sweetness, completing each bite with delightful texture.
HOW TO MAKE PUMPKIN OREO BALLS
Get ready to roll up your sleeves and have some fun! This recipe is all about simple techniques and a bit of patience as the balls chill and the chocolate sets. Follow these detailed steps for perfectly shaped, irresistibly spiced Pumpkin Oreo Balls.
1. Place the Pumpkin Spice Oreo cookies in a food processor. Pulse the cookies in short bursts until they transform into fine, uniform crumbs—this ensures a smooth dough without any large chunks.
2. Transfer the Oreo crumbs to a large mixing bowl. Add the softened cream cheese and use a spatula or clean hands to blend the mixture thoroughly. You should end up with a cohesive, dough-like consistency.
3. If you want an extra hit of warmth, sprinkle in the ground cinnamon. Mix until the spice is evenly distributed throughout the dough, deepening that pumpkin flavor.
4. Scoop out about 1 tablespoon of dough at a time using a cookie scoop or spoon. Roll each portion between your palms to form smooth, round balls. Place them on a baking sheet lined with parchment paper, spacing them evenly.
5. Slide the baking sheet into the refrigerator and let the balls firm up for about 30 minutes. Chilling makes them easier to coat in chocolate without losing their shape.
6. While the balls chill, melt the chocolate coating. In a microwave-safe bowl, combine the white chocolate chips and coconut oil. Heat in 30-second intervals, stirring between each burst, until the mixture is completely melted and silky smooth.
7. Remove the chilled Oreo balls from the fridge. One by one, dip each ball into the melted white chocolate, using a fork to ensure it’s fully coated. Gently tap off any excess chocolate before returning it to the parchment-lined sheet.
8. While the chocolate is still wet, sprinkle a pinch of crushed graham crackers over each ball for added crunch and decorative flair.
9. Refrigerate the dipped balls for another 30 minutes, or until the white chocolate shell has completely set and is firm to the touch.
SERVING SUGGESTIONS FOR PUMPKIN OREO BALLS
When it comes time to share these bite-sized delights, presentation can take them from cute to unforgettable. Whether you’re adding them to a dessert table or offering them as party favors, there are endless ways to showcase their charm and flavor. Here are some fun ideas to make your Pumpkin Oreo Balls the star of the show:
- Place the balls on a decorative platter lined with autumn leaves or a festive doily. Arrange them in concentric circles for a polished look and garnish the center with a small bowl of extra crushed graham crackers.
- Pair these sweet treats with a warm beverage station—think spiced lattes, hot apple cider, or creamy chai tea. The combination of cozy drinks and these festive bites will have your guests feeling snug and satisfied.
- Package them in clear cellophane bags tied with orange ribbon or twine for an adorable take-home gift. Attach a personalized tag describing the flavor and a harvest-themed illustration for extra charm.
- Create a themed dessert board by mixing these Oreo balls with other fall goodies like mini pumpkin muffins, caramel-dipped pretzels, and candied pecans. Use small labels to identify each item and watch how quickly this spread disappears!
HOW TO STORE PUMPKIN OREO BALLS
Maintaining that fresh, creamy center and crisp chocolate shell is all about proper storage. With just a few simple steps, you can ensure your Pumpkin Oreo Balls stay delicious for days—or even weeks—so you can plan ahead for gatherings or keep them on hand for a last-minute treat.
- Store in an airtight container in the refrigerator. Layer the balls between sheets of parchment paper to prevent sticking, and enjoy them chilled for up to one week.
- For longer storage, freeze the balls on a parchment-lined tray until solid. Transfer them to a sealed freezer bag, removing as much air as possible. They’ll keep for up to two months—just thaw in the fridge before serving.
- If condensation forms when bringing frozen balls back to room temperature, let them thaw fully in the fridge to preserve the smooth chocolate coating and avoid sogginess.
- To prevent flavor absorption, wrap the container in a layer of cling film or store it on a high shelf away from strong-smelling items like onions or cheeses.
CONCLUSION
Bringing together the cozy flavors of pumpkin spice and the nostalgic crunch of Oreo cookies, these no-bake Pumpkin Oreo Balls are the ultimate fall dessert that anyone can master. We’ve covered every detail—from gathering the key ingredients to coating each ball in glossy white chocolate and sprinkling on a final layer of crushed graham crackers. Whether you’re a beginner in the kitchen or an experienced home cook looking for a quick seasonal treat, this recipe delivers on both simplicity and taste. Feel free to customize with different Oreo flavors, swap white chocolate for dark or milk, or add a dash of espresso powder for a mocha twist. With a total of 24 balls, 130 calories per bite, and beginner-friendly instructions, you’ll have plenty to share (or keep all to yourself—we won’t judge!).
Be sure to print this article or save it to your favorite recipe folder so you can revisit it whenever the mood for a bite-sized pumpkin indulgence strikes. You’ll also find a FAQ below to answer any lingering questions as you prepare these sweet gems. If you give this recipe a try, please leave your comments, questions, or feedback—I’d love to hear how your Pumpkin Oreo Balls turned out, any twists you added, or tips you discovered along the way. Happy baking (or, rather, no-baking), and here’s to cozy fall gatherings filled with sweet memories!
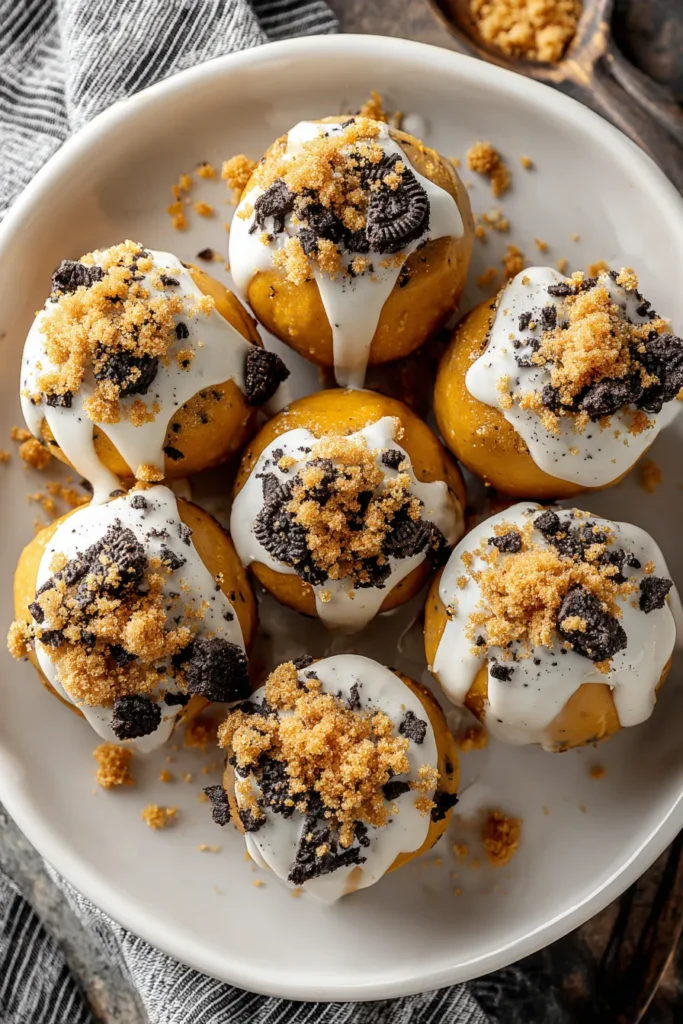

Pumpkin Oreo Balls
Description
These Pumpkin Oreo Balls are a delightful fusion of creamy pumpkin spice goodness and a crunchy chocolate coating, making them an irresistible fall treat.
Ingredients
Instructions
-
Start by placing the Pumpkin Spice Oreo cookies in a food processor. Pulse until they are finely ground into crumbs.
-
In a large mixing bowl, combine the Oreo crumbs and softened cream cheese. Use a spatula or your hands to blend the mixture until well combined and dough-like.
-
If desired, add ground cinnamon to the mixture for an enhanced flavor and mix thoroughly.
-
Once mixed, scoop out small portions of the dough (about 1 tablespoon each) and roll them into balls. Place the balls on a baking sheet lined with parchment paper.
-
Once all the balls are shaped, place the baking sheet in the refrigerator for about 30 minutes to allow them to firm up.
-
Meanwhile, in a microwave-safe bowl, combine the white chocolate chips and coconut oil. Microwave in 30-second intervals, stirring in between, until the chocolate is melted and smooth.
-
Once the Oreo balls are firm, remove them from the refrigerator. Dip each ball into the melted white chocolate, ensuring they are fully coated. Tap off any excess chocolate.
-
Return each dipped ball to the parchment-lined baking sheet. While the chocolate is still wet, sprinkle crushed graham crackers on top for added texture and flavor.
-
Place the baking sheet back in the refrigerator for another 30 minutes or until the chocolate coating has completely set.
Note
- These treats can be made ahead of time; they store well in the fridge for up to a week.
- You can customize the flavor by using different types of Oreo cookies or chocolate coatings.
- They make for a perfect dessert for fall gatherings or Halloween parties!

