

Autumn has a way of wrapping us in cozy layers of warmth and tradition, and there’s no better way to celebrate the season than by diving spoon-first into a tray of Pumpkin Pie Crisp. With its creamy pumpkin base spiced just right and a golden, crunchy oat topping that sings with cinnamon and nutmeg, this dessert feels like a hug in every bite. As a home cook who adores the interplay of textures, I’m always enchanted watching that crisp layer bake to perfect golden-brown, bubbling ever so slightly around the edges. It’s comforting to know that while it tastes like it came from your favorite artisanal bakery, it’s actually a breeze to whip up in your own kitchen.
I love how this recipe is beginner-friendly, taking just 15 minutes of prep time before the oven works its magic for about 40 minutes—and then a quick 15-minute rest lets everything set just right. Serving twelve people at around 300 calories per slice, it’s ideal for cozy family gatherings, potlucks, or simply treating yourself on a chilly evening. Whether you’re sniffing the deliciously sweet steam wafting from the oven or savoring that first warm bite alongside a scoop of vanilla ice cream, Pumpkin Pie Crisp is fall comfort delivered in its most joyful form.
KEY INGREDIENTS IN PUMPKIN PIE CRISP
Every spoonful of this crisp is powered by simple, pantry-friendly staples that come together to create something truly special. Let’s break down why each component plays an essential role in the flavor, texture, and overall success of this dessert.
- Pure pumpkin puree
This smooth, vibrant orange base delivers that classic pumpkin flavor and creamy consistency you expect in autumn desserts. It also keeps the filling moist and tender as it bakes.
- Sweetened condensed milk
Adds a rich, velvety sweetness that melds seamlessly with the pumpkin. Its thick consistency helps bind the filling and creates a luscious custard-like texture.
- Large eggs
Act as the natural thickening agents, giving structure to the pumpkin layer. They also enrich the filling, providing a silkiness that balances the crisp topping.
- Vanilla extract
Enhances the sweetness and deepens the overall flavor profile. A touch of vanilla works wonders to round out the spice blend.
- Ground cinnamon
Brings warm, earthy notes that are synonymous with fall baking. It pairs beautifully with pumpkin’s natural sweetness.
- Ground nutmeg
Offers a slightly nutty undertone and a hint of peppery spice. A little goes a long way in boosting complexity.
- Ground ginger
Delivers a subtle zest and warmth, lifting the spiced pumpkin filling with a gentle, aromatic kick.
- Salt
Balances the sweetness and amplifies the individual flavors. Just the right pinch ensures your crisp isn’t cloying.
- Old-fashioned rolled oats
Form the heart of the crunchy topping. They crisp up beautifully, providing a hearty chew and rustic appeal.
- All-purpose flour
Helps bind the oat topping with the sugars and butter, creating those irresistible clusters that contrast the creamy pumpkin layer.
- Packed brown sugar
Contributes deep, caramel-like sweetness and moisture to the crumb topping, ensuring it stays tender but crunchy.
- Granulated sugar
Adds sparkly sweetness and helps create a golden crust on the oat mixture when it bakes.
- Unsalted butter, melted
Binds the oat and sugar mixture, adds richness, and promotes that toasty, golden-brown finish.
- Chopped pecans or walnuts (optional)
Introduce an extra layer of crunch and a toasty, nutty dimension. You can swap these for toasted seeds for a nut-free option.
HOW TO MAKE PUMPKIN PIE CRISP
Bringing together a luscious pumpkin filling and a satisfyingly crunchy topping is easier than you might think. With just a handful of steps, you’ll have a dessert that’s brimming with fall flavors and textural contrast.
1. Preheat your oven to 350°F (175°C). Lightly grease a 9×13-inch baking dish with butter or non-stick cooking spray, ensuring the crisp won’t stick and can be served cleanly.
2. In a large mixing bowl, combine the pure pumpkin puree, sweetened condensed milk, eggs, vanilla extract, ground cinnamon, ground nutmeg, ground ginger, and salt. Use a whisk to blend everything until ultra-smooth and fully uniform, eliminating any streaks of egg white or unmixed spices.
3. Pour the spiced pumpkin mixture into the prepared baking dish. With a flexible spatula, spread it evenly so the layer is uniform in thickness—this ensures even baking and prevents any pooling or uneven set.
4. In another bowl, mix together the old-fashioned rolled oats, all-purpose flour, packed brown sugar, granulated sugar, and melted butter. Stir just until the ingredients form a crumbly, cohesive topping. If you’re adding nuts, gently fold in the chopped pecans or walnuts until they’re evenly distributed.
5. Evenly sprinkle the oat-nut mixture over the pumpkin layer. Make sure the topping fully covers the filling in a single layer so that each bite has the perfect balance of creamy pumpkin and crunchy crisp.
6. Place the dish in the preheated oven and bake for 35–40 minutes. You’ll know it’s done when the top turns golden brown, the oats look toasted, and the pumpkin filling is set—just barely jiggles in the center when you gently shake the pan.
7. Remove the crisp from the oven and let it cool for 10–15 minutes. This resting period allows the filling to firm up, making it easier to slice. Serve warm or let it come to room temperature before indulging.
SERVING SUGGESTIONS FOR PUMPKIN PIE CRISP
Elevating your Pumpkin Pie Crisp from delightful to unforgettable often comes down to how you serve it. There’s something magical about pairing this cozy dessert with the right accompaniments, and a few thoughtful touches will have your guests—or just you—smiling with each delicious bite.
- Whipped cream dollop
Top each warm square with a generous swirl of freshly whipped cream. The airy creaminess balances the spiced pumpkin and adds a luxurious, melt-in-your-mouth texture.
- Vanilla ice cream scoop
Placing a cold scoop of creamery-style vanilla on the warm crisp sends the temperatures into a heavenly contrast. Watch as it slowly softens and melds into the crevices of the oat topping.
- Caramel drizzle
Warm a little salted caramel sauce and drizzle it in a zigzag pattern over the top. The sweet-salty finish deepens the overall flavor and adds an elegant touch.
- Toasted nuts garnish
Sprinkle extra toasted pecans or walnuts on top right before serving. This boosts the nutty aroma and gives an additional crunchy surprise.
HOW TO STORE PUMPKIN PIE CRISP
Keeping your Pumpkin Pie Crisp at its absolute best beyond the first serving is a breeze. Whether you’re saving leftovers for the next day or preparing it ahead for a busy table, proper storage safeguards both its texture and flavor, ensuring every bite remains as delightful as the first.
- Refrigerate in an airtight container
Once the crisp has cooled completely, transfer individual portions or the whole pan (tightly covered with plastic wrap or aluminum foil) to the fridge. This method preserves freshness for up to three days and prevents the oat topping from becoming soggy.
- Cover and keep at room temperature
If you plan to enjoy the crisp within the same day, leave it on the counter under a cake dome or loosely tented with foil. This approach maintains the topping’s crunch for about 6–8 hours without losing the luscious texture of the pumpkin layer.
- Reheat in the oven
To revive that just-baked quality, warm single servings on a baking sheet at 300°F (150°C) for 10–12 minutes. This gentle heat will re-crisp the topping and bring back the pumpkin’s melt-in-your-mouth warmth without overbaking.
- Freeze for longer storage
For planning ahead, freeze baked and cooled crisp in a freezer-safe, airtight container for up to one month. Thaw overnight in the refrigerator, then reheat as described above to restore that freshly-baked feel.
CONCLUSION
This Pumpkin Pie Crisp has everything you love about fall desserts: a creamy, warmly spiced pumpkin filling topped with a sweet and crunchy oat layer. From the moment you whisk together the spices and puree in your mixing bowl to that triumphant first slice straight from the oven, it’s a recipe designed to bring joy and comfort. With minimal prep time and straightforward instructions, it’s perfect for both seasoned bakers and complete beginners. You’ll find that roasting the nuts or experimenting with a hint of allspice can be delightful variations, but even in its classic form, this crisp stands out as a crowd-pleaser.
Feel free to print out this article or save it in your recipe binder for those cozy evenings when you crave a warm slice of homemade dessert. Don’t forget, you can scroll down to find a helpful FAQ section below for common questions and kitchen tips. If you give this Pumpkin Pie Crisp a try, please leave a comment sharing your experience, ask any questions if you need clarifications, or let me know your favorite twist on the toppings. I love hearing from fellow home cooks, and your feedback helps make this recipe even better. Happy baking!
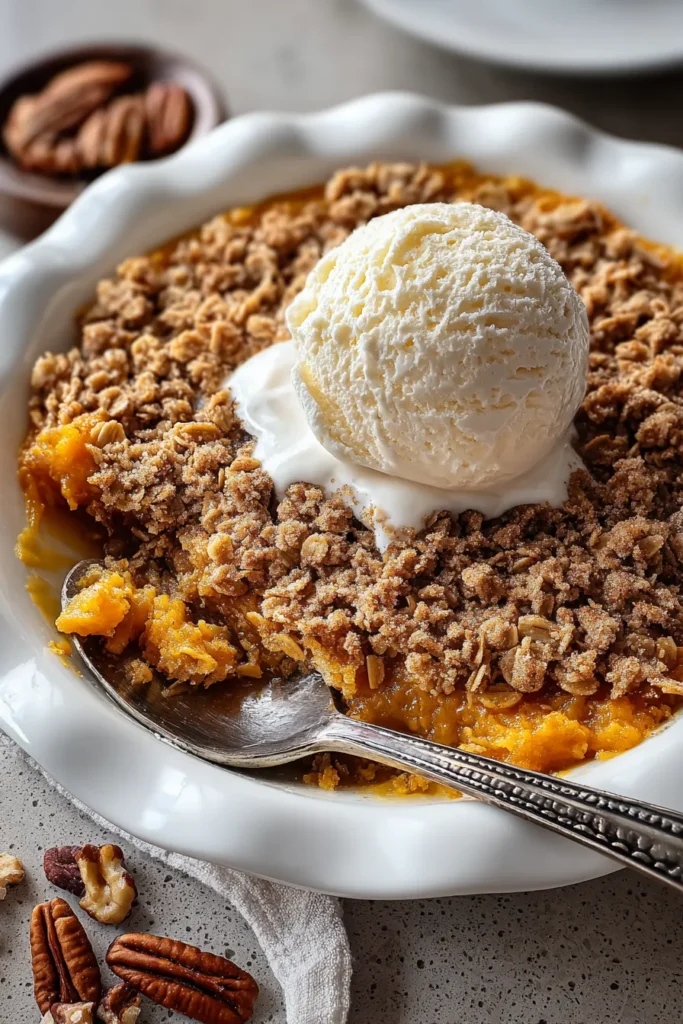

Pumpkin Pie Crisp
Description
This Pumpkin Pie Crisp combines the rich, creamy flavor of spiced pumpkin filling with a crunchy, sweet topping, making it the ultimate comfort dessert for cooler days.
Ingredients
Instructions
-
Preheat your oven to 350°F (175°C). Grease a 9x13 inch baking dish with butter or non-stick cooking spray.
-
In a large mixing bowl, combine the pumpkin puree, sweetened condensed milk, eggs, vanilla extract, cinnamon, nutmeg, ginger, and salt. Whisk until the mixture is well blended and smooth.
-
Pour the pumpkin mixture into the prepared baking dish, spreading it out evenly with a spatula.
-
In another bowl, mix together the rolled oats, flour, brown sugar, granulated sugar, and melted butter. Stir until the mixture is crumbly and well combined. If using, fold in the chopped nuts.
-
Evenly sprinkle the oat mixture over the pumpkin layer in the baking dish.
-
Bake in the preheated oven for 35-40 minutes or until the top is golden brown and the pumpkin filling is set.
-
Remove from the oven and let it cool for about 10-15 minutes before serving. This can be served warm or at room temperature.
Note
- Serve with whipped cream or vanilla ice cream for a delicious contrast.
- This recipe can be made ahead and stored in the refrigerator for up to 3 days.
- You can substitute the nuts with your favorite toasted seeds for a nut-free version.
- Feel free to experiment by adding spices like cloves or allspice for extra flavor.
- Leftovers can be easily reheated in the oven or microwave for a quick treat.

