

There’s something utterly enchanting about sinking your teeth into a pool of rich, fudgy brownie that’s been kissed with a swirl of vibrant red. These Red Velvet Brownies are a delightful spin on the classic treat, turning an ordinary bake into a showstopper that wows every time. With a hint of cocoa warming each bite and creamy pops of white chocolate dancing on your palate, you’ll find yourself reaching back for one more square before you even realize how many you’ve devoured. Not only do these brownies taste incredible, but their ruby-red hue adds a festive flair perfect for gatherings, holidays, or simply to brighten an ordinary Tuesday afternoon.
Baking this batch is an Intermediate-level project that takes about 20 minutes of prep, 35 minutes in the oven, and a brief 10-minute rest before slicing—totally worth the 320 calories of bliss per serving (based on 16 squares). I love how these brownies come together: melted butter, two kinds of sugar, and warmed vanilla get whipped into a light, fluffy batter with eggs. A dash of apple cider vinegar and a generous dollop of red food coloring turn the mix into that signature scarlet shade, while a careful sift of flour, cocoa, baking powder, and salt brings structure. Fold in plump white chocolate chips, and pop everything into a 9×13-inch pan for a half-hour of oven magic. By the time you pull them out, the edges are set and the center glistens with soft crumbs—proof you’ve hit the perfect balance of fudgy and firm. Get ready to treat yourself and your loved ones with these delectable red velvet delights!
KEY INGREDIENTS IN RED VELVET BROWNIES
Every epic bake starts with quality ingredients, each playing a crucial role in the final texture, color, and flavor of your brownies. Below are the stars of this recipe and why you definitely don’t want to skip or substitute them without a second thought.
- Unsalted Butter
This provides a silky richness that carries all the other flavors. Melting it gently ensures an even coating of sugar and a luxuriously moist crumb in the finished brownies.
- Granulated Sugar
It lends sweetness and structure. Combined with melted butter, it helps create a slightly crisp top layer while tenderizing the interior.
- Brown Sugar
Packed with moisture, it deepens the flavor profile with a subtle caramel note. It keeps the brownies extra fudgy and prevents them from drying out.
- Large Eggs
Beating them in one at a time incorporates air, giving lift and a light texture. The proteins also help set the brownies’ shape once they’re baked.
- Vanilla Extract
A little vanilla intensifies the sweet and chocolate flavors. It’s the secret depth enhancer for any decadent dessert.
- Red Food Coloring
The heart of the “red velvet” magic. It gives that signature crimson shade, turning ordinary cocoa into a festive, eye-catching palette.
- Apple Cider Vinegar
Reacting with the baking powder, it gives a subtle tang and superior rise. The acidity also brightens the red color and balances the sweetness.
- All-Purpose Flour
Acting as the structural backbone, it provides just enough gluten to hold the brownies together without making them cakey.
- Unsweetened Cocoa Powder
A pinch of cocoa imparts that whisper of chocolate flavor, complementing the red velvet character without overpowering the white chocolate chips.
- Baking Powder
This leavening agent creates gentle lift, ensuring your brownies are fudgy yet slightly springy in the center.
- Salt
Even a small amount heightens all the sweet and chocolate notes, making the flavors pop and preventing cloying richness.
- White Chocolate Chips
These creamy morsels melt into pockets of sweet decadence, contrasting the slight tang of the cocoa and vinegar for a perfectly balanced bite.
HOW TO MAKE RED VELVET BROWNIES
Get ready to transform that beautiful list of ingredients into a pan of show-stopping brownies. The steps are straightforward, but each technique—from melting butter to folding in chips—matters for a flawless finish. Follow along, and you’ll have luscious, crimson bites in no time!
1. Preheat your oven to 350°F (175°C). Lightly grease a 9×13-inch baking pan with butter or line it with parchment paper. This ensures your brownies slide out easily when they’re perfectly baked.
2. In a medium saucepan, melt the butter over low heat until it’s completely liquid. Pull the pan from the heat and let the butter cool just slightly—it should be warm but not scalding before mixing with sugars.
3. In a large mixing bowl, combine the granulated sugar, brown sugar, melted butter, and vanilla extract. Stir until the mixture is smooth and every grain of sugar is coated, creating a glossy, cohesive base.
4. Add the eggs one at a time, beating vigorously after each addition. This builds volume, making the batter light and fluffy—the secret to a tender crumb.
5. Stir in the red food coloring and apple cider vinegar, mixing until the vibrant hue is uniform throughout and the tang is evenly balanced.
6. In a separate bowl, sift together the flour, cocoa powder, baking powder, and salt. Sifting prevents lumps and ensures an even rise.
7. Gradually fold the dry ingredients into the wet mixture, stirring gently until just combined. Overmixing can break down the air bubbles and lead to denser brownies.
8. Carefully fold in the white chocolate chips, dispersing them throughout the batter for delightful pockets of creamy sweetness.
9. Pour the batter into the prepared pan, using a spatula to spread it evenly to every corner. Smooth the top for a clean finish.
10. Bake for 30–35 minutes, or until a toothpick inserted into the center comes out with a few moist crumbs clinging to it. This indicates the perfect fudgy texture.
11. Cool the brownies in the pan on a wire rack for about 10 minutes. Let them rest just enough to set before using a sharp knife to cut them into squares.
SERVING SUGGESTIONS FOR RED VELVET BROWNIES
These vibrant brownies are versatile enough to steal the show on any dessert table. Whether you’re hosting a birthday, sending lunchbox love, or simply treating yourself after a long day, here’s how to elevate each serving into an unforgettable experience.
- Warm with Ice Cream
Serve a warm brownie right off the rack alongside a scoop of vanilla or salted caramel ice cream. The contrast of cold cream and cozy, gooey center is pure magic.
- Cream Cheese Frosting Dollop
Add a generous swirl of creamy frosting on top. Whip together cream cheese, butter, powdered sugar, and vanilla until silky, then pipe it on for a nostalgic red velvet cake vibe.
- Berry and Mint Garnish
Top each square with fresh raspberries or strawberries and a sprig of mint. The bright fruit sharpens the sweetness and adds a refreshing lift.
- White Chocolate Drizzle
Melt a handful of extra white chocolate chips and use a spoon to drizzle fine threads across cooled brownies. It creates an elegant presentation and an extra layer of flavor.
HOW TO STORE RED VELVET BROWNIES
Keeping these brownies fresh ensures you’ll enjoy the same tender, fudgy texture days after baking. Moisture, temperature, and exposure to air are the key factors, so follow these guidelines to lock in flavor and softness.
- Room Temperature in an Airtight Container
Once cooled, lay brownies in a single layer or with parchment paper between layers. Seal them in an airtight container or zip-top bag at room temperature for up to 3 days. This method preserves the soft crumb without drying them out.
- Refrigeration for Extended Freshness
For up to a week of enjoyment, wrap the pan tightly with plastic wrap or transfer brownies to a sealed container in the fridge. The cooler environment slows staleness, though you may want to let squares come to room temperature before indulging.
- Freezing for Long-Term Storage
Freeze fully cooled brownies in individual portions by wrapping each square in plastic wrap and then foil. Place the bundles in a freezer-safe bag for up to 3 months. Thaw at room temperature or give them a quick zap in the microwave for that just-baked feel.
- Avoiding Soggy Texture
Keep brownies away from moisture sources in the fridge by using paper towels under the lid of your container to absorb excess humidity. This prevents them from becoming overly soft or soggy while stored.
CONCLUSION
Baking these Red Velvet Brownies has taken us on a delightful journey through vibrant color, rich cocoa notes, and sweet pockets of white chocolate. From melting golden butter to sifting flour into that crimson-hued batter, every step contributes to a treat that’s both visually stunning and utterly irresistible. With just 20 minutes of prep, a half-hour in the oven, and a brief cooling period, you’ll be cutting into glossy, fudgy squares perfect for sharing or savoring all by yourself. Feel free to print this article and save it in your recipe binder, so you can revisit the joy and excitement of making these brownies time and again. At the bottom, you’ll also find a FAQ section to answer any lingering questions you might have about technique, substitutions, or troubleshooting.
I can’t wait to hear how your Red Velvet Brownies turn out—drop a comment if you try this recipe or have any questions along the way! Whether you’re curious about swapping beetroot powder for natural coloring, need clarification on mixing methods, or just want to share a photo of your finished batch, I’m here to help. Your feedback and personal stories inspire me every day, and I’m always thrilled to see my fellow home bakers succeed. Happy baking, and don’t forget to save a square or two for me!
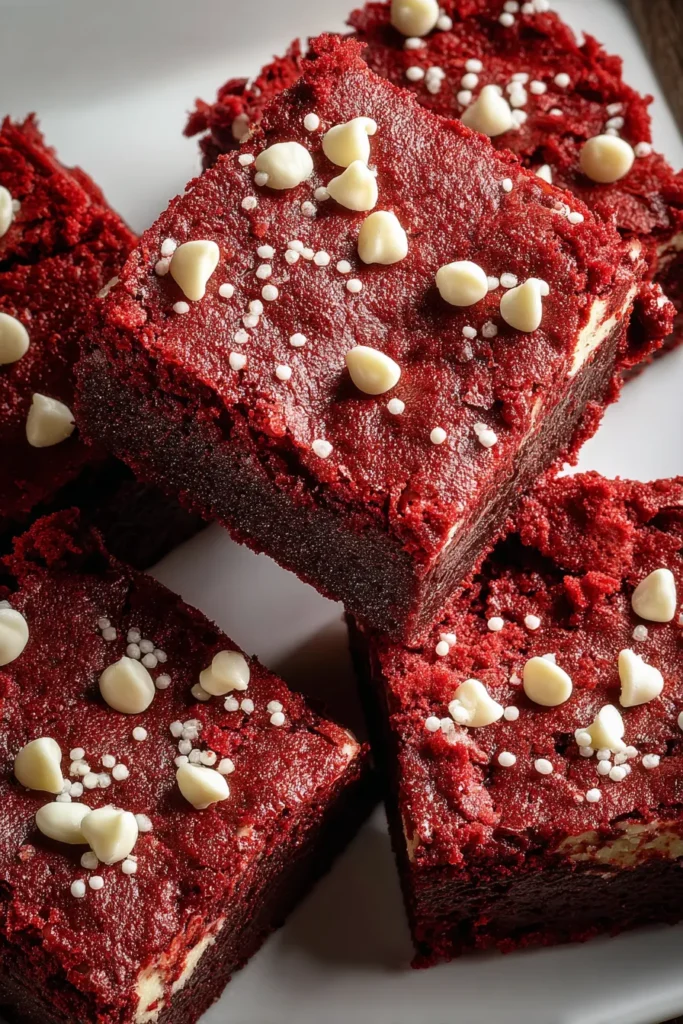

Red Velvet Brownies
Description
These Red Velvet Brownies boast a moist texture, a hint of cocoa, and the sweetness of white chocolate, creating a treat that's as delicious as it is visually stunning.
Ingredients
Instructions
-
Preheat your oven to 350°F (175°C). Grease a 9x13-inch baking pan lightly with butter or line it with parchment paper for easy removal.
-
In a medium saucepan, melt the butter over low heat until completely liquid. Remove from heat and let it cool for a few minutes.
-
In a large mixing bowl, combine the granulated sugar, brown sugar, melted butter, and vanilla extract. Stir until the mixture is smooth and fully incorporated.
-
Add the eggs one at a time, beating well after each addition until the mixture is light and fluffy.
-
Stir in the red food coloring and apple cider vinegar, mixing until the color is evenly distributed.
-
In a separate bowl, sift together the flour, cocoa powder, baking powder, and salt.
-
Gradually add the dry ingredients into the wet mixture, stirring gently until just combined. Do not overmix.
-
Fold in the white chocolate chips until they're evenly distributed throughout the batter.
-
Pour the batter into the prepared baking pan, spreading it evenly with a spatula.
-
Bake in the preheated oven for 30-35 minutes, or until a toothpick inserted into the center comes out with a few moist crumbs.
-
Allow the brownies to cool in the pan on a wire rack before cutting them into squares.
Note
- Red velvet is traditionally known for its moist texture and vibrant color.
- You can add a cream cheese frosting on top for extra flavor reminiscent of a classic red velvet cake.
- If you cannot find red food coloring, beetroot powder can be a natural alternative.
- Be sure to monitor the baking time closely as overbaking can result in dry brownies.

