

Bright, tangy, and just a little spicy, Zesty Pickled Banana Peppers bring a vibrant crunch to everything from burgers to salads. This simple, beginner-friendly recipe uses garlic, mustard, and bay leaf to infuse crisp banana pepper rings with mouthwatering flavor that’s ready in just 24 hours. Whether you’re jazzing up a sandwich or sneaking them into tacos, these pickles pack a zesty punch you won’t forget.
Key Ingredients
To make these zesty pickles, you’ll need simple pantry staples and plenty of fresh banana peppers to achieve that perfect balance of heat and tang.
- 4 cups sliced banana peppers: Crisp, mild peppers that form the colorful, crunchy base of your zesty pickles.
- 2 cups white vinegar: Provides acidity and tang, essential for proper pickling and flavor balance.
- 2 cups water: Dilutes the vinegar slightly, ensuring the brine isn’t overwhelmingly sour.
- 2 tablespoons granulated sugar: Balances the acidity with a touch of sweetness.
- 1 tablespoon kosher salt: Enhances flavors and helps draw moisture from the peppers for a crisp bite.
- 4 cloves garlic peeled and halved: Imparts savory depth and gentle garlic notes throughout the brine.
- 1 teaspoon black peppercorns: Adds aromatic warmth and subtle spice pops.
- 1 teaspoon mustard seeds: Bring a mild tang and a slight crunchy texture to the mix.
- ½ teaspoon red pepper flakes: Boosts the heat level with a smoky, spicy kick.
- 2 bay leaves: Infuse herbal undertones that round out the brine’s flavor profile.
How To Make Zesty Pickled Banana Peppers
With your ingredients prepped and jars sterilized, pickling these banana peppers is a breeze. You’ll bring a garlic-spiced brine to a boil, pack your peppers into jars, then pour the hot brine over them. A bit of patient cooling and a 24-hour wait give you perfectly tangy, crunchy pickles that shine in every bite.
1. Sterilize your jars and lids by boiling them in water for 10 minutes, then set aside to dry. In a large pot, bring enough water to a rolling boil and carefully submerge jars and lids to kill any bacteria. Use tongs to remove them and let them air-dry on a clean towel.
2. Slice the banana peppers into rings, discarding seeds if you prefer milder heat. Use a sharp knife to cut even ¼-inch rings so each piece soaks up the brine uniformly.
3. In a medium saucepan, combine the vinegar, water, sugar, salt, garlic, peppercorns, mustard seeds, red pepper flakes, and bay leaves and bring to a boil, stirring until sugar and salt dissolve. Maintain the boil for 2–3 minutes to let the spices bloom.
4. Pack the sliced peppers evenly into the sterilized jars, leaving about ½ inch of headspace at the top. Press down gently to remove air pockets without crushing the rings.
5. Carefully pour the hot brine over the peppers, making sure the solids are submerged and headspace remains. Use a clean spoon to nudge any floating garlic or spices beneath the surface.
6. Wipe the jar rims clean, seal with lids, and let them cool to room temperature. Ensuring a tight seal prevents leaks and keeps contaminants out.
7. Refrigerate the jars for at least 24 hours before serving to allow flavors to develop. Patience pays off—flavors intensify and peppers get even crunchier with time.
Serving Suggestions
These Zesty Pickled Banana Peppers are incredibly versatile and bring bright acidity to a variety of dishes. Whether you’re building a sandwich masterpiece or adding a spicy crunch to your meals, these peppers will steal the show. Try these ideas to make the most of your homemade pickles:
- Add them to burgers for an instant zesty crunch that cuts through rich melted cheese.
- Layer on sandwiches or wraps, balancing creamy spreads with crisp, tangy pepper rings.
- Stir into fresh salads, from simple greens to grain bowls, for a burst of color and heat.
- Serve alongside a charcuterie board, pairing the pickles with cheeses, cured meats, and crusty bread for a well-rounded snack spread.
Tips For Perfect Zesty Pickled Banana Peppers
Turning ordinary banana peppers into zesty pickles is easier than you think, but a few extra pointers will guarantee success every time. From keeping your hands protected to dialing in the perfect sweet-tang balance, these friendly tips help you achieve that ideal crunch and flavor, whether you’re a beginner or a seasoned home pickler.
- Wear gloves when handling hot peppers to protect your skin from capsaicin irritation.
- Adjust sugar and salt levels to taste, ensuring a sweeter or tangier brine that suits your palate.
- For shelf-stable pickles, process the sealed jars in a boiling water bath for 10 minutes to create a safe vacuum seal.
- Store refrigerated jars for up to 2 months, allowing flavors to deepen while keeping the peppers crisp.
How To Store It
Proper storage is key to maintaining the vibrant crunch and bright flavor of your Zesty Pickled Banana Peppers. Whether you want to keep jars in the fridge for quick access or make them shelf-stable for long-term enjoyment, follow these guidelines to preserve freshness and tangy goodness.
- Refrigerator: Store sealed jars on a cold shelf away from the door to keep a consistent temperature. Consume within 2 months for optimal crunch.
- Water Bath Canning: Process jars in a boiling water bath for 10 minutes, then cool and store in a cool, dark pantry. Properly canned jars will last up to one year.
- After Opening: Once you open a jar, always use a clean utensil and reseal tightly. Keep in the fridge and enjoy within 6 weeks.
- Labeling: Write the date of pickling on each jar to track freshness and ensure you use the oldest jars first.
Frequently Asked Questions
Got questions? We’ve got answers to help you master these zesty pickles!
- How long does it take to prepare and pickle these Zesty Pickled Banana Peppers?
Hands-on preparation takes about 15 to 20 minutes, including slicing peppers, measuring ingredients, and sterilizing jars. Bringing the brine to a boil and filling jars adds another 10 minutes. After jarring, let the peppers cool to room temperature, then refrigerate for at least 24 hours before serving.
- Can I adjust the heat level of the pickled banana peppers?
Yes. For milder pickles, remove all the seeds and membranes before packing the jars. To increase heat, leave some seeds intact and add an extra pinch of red pepper flakes. Remember to wear gloves when handling hot peppers to avoid skin irritation from capsaicin.
- What is the purpose of sterilizing the jars and lids?
Sterilizing jars and lids by boiling them for 10 minutes kills any bacteria or yeasts that could spoil the pickles or cause unwanted fermentation. Using sterile containers helps ensure the pickles stay fresh and safe to eat for up to two months in the refrigerator or longer if properly canned.
- How can I make these pickles shelf-stable instead of refrigerated?
After packing the hot brine and peppers into sterilized jars and sealing them, process the sealed jars in a boiling water bath for 10 minutes. This step creates a vacuum seal that allows you to store the pickles at room temperature for up to one year. Ensure jars remain submerged and adjust processing time for altitude if needed.
- What variations can I make to the brine for different flavors?
You can adjust the sugar for a sweeter brine or increase the salt for a tangier bite. Substituting brown sugar or honey adds depth and caramel notes. For a more complex spice profile, add a cinnamon stick or a few coriander seeds. Always taste the brine before pouring and tweak sugar or salt levels to suit your preference.
- How long will the pickled banana peppers stay good, and how should I store them?
Refrigerated jars will retain optimal flavor and crispness for up to two months. Keep them tightly sealed and stored in the coldest part of the fridge. Once opened, consume within six weeks for the best texture. If you’ve processed them in a boiling water bath, unopened jars can be stored in a cool, dark pantry for up to one year.
- Why are garlic, peppercorns, mustard seeds, red pepper flakes, and bay leaves included in the brine?
These aromatics and spices infuse the brine with layers of savory, pungent, and slightly spicy notes. Garlic adds depth and subtle sweetness when pickled, black peppercorns bring warm heat, mustard seeds give a mild tang, red pepper flakes lend extra kick, and bay leaves contribute herbal undertones that round out the flavor.
What Makes This Special
These Zesty Pickled Banana Peppers stand out because they balance tang, heat, and savory garlic in a crunch-packed brine that’s both simple and unforgettable. This beginner-friendly recipe works every time, turning bright banana peppers into a versatile condiment that elevates burgers, salads, sandwiches, and more. Don’t forget to print and save this guide for quick reference, then let me know in the comments how your pickles turned out or if you have any questions—happy pickling!
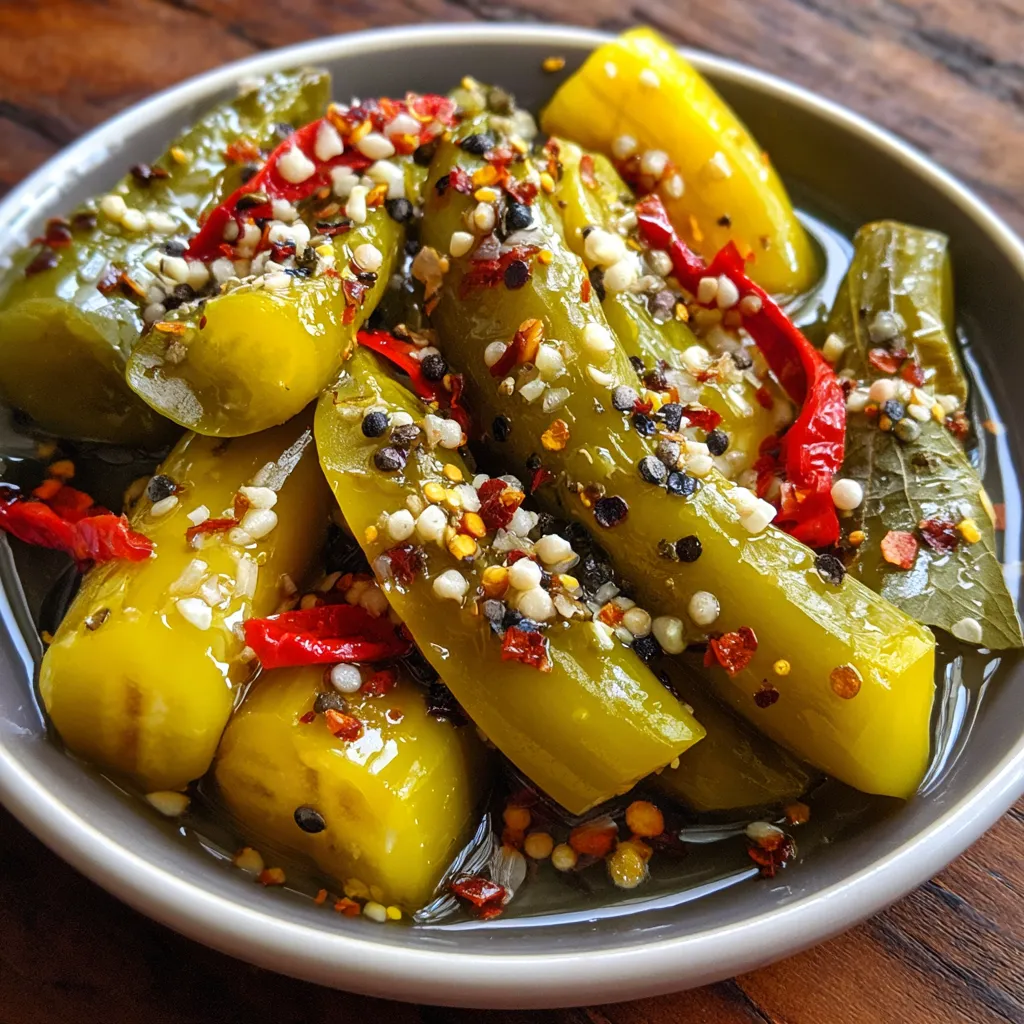

Zesty Pickled Banana Peppers
Description
Crisp banana pepper rings soaked in a tangy vinegar brine scented with garlic, mustard, and bay leaf, delivering a burst of bright, savory heat in every crunchy bite.
Ingredients
Instructions
-
Sterilize your jars and lids by boiling them in water for 10 minutes, then set aside to dry.
-
Slice the banana peppers into rings, discarding seeds if you prefer milder heat.
-
In a medium saucepan, combine the vinegar, water, sugar, salt, garlic, peppercorns, mustard seeds, red pepper flakes, and bay leaves and bring to a boil, stirring until sugar and salt dissolve.
-
Pack the sliced peppers evenly into the sterilized jars, leaving about ½ inch of headspace at the top.
-
Carefully pour the hot brine over the peppers, making sure the solids are submerged and headspace remains.
-
Wipe the jar rims clean, seal with lids, and let them cool to room temperature.
-
Refrigerate the jars for at least 24 hours before serving to allow flavors to develop.
Note
- Wear gloves when handling hot peppers to protect your skin.
- Adjust sugar and salt levels to taste for a sweeter or tangier brine.
- For shelf-stable pickles, process jars in a boiling water bath for 10 minutes.
- Store refrigerated jars for up to 2 months for optimal flavor.

