

Chocolate Covered Strawberry Yogurt Bites are a delightful mash-up of tangy yogurt blended with juicy strawberries, frozen into bite-sized treats and dipped in crisp, glossy chocolate for a playful twist on a classic flavor combo. This creamy snack freezes into cool, chewy nuggets swirled with strawberry pieces and is perfect for a healthy dessert or an afternoon pick-me-up that’s as fun to eat as it is easy to make.
Key Ingredients
To whip up these Chocolate Covered Strawberry Yogurt Bites, you only need five simple staples that come together in minutes:
- 1 cup plain Greek yogurt: Thick, creamy base that holds its shape when frozen.
- 1/2 cup fresh strawberries, diced: Bursts of bright, fruity flavor and natural sweetness.
- 2 tablespoons honey: Gentle sweetener that binds the yogurt and fruit.
- 4 ounces semisweet chocolate chips: Rich coating that hardens into a satisfying shell.
- 1 teaspoon coconut oil: Keeps melted chocolate glossy and smooth for easy dipping.
How To Make Chocolate Covered Strawberry Yogurt Bites
Making these frozen yogurt bites is straightforward and perfect for beginners—no fancy equipment required, just a bowl, a silicone mold, and patience while they freeze. You’ll mix, mold, freeze, dip, and then freeze again to lock in the flavor and texture. Follow each step closely to achieve that perfect blend of creamy center and crisp chocolate shell.
1. In a mixing bowl, stir together the plain Greek yogurt, diced strawberries, and honey until the ingredients are fully combined and you see a uniform pink hue with strawberry flecks.
2. Spoon the yogurt mixture into a silicone ice cube tray or mold, making sure to fill each cavity evenly to ensure consistent bite sizes.
3. Freeze the tray for at least 2 hours, or until the yogurt bites are rock-solid, so they hold their shape during dipping.
4. Meanwhile, melt the semisweet chocolate chips and coconut oil together in a double boiler, stirring constantly until the mixture is smooth and free of lumps. Alternatively, microwave in 20-second bursts, stirring between each interval.
5. Remove the frozen yogurt bites from the mold by gently flexing the silicone, then dip each one into the melted chocolate, allowing any excess to drip off back into the bowl.
6. Place the chocolate-coated bites on a parchment-lined baking sheet, spacing them slightly apart, and return to the freezer for about 15 minutes so the chocolate can fully set into a crisp shell.
7. Once the coating is firm, transfer the bites to an airtight container and keep them in the freezer until you’re ready to enjoy a sweet, chilly treat.
Serving Suggestions
These yogurt bites shine when properly presented. Here are four fun ways to serve:
- Serve on a decorative platter, arranging the bites in concentric circles for a party-worthy display.
- Place a few bites in mini cupcake liners to keep them from sticking and to add a festive touch.
- Let guests build their own yogurt bite charcuterie board, complete with fresh fruit, nuts, and drizzles of extra melted chocolate.
- Stack a handful in a small glass jar, tie a ribbon around the lid, and gift them as homemade, freezer-ready treats.
Tips For Perfect Chocolate Covered Strawberry Yogurt Bites
Creating flawless yogurt bites is all about the details. These tips will help you get that ideal snap of chocolate around a chewy, fruity center:
- Use flavored yogurt or add vanilla extract to the mix for a custom taste profile and extra aroma.
- Make sure the yogurt bites are fully frozen before dipping; this prevents premature melting and ensures a neat coating.
- Store in an airtight container in the freezer for up to one month to maintain peak freshness and avoid freezer burn.
- For a festive look, drizzle with white chocolate or sprinkle with freeze-dried strawberry powder immediately after dipping.
How To Store It
Keeping these bites at their best is easy when you follow proper storage methods. A quick prep session and you’ll have snacks ready whenever you need a cool, fruity pick-me-up:
- Freeze in a single layer on a baking sheet first, then transfer to an airtight container to prevent clumping.
- Place parchment paper between layers if you need to stack bites; this stops them from sticking together.
- Keep the container sealed tightly to avoid ice crystals, which can dull both flavor and texture.
- Thaw individual bites at room temperature for 2–3 minutes before serving so the center softens slightly for the perfect chew.
Frequently Asked Questions
Here are some quick answers to common questions from home cooks:
- Q: How can I use flavored yogurt or vanilla extract in this recipe?
You can substitute plain Greek yogurt with a flavored variety, such as vanilla or strawberry, for an added taste layer. If you prefer to stick with plain yogurt, stir in 1 teaspoon of vanilla extract before combining with the strawberries and honey to introduce a subtle vanilla aroma.
- Q: What’s the best method to remove the yogurt bites from the silicone mold without damaging them?
Allow the tray to sit at room temperature for about 1–2 minutes after taking it out of the freezer. Gently flex or twist the silicone mold to loosen each bite. If the bites still resist, press from the bottom of each cavity to pop them out cleanly without cracking the yogurt center.
- Q: How can I prevent the melted chocolate from seizing or becoming grainy during dipping?
Melt the chocolate chips and coconut oil slowly over low heat in a double boiler or in 20‐second intervals in the microwave, stirring thoroughly between each interval. Avoid introducing any water. The coconut oil ensures a smooth, glossy finish and helps maintain the chocolate’s fluidity for dipping.
- Q: What’s the ideal storage method and how long will the bites stay fresh?
Place the fully set bites in a single layer in an airtight, freezer‐safe container, separating layers with parchment paper to prevent sticking. Store them in the freezer for up to one month. Thaw individual bites at room temperature for 2–3 minutes before serving.
- Q: Can I use other fruits instead of strawberries?
Yes. You can replace diced strawberries with raspberries, blueberries, or finely chopped mango for a different flavor profile. Be sure to drain any excess juice from very juicy fruits to keep the yogurt mixture from becoming too watery.
- Q: How do I prevent the yogurt bites from sticking to the parchment paper after dipping?
Use parchment or a silicone baking mat, both of which have nonstick properties. Arrange the dipped bites in a single layer without crowding, then immediately return them to the freezer so the chocolate sets quickly and releases easily from the paper.
- Q: What festive variations can I add to the yogurt bites?
After dipping, while the chocolate is still wet, sprinkle freeze-dried strawberry powder or finely chopped nuts over the tops. For a white-chocolate drizzle, melt white chocolate with a teaspoon of coconut oil and use a fork to flick thin ribbons across the set dark coating, then freeze until firm.
What Makes This Special
These Chocolate Covered Strawberry Yogurt Bites work their magic by combining creamy, tangy yogurt with sweet fruit and a snap-worthy chocolate shell. It’s a quick, no-guilt dessert that feels fancy but comes together in minutes—and you can print and save this article for your next snack attack or party. If you whip up a batch, drop a comment below or give a shout if you’ve got questions or fun flavor ideas!
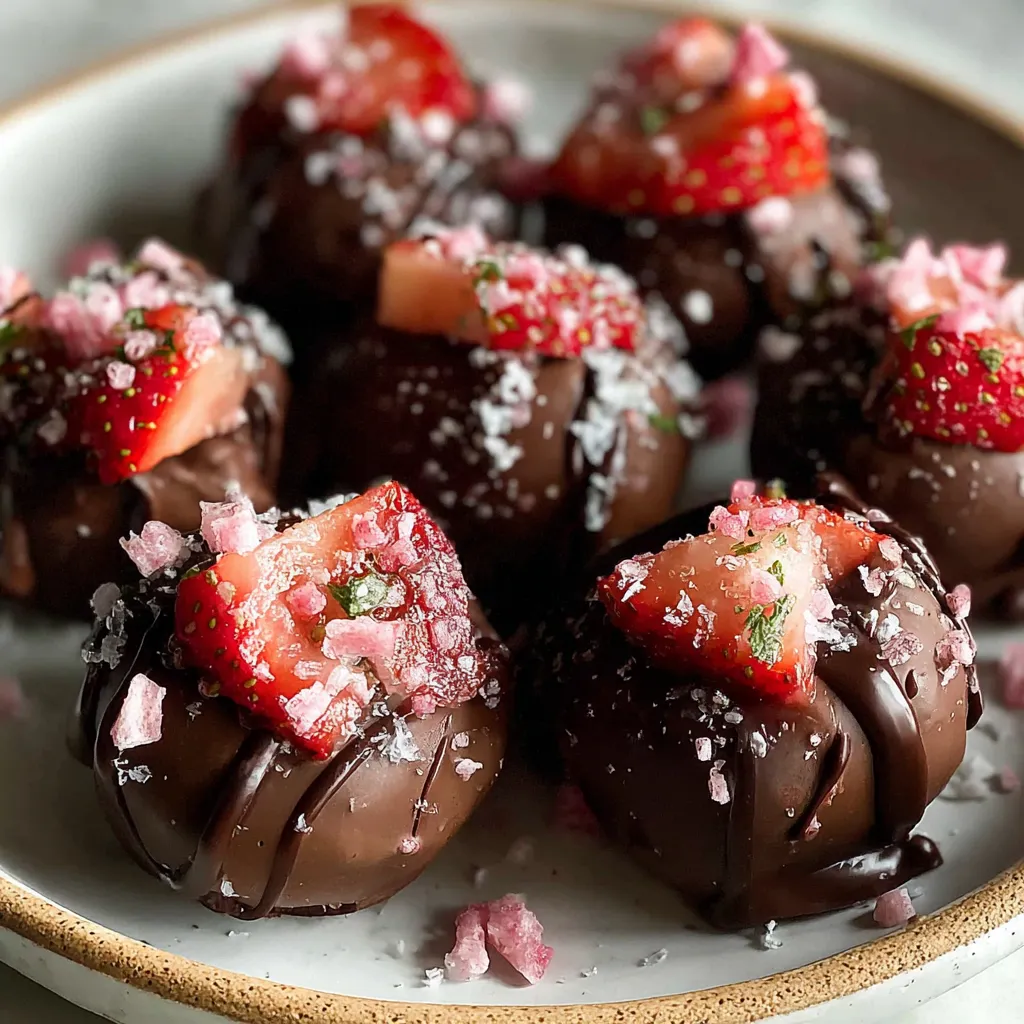

Chocolate Covered Strawberry Yogurt Bites
Description
Creamy yogurt swirled with strawberry pieces freezes into cool, chewy nuggets, then gets a glossy chocolate coat that cracks with each bite, unveiling chilly, fruity sweetness.
Ingredients
Instructions
-
In a bowl, stir together Greek yogurt, diced strawberries, and honey until well combined.
-
Spoon the yogurt mixture into a silicone ice cube tray or silicone mold, filling each cavity evenly.
-
Freeze the tray for at least 2 hours or until the yogurt bites are completely solid.
-
While the yogurt bites freeze, melt the semisweet chocolate chips and coconut oil together in a double boiler or microwave-safe bowl, stirring until smooth.
-
Remove the frozen yogurt bites from the mold and quickly dip each one into the melted chocolate, letting any excess drip off.
-
Place the chocolate-coated yogurt bites on a parchment-lined baking sheet and return to the freezer for about 15 minutes to allow the chocolate to set.
-
Once set, transfer the bites to an airtight container and store in the freezer until ready to serve.
Note
- Use flavored yogurt or add vanilla extract for a different taste profile.
- Make sure the yogurt bites are fully frozen before dipping to prevent melting.
- Store in an airtight container in the freezer for up to one month.
- For a festive look, drizzle with white chocolate or sprinkle with freeze-dried strawberry powder.

